
Contents
- Guidelines for building the work order: A step-by-step guide.
- 1. After converting the quote to a job, Click on ‘Services’ on the left menu.
- 2. Select the service for which you wish to build the work order.
- 3. From the left menu, Click on ‘Work orders’.
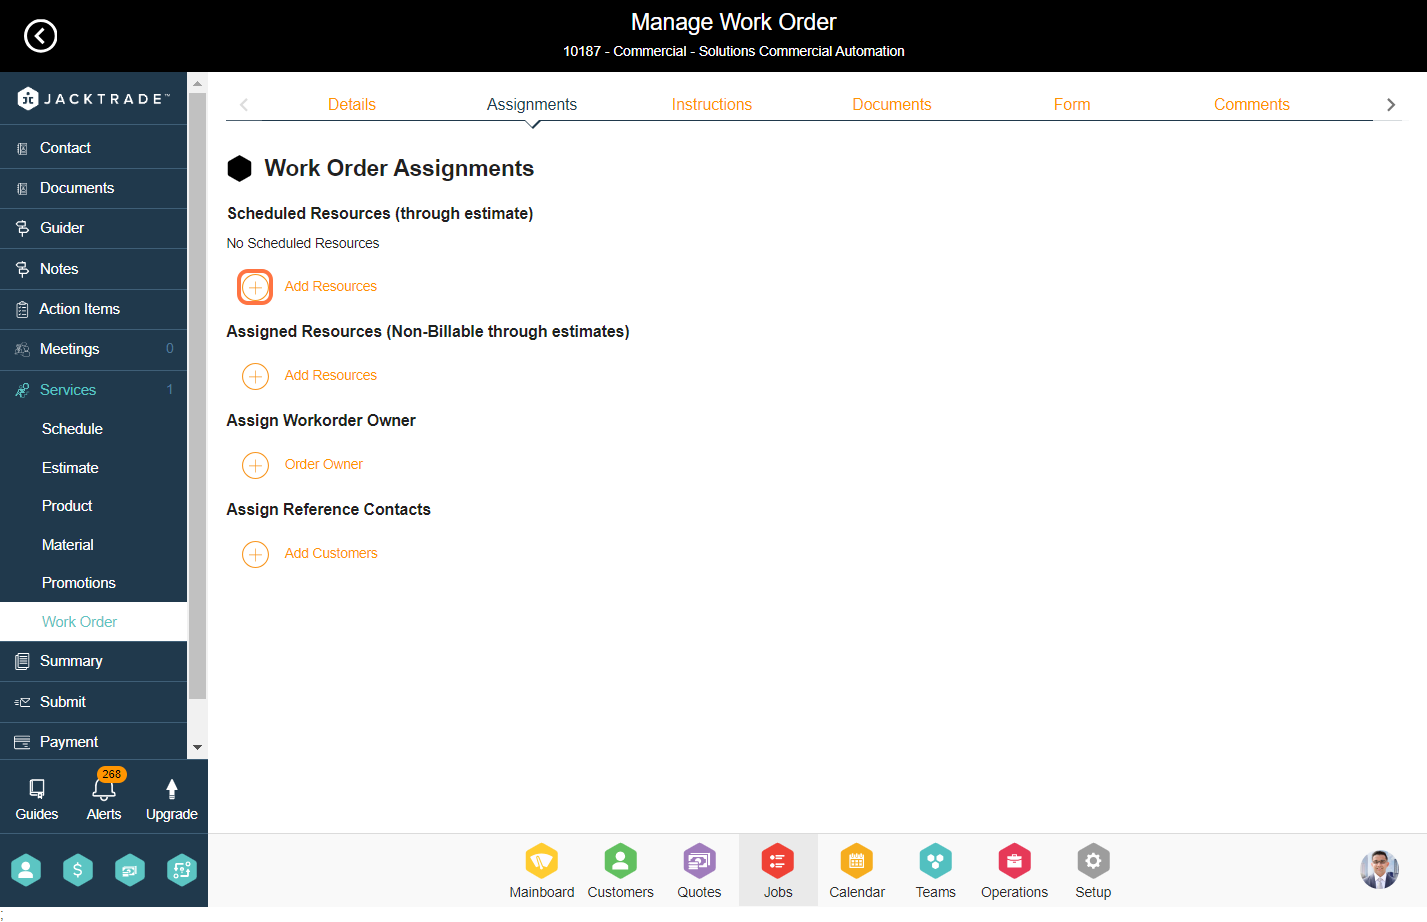
- 4. Click on the ‘Assignments’ tab.
- 5. You have the option to allocate resources to the work order, such as scheduling resources (via estimates) or assigning non-billable resources (through estimates). Additionally, you can designate the work order owner and reference contact.
- In the following example, we will be assigning scheduled resources. Scheduled resources are basically resources based on the role types you have added in the estimates of this service under ‘resources’.
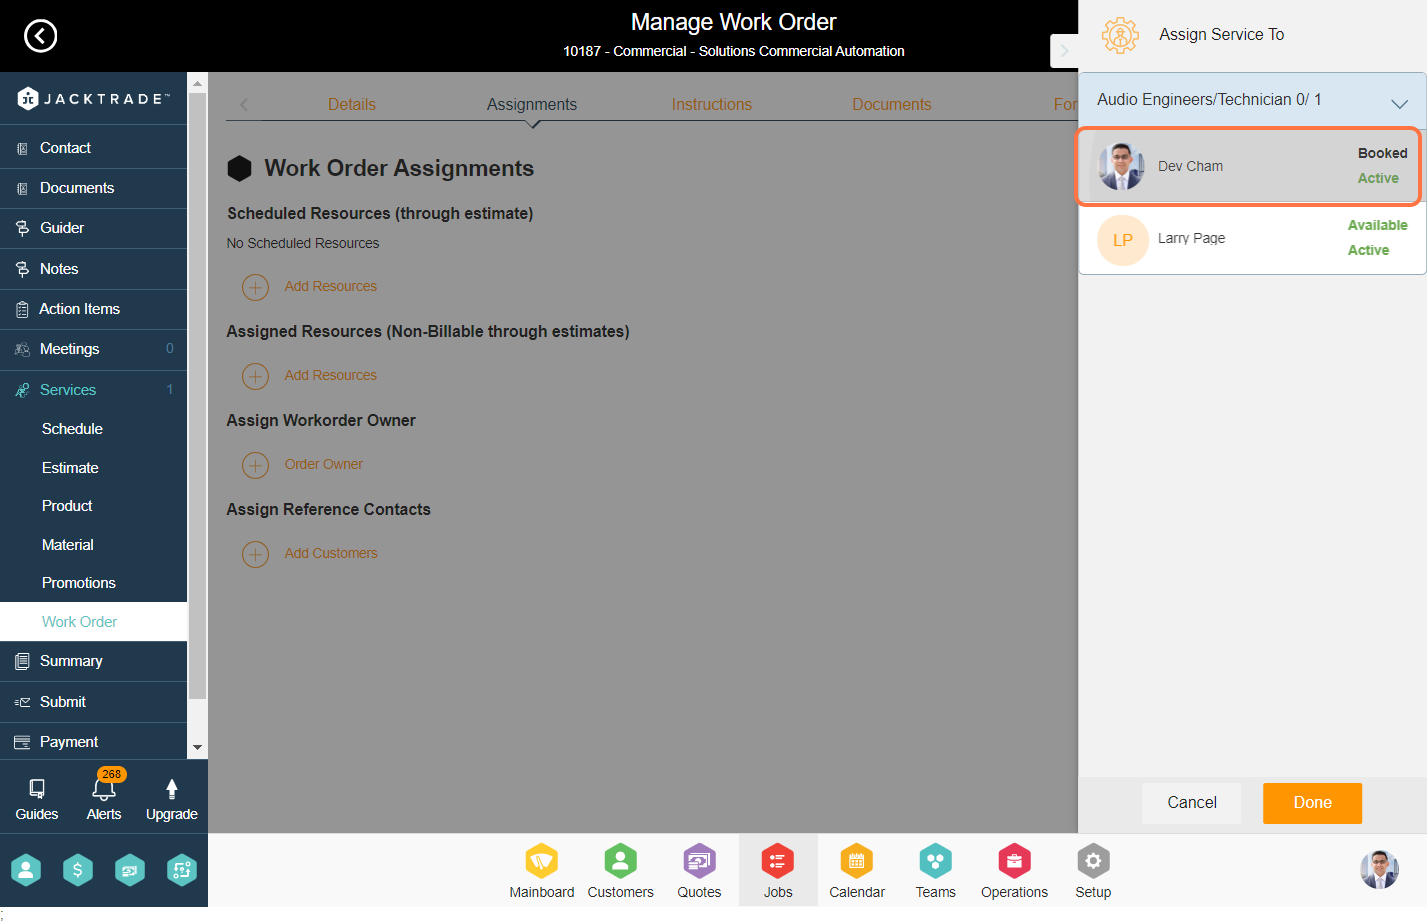
- 6. Select the resource and click on ‘Done’.
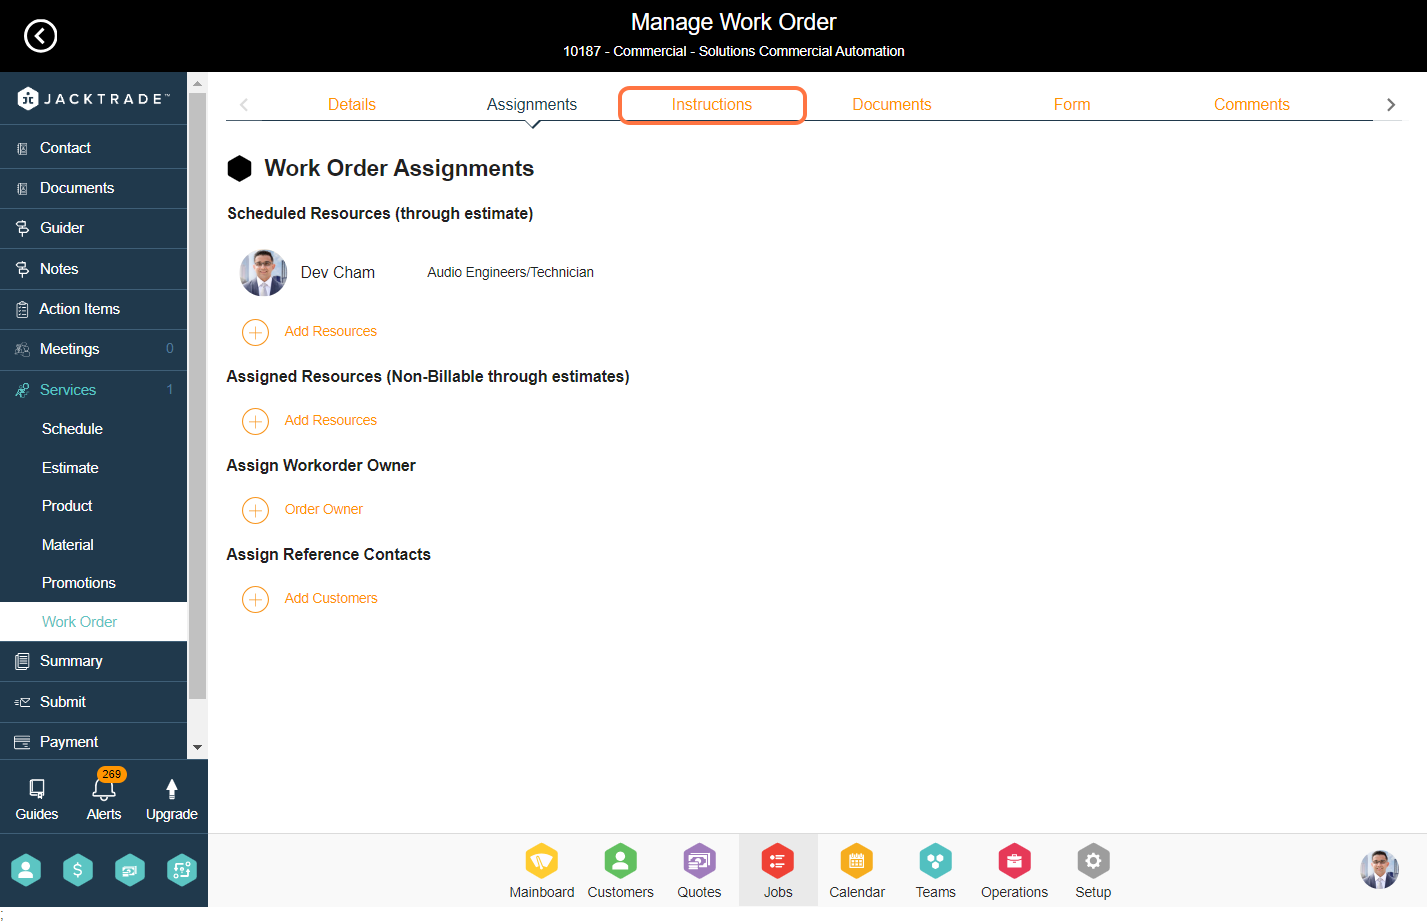
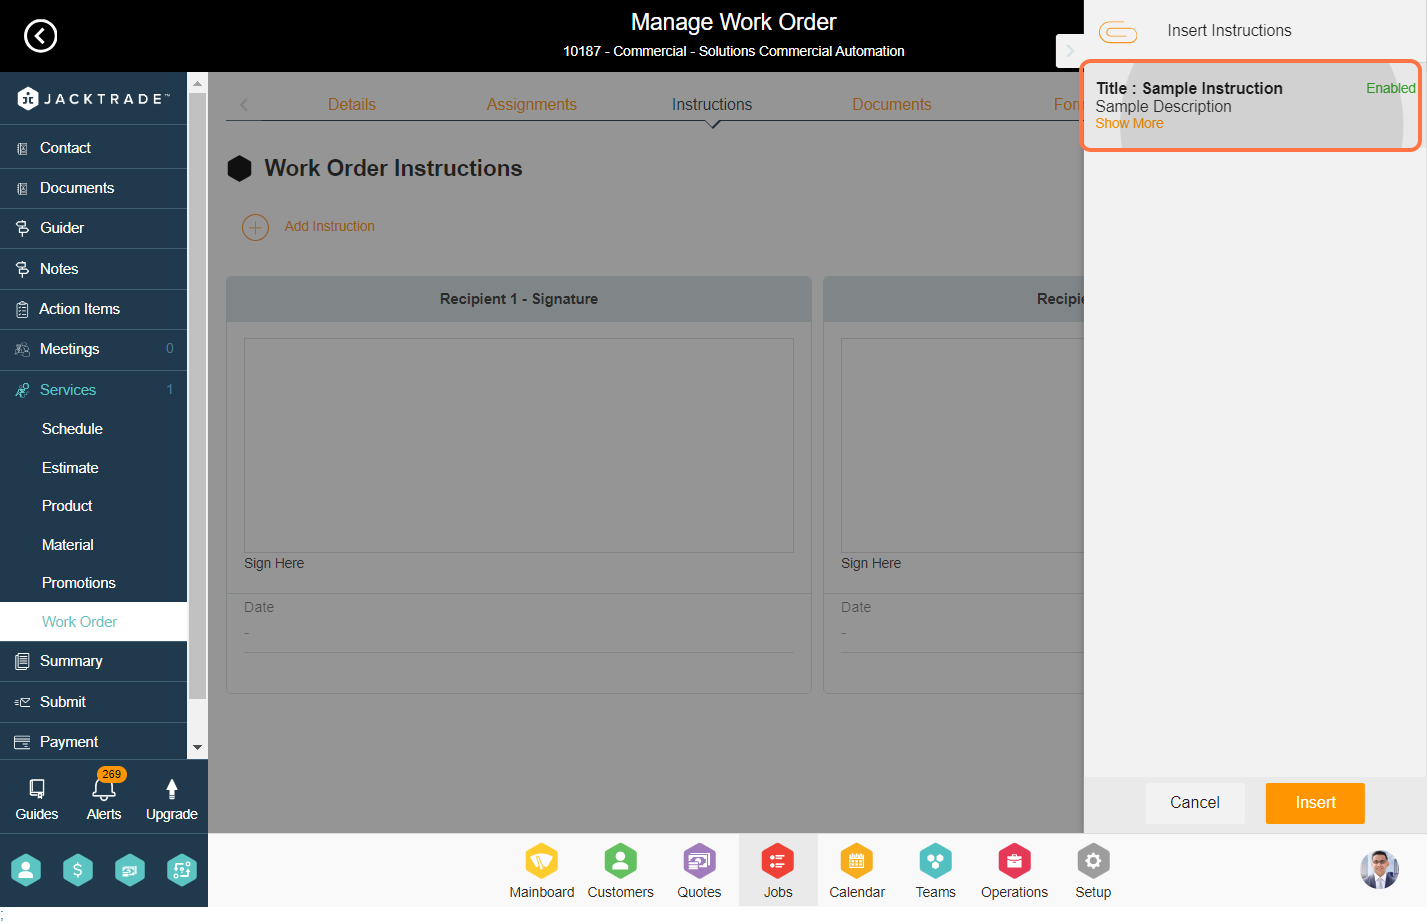
- 7. Click on the ‘Instructions’ tab from the top.
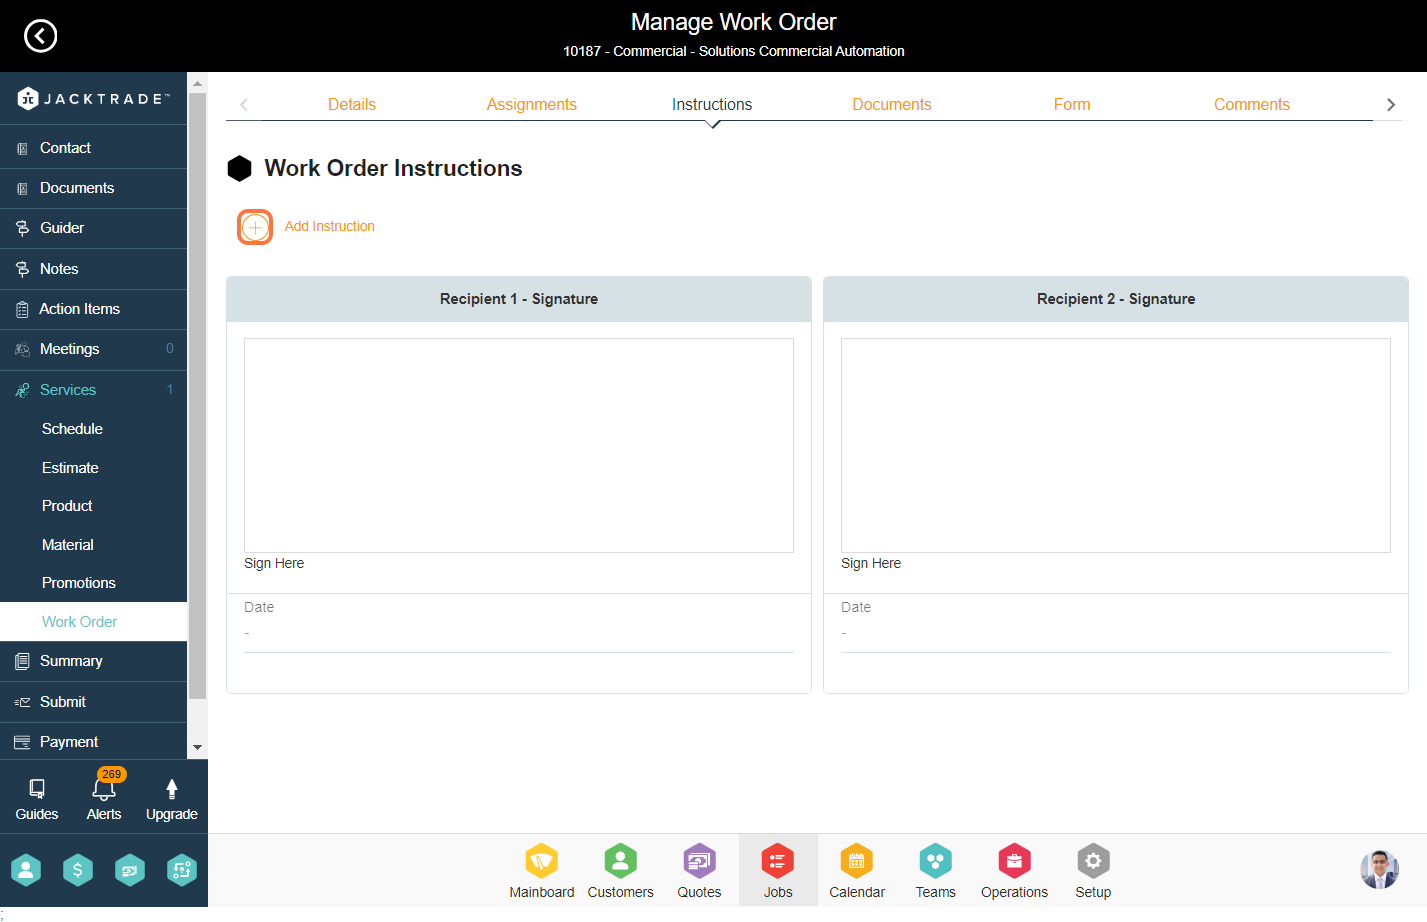
- 8. Click on the ‘Add Instruction’ option and the right navigation will open up with all the available instructions set in the Work Order settings.
- 9. Select the instructions configured in the work order settings and then click ‘Insert’ at the bottom of the right navigation.
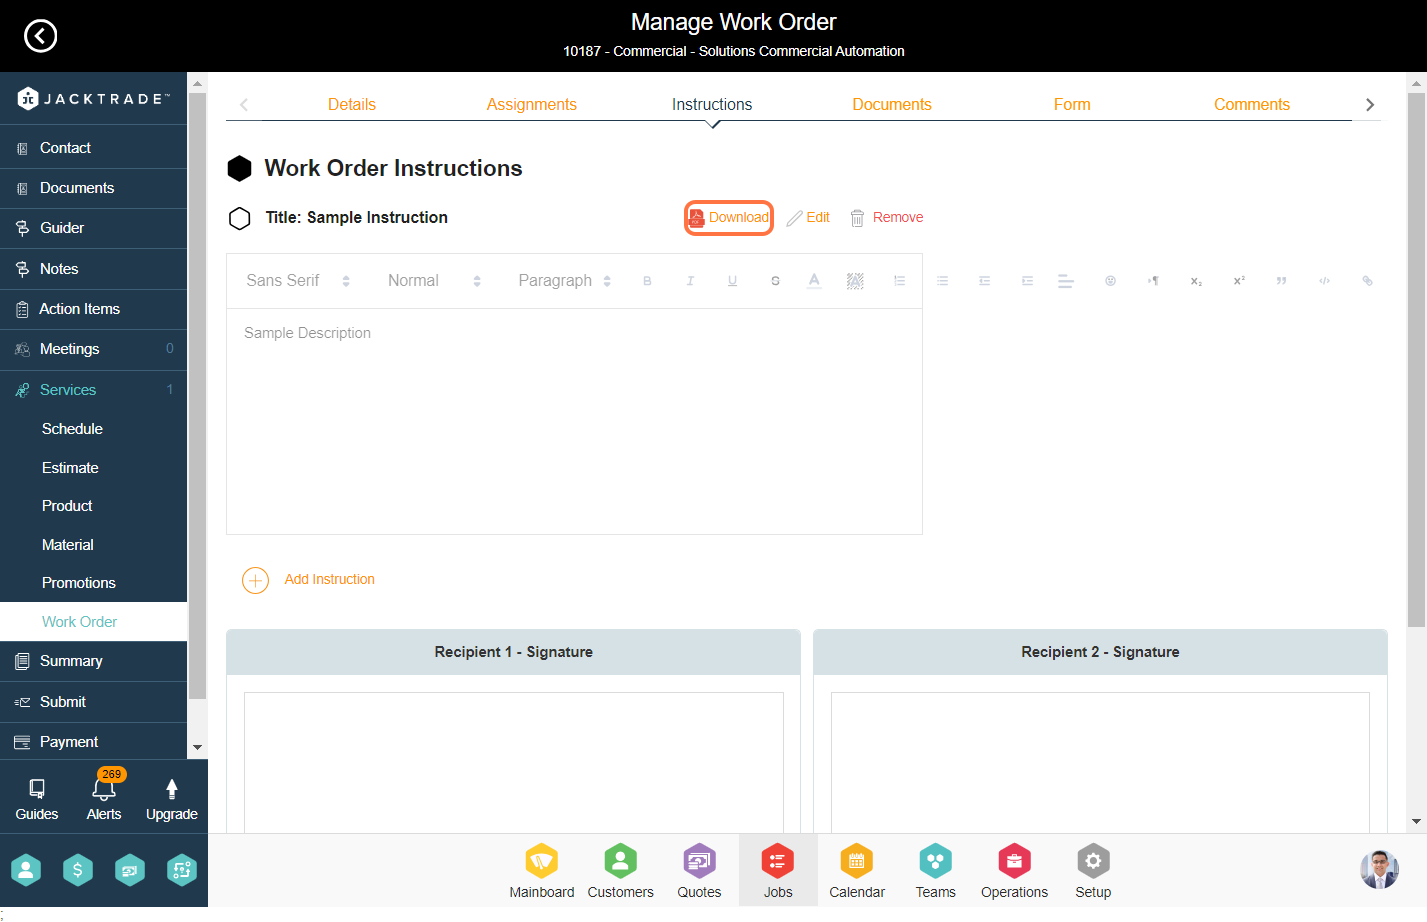
- 10. Upon inserting the WO instructions, you can download, edit, or remove them from this location.
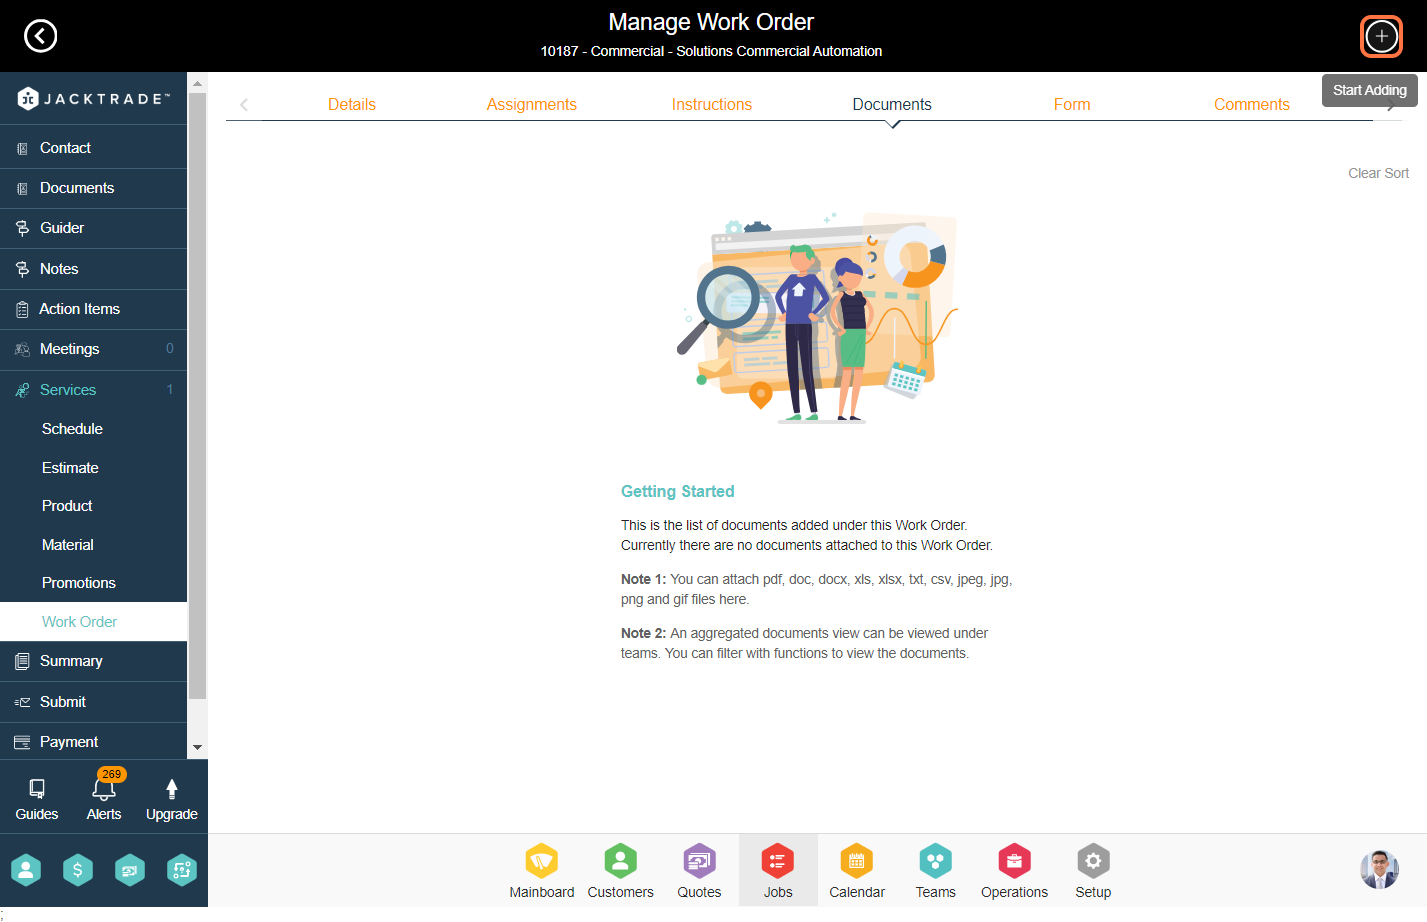
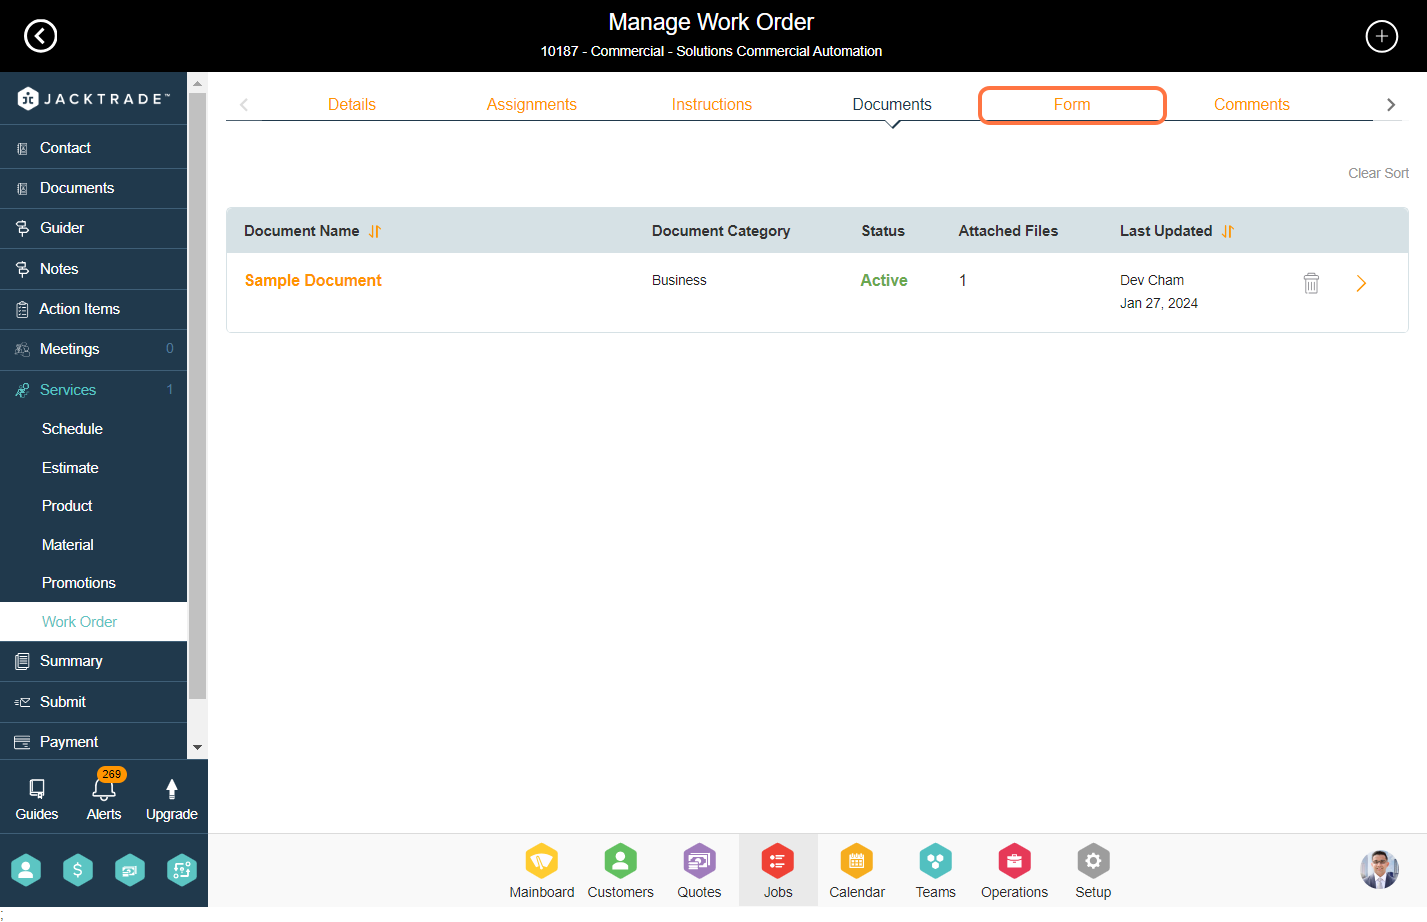
- 11. Click on the ‘Documents’ tab from the top, and then click on the ‘Add’ icon from the top right.
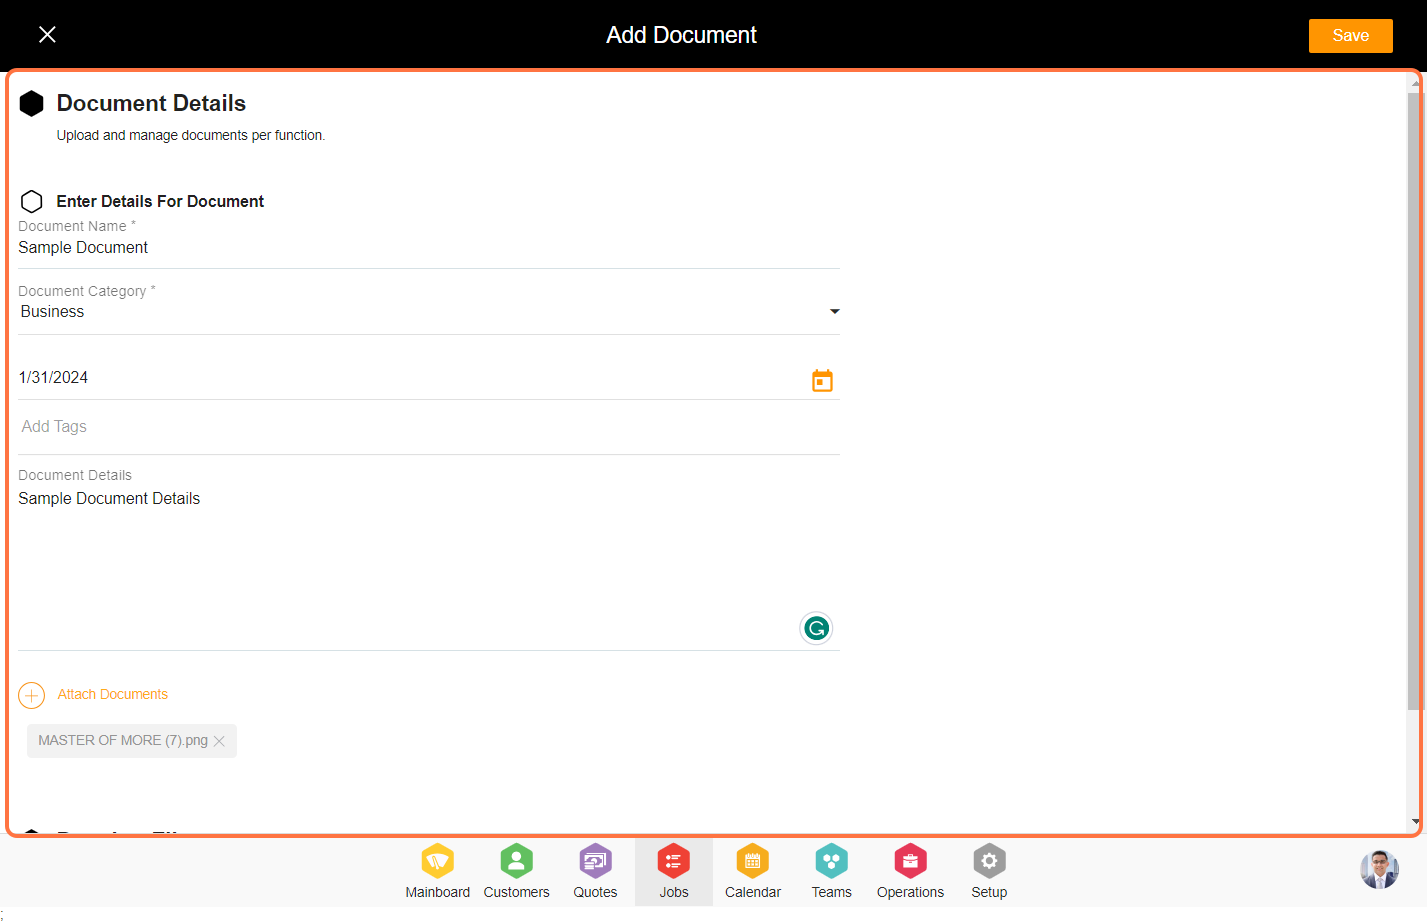
- 12. Enter the document details such as name, category, date, descriptions, tags, and image.
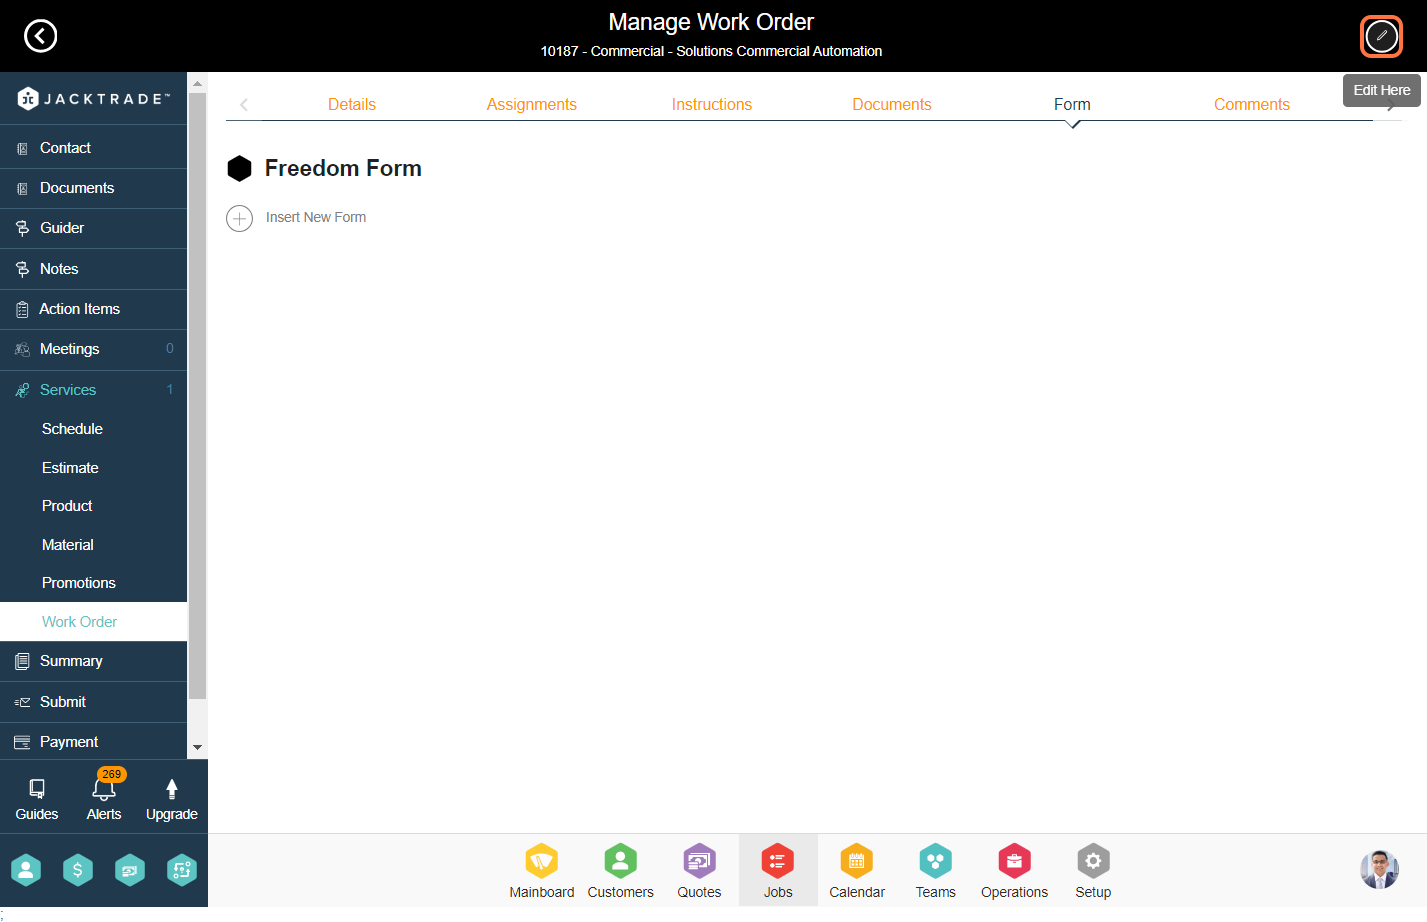
- 13. Click on the ‘Forms’ tab from the top.
- 14. Click on the ‘Edit’ icon and then click on ‘Insert New Form’.
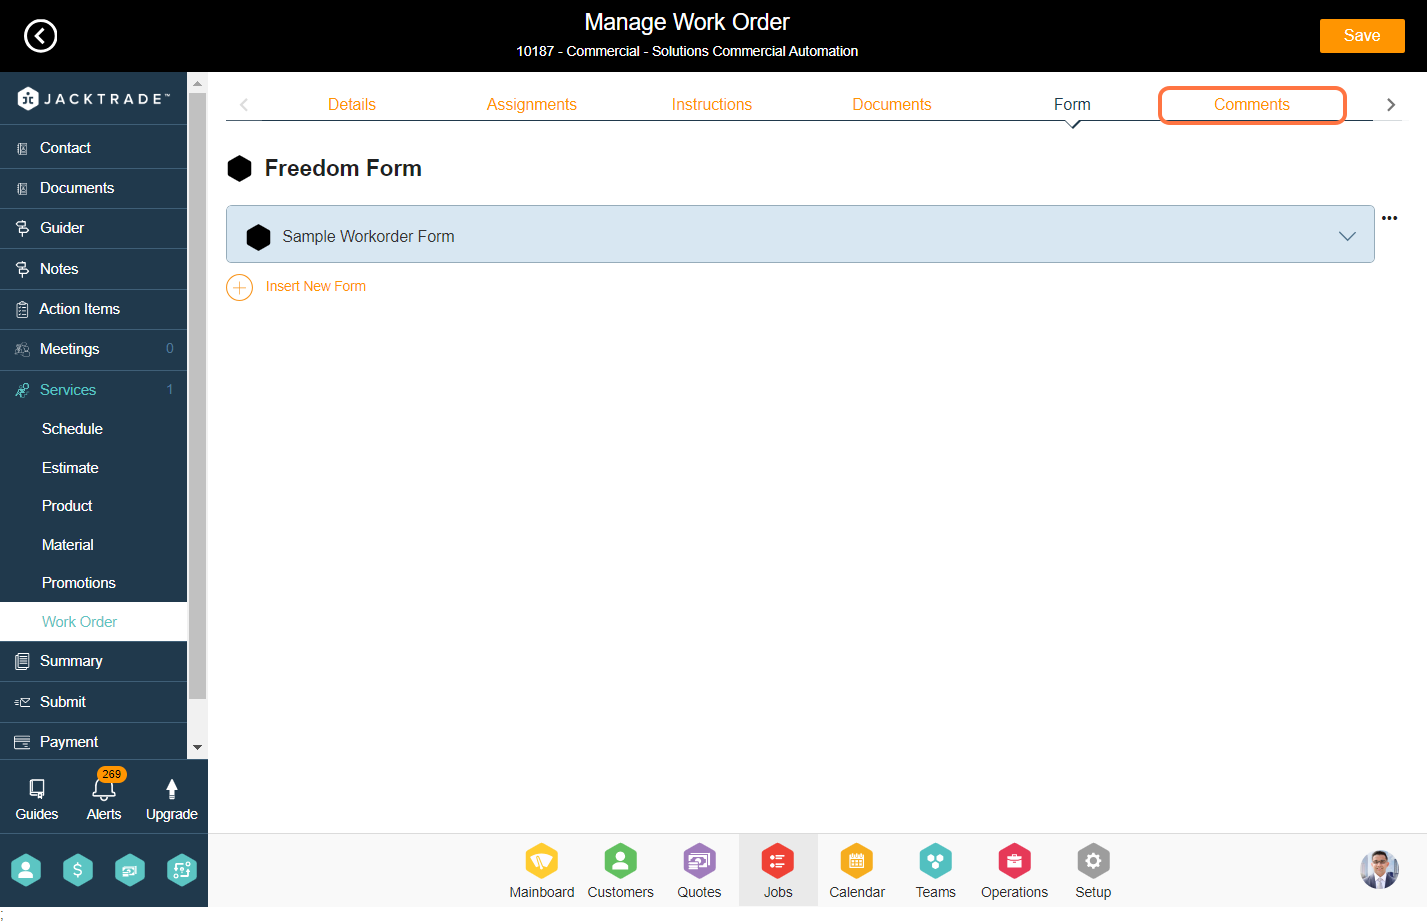
- 15. Select and insert the form that is configured from the setup.
- 16. Fill up the form details and click on ‘Save’.
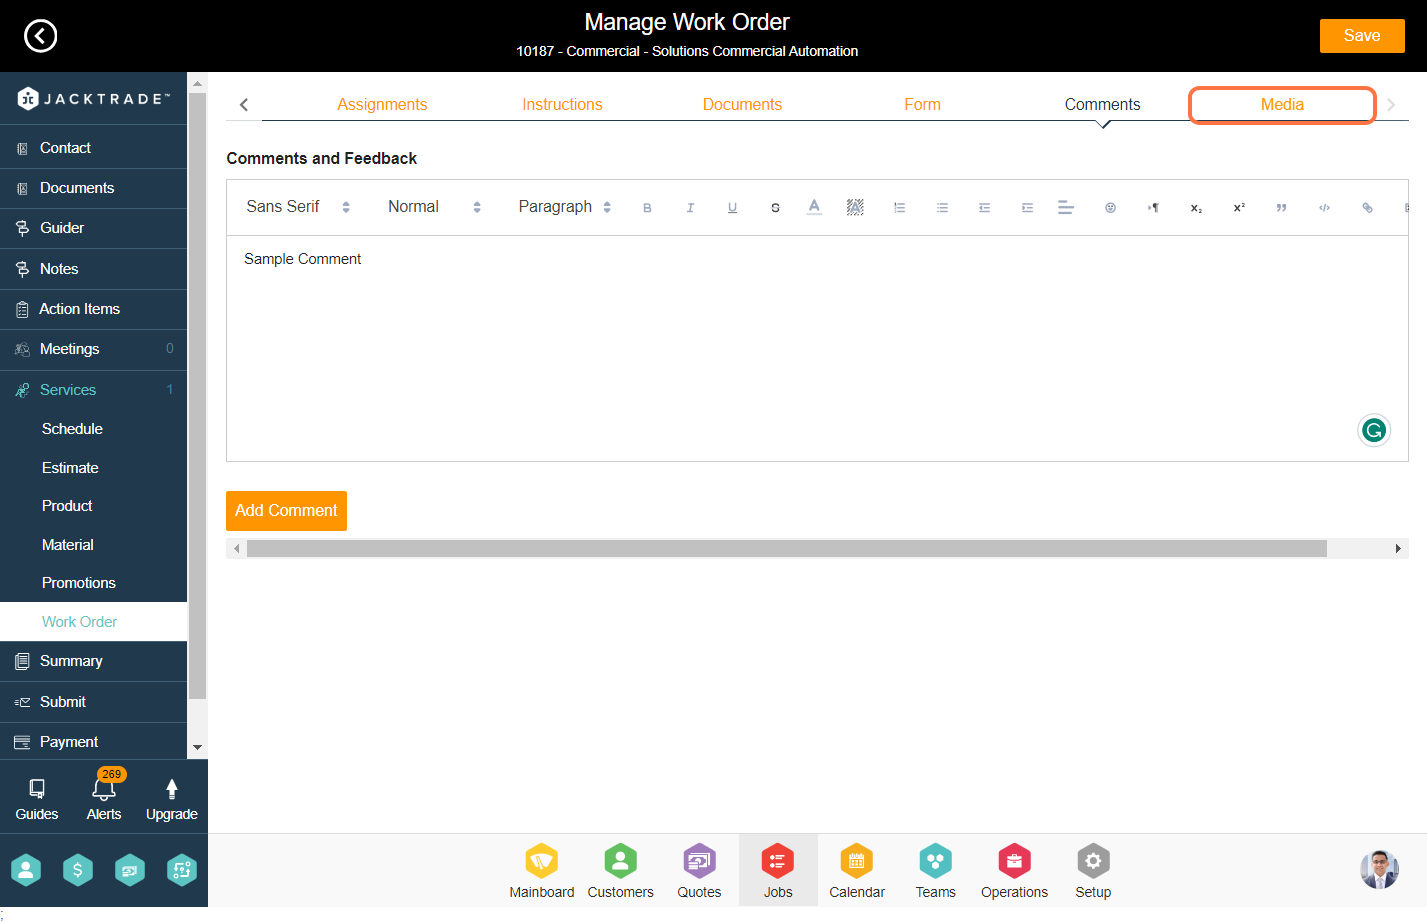
- 17. Click on the ‘Comments’ tab from the top.
- 18. Enter the comment then click on ‘Add Comment’ and then click on ‘Save’.
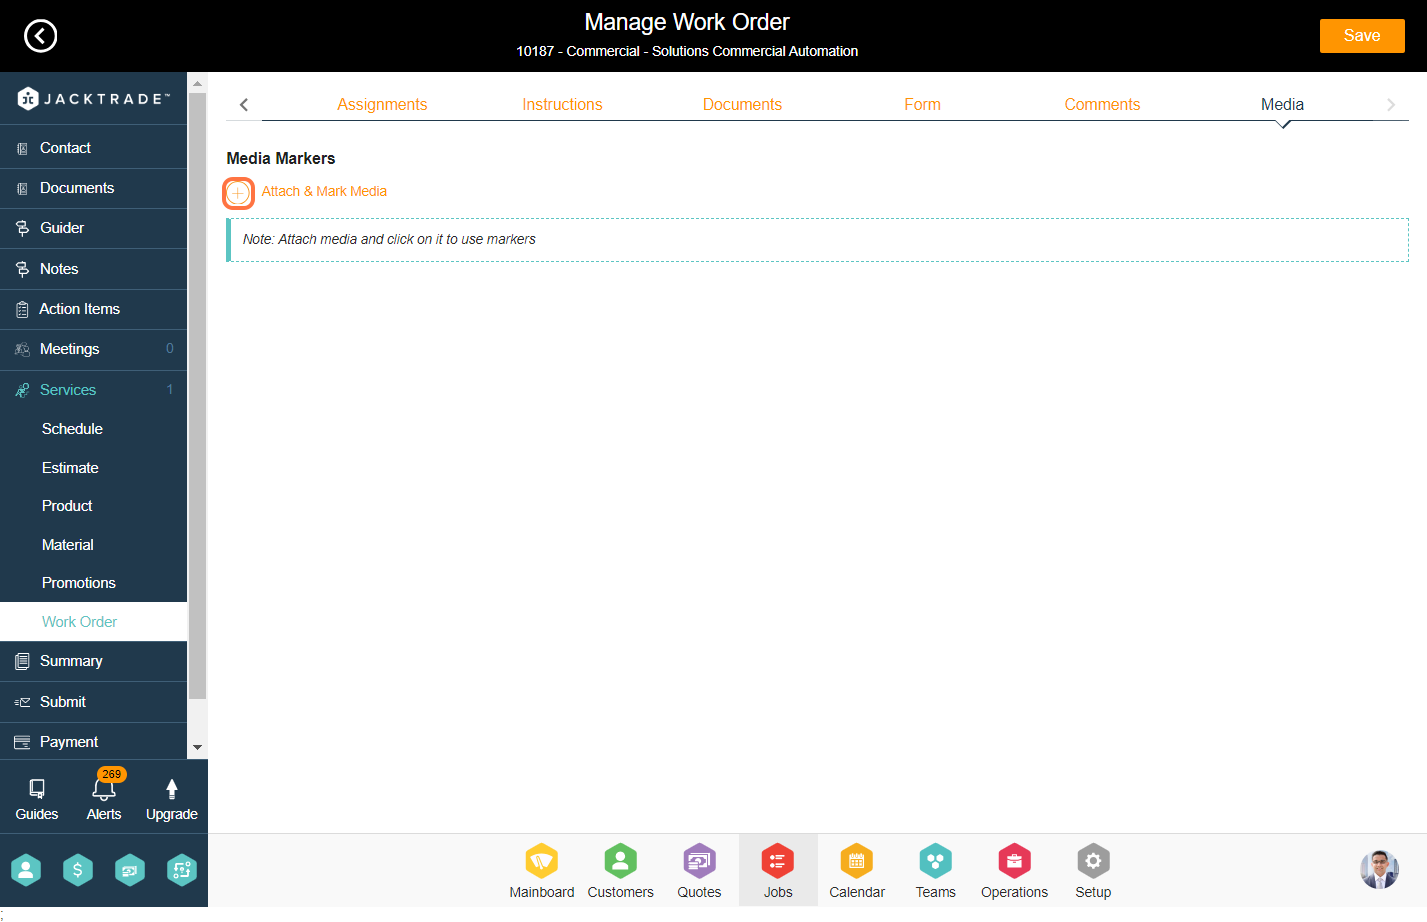
- 19. Click on the ‘Media’ tab from the top.
- 20. Click on ‘Attach & Mark Media’.
- 21. Upload the images you want to insert to the work order.
Guidelines for building the work order: A step-by-step guide.
Note: Learn ‘How To – Convert Quote to Job’.

2. Select the service for which you wish to build the work order.


4. Click on the ‘Assignments’ tab.

5. You have the option to allocate resources to the work order, such as scheduling resources (via estimates) or assigning non-billable resources (through estimates). Additionally, you can designate the work order owner and reference contact.
In the following example, we will be assigning scheduled resources. Scheduled resources are basically resources based on the role types you have added in the estimates of this service under ‘resources’.
6. Select the resource and click on ‘Done’.
7. Click on the ‘Instructions’ tab from the top.
Note: Learn ‘How To – Configure WO Instructions‘.
10. Upon inserting the WO instructions, you can download, edit, or remove them from this location.
Note: Please note that Jakctrade supports two types of work order pdfs to be shared with your team. One with instructions and another without instructions.
11. Click on the ‘Documents’ tab from the top, and then click on the ‘Add’ icon from the top right.

13. Click on the ‘Forms’ tab from the top.
14. Click on the ‘Edit’ icon and then click on ‘Insert New Form’.

15. Select and insert the form that is configured from the setup.
Note: Learn ‘How To – Setup Freedom Form‘ and ‘How To – Add Custom Form‘.

16. Fill up the form details and click on ‘Save’.

17. Click on the ‘Comments’ tab from the top.
18. Enter the comment then click on ‘Add Comment’ and then click on ‘Save’.

19. Click on the ‘Media’ tab from the top.
20. Click on ‘Attach & Mark Media’.
21. Upload the images you want to insert to the work order.
Note: You can upload the images from your System, Dropbox, or Google Drive.
