
Custom Forms
Your business has its own unique challenges. Your customers have their own unique needs. So it doesn’t make much sense for you to be using a CRM that can’t be customized to suit your unique situation. A flexible CRM is one that allows you to sync it with your operating systems, gives you full control over what kind of data is being mined, and makes it possible for you to update and re-evaluate your processes as you go.
Remember: Your CRM should be working for you, not the other way around and that is exactly what Jacktrade does for you. Customs form is a unique functionality that lets you add custom fields to the forms. By default each form has predefined fields - for example, there are pre-defined fields for adding a customer contact. If you wish to record more data in the customer contact form besides the predefined fields, then the custom form allows you to add additional fields to the form.
Supported Custom Fields
Field types for single or multiple selections or entry fields
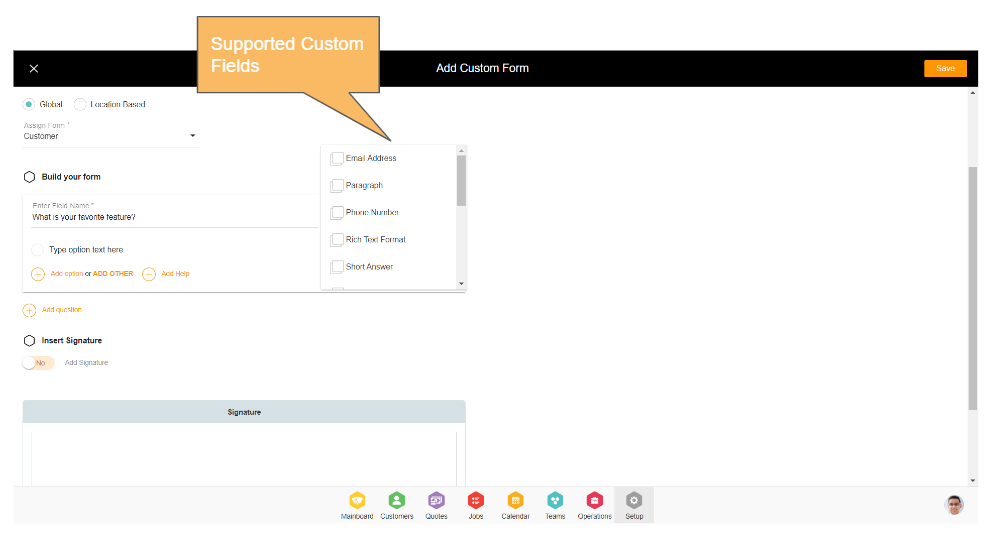
- Rich Text Format - This field provides the functionality with a text format bar with 2000 character limitations.
- Short answer - Simple short answer input field with a character limitation of 140 characters.
- Paragraph - Detail long answer input field with 1000 character limitations.
- Multiple choice - Provides multiple choices of up to 20 options including “Other”. If the user enters 20 custom choices, then “Other” can not be entered.
- Checkboxes - Provides multiple selections of up to 20 options including “Other”. If the user enters 20 custom choices, then “Other” can not be entered.
- Dropdown - Provides multiple choices of up to 20 options including “Other”. If the user enters 20 custom choices, then “Other” can not be entered.
- Date - Simple data field selectable with calendar input.
- Time - Time field selectable with time input.
Custom Fields Setup
Businesses can add custom fields in the business structure and map that to targeted modules. Custom fields are developed as a common module for their reusability in the architecture.
Jacktrade gives options to set up custom fields that apply to any modules of the application. Each of these modules can only have one form mapped to them. By default, preset data will not be set for any of the customer forms.
Form & Field Configurations
Form Configuration
Each form will support the following fields that apply to the entire single form:
- Form Title - This is a mandatory title name that multiple custom fields can be grouped into to form a single structure or form layout. It has a character limitation of 140 characters.
- Form Description - This is optional for long text with 1000-character limitations.
- Enable or Disable - To enable or disable the form.
- Form Target - Target where the form should be filled by the user.
- Quotes - Guider
- Jobs - Guide
- Customer - Contact
- Customer - Opportunities
- Inventory - Product
- Inventory - Material
- Procurement - Purchase Order
- Procurement - Supplier
- Teams - Business Contacts
Field Per Form Configuration
Each form can build multiple questionnaires or input fields:
- Field Type - Field type is the mandatory selection and provides the ability for users to choose single or multiple selections or entry fields. The following field types are supported:
- Rich Text Format - This field provides the functionality with a text format bar with 2000 character limitations.
- Short answer - Simple short answer input field with a character limitation of 140 characters.
- Paragraph - Detail long answer input field with 1000 character limitations.
- Multiple choice - Provides multiple choices of up to 20 options including “Other”. If the user enters 20 custom choices, then “Other” can not be entered. Values are required for each choice.
- Checkboxes - Provides multiple selections of up to 20 options including “Other”. If the user enters 20 custom choices, then “Other” can not be entered. Values are required for each choice.
- Dropdown - Provides multiple choices of up to 20 options including “Other”. If the user enters 20 custom choices, then “Other” can not be entered. Values are required for each choice. A default value can be selected. Usually used for large value set to shorten the form size.
- Date - Simple data field selectable with calendar input where the field is actually used.
- Time - Time field selectable with time input where the field is actually used.
- Field Values - Possible values of the questionnaire depending on the field type:
- Multiple values d input fields with choices. Example: Multiple choice, checkboxes, and dropdown.
- Single value for input field without choices. Example: Short answer, Paragraph, Rich Text, Date and Time.
- Default Value - Value of the default field when its multiple choices.
- Response Type - Mandatory or Optional
- Field Placeholder - (optional string) Helper text in the input if no value is provided.
- Help - (optional string) Help/description to accompany a label.
- Field Position - Defines where in the form the field should be placed when pulling the data in the target location.
Changing Custom Fields
Customer fields and forms can be enabled, disabled or updated at any given time as per the business's requirement. This is how the operations on custom form affect your data in the functions targeted -
- New Creation - When the custom form has never been injected. In this case, the customs form is simply inserted into the target destination.
- Updating Case - When the custom form has been injected before and none of the target records have data filled in them. In this case, the customs form is simply injected into the target destination replacing all the fields.
- Updating Case - An update happens when a user adds/updates/removes Fields or Values in the Form. Users can add the field in the form in an active or inactive form. When the custom form has been injected before and the target records have data filled in them. It could be possible that the custom forms were injected before, and custom forms were rebuilt and re-injected. In this case, the user is given the following choices:
- Replace and inject in all records as a new form. All current data will be lost.
- Inject in all new records. Leave the previous records alone.
- Clearing Custom Forms - Remove custom forms (all fields and data regardless of version) in all the records.
- When Enabling Form - Enabling the form will show the form in the target destination. All new elements will show the form (example: New Quote). Existing or previous elements will not have the newly enabled form. Enabling also looks for previous data set in the target and like Update, Form provides the following two options:
- Replace and inject in all records as a new form. All current data will be lost.
- Inject in all new records. Leave the previous records alone.
- When Disabling Form - Disabling the form will not show the form in the destined location. All new elements will not show the form (example: New Customer). Existing or previous elements will retain the forms they were attached at the point of creation of the element.
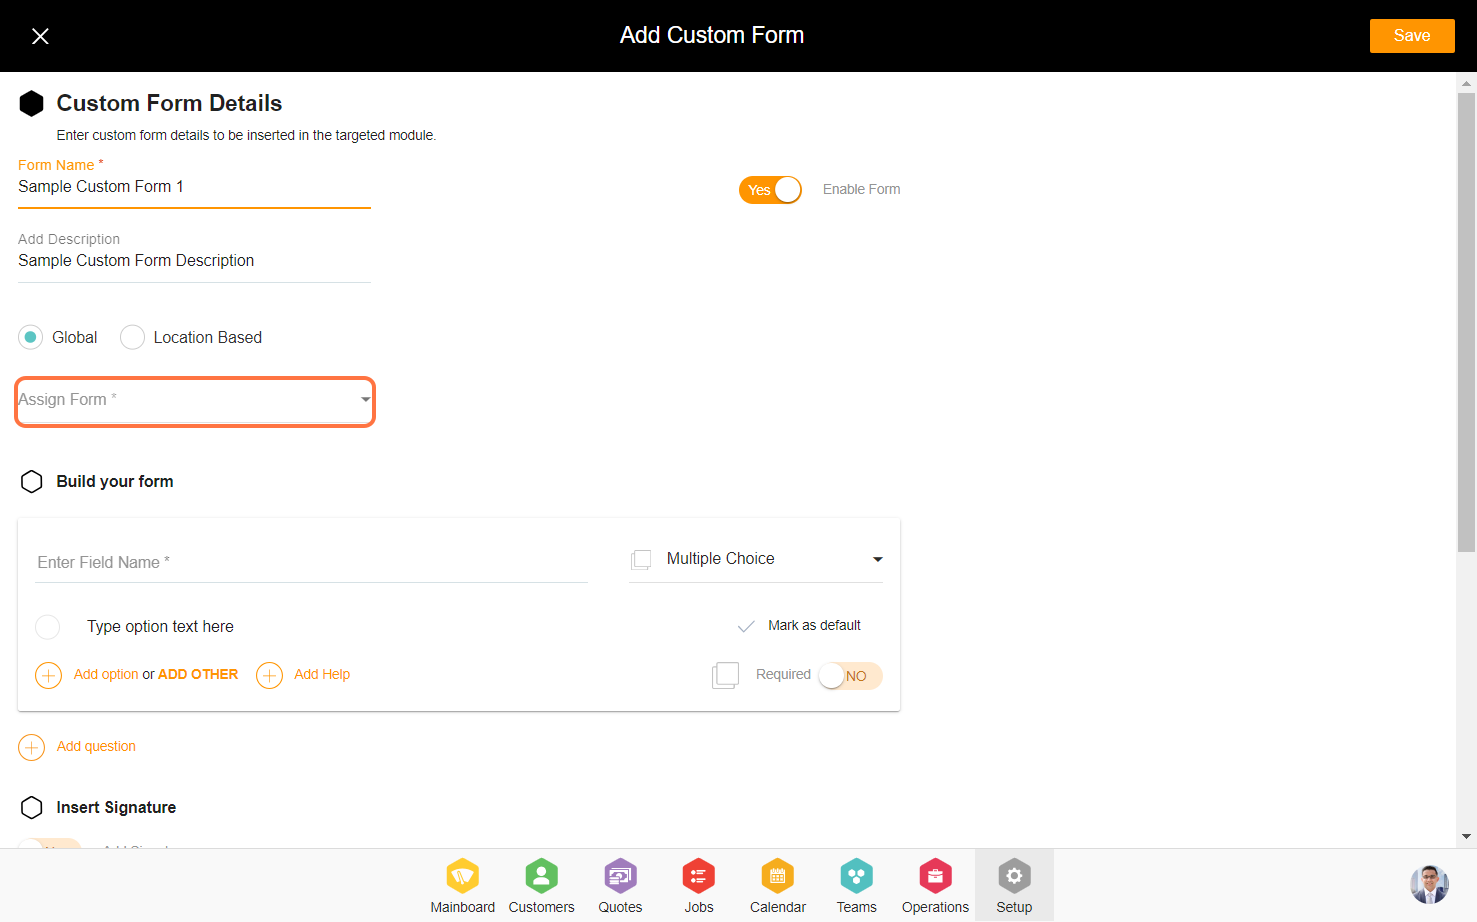
Steps to add a custom form.
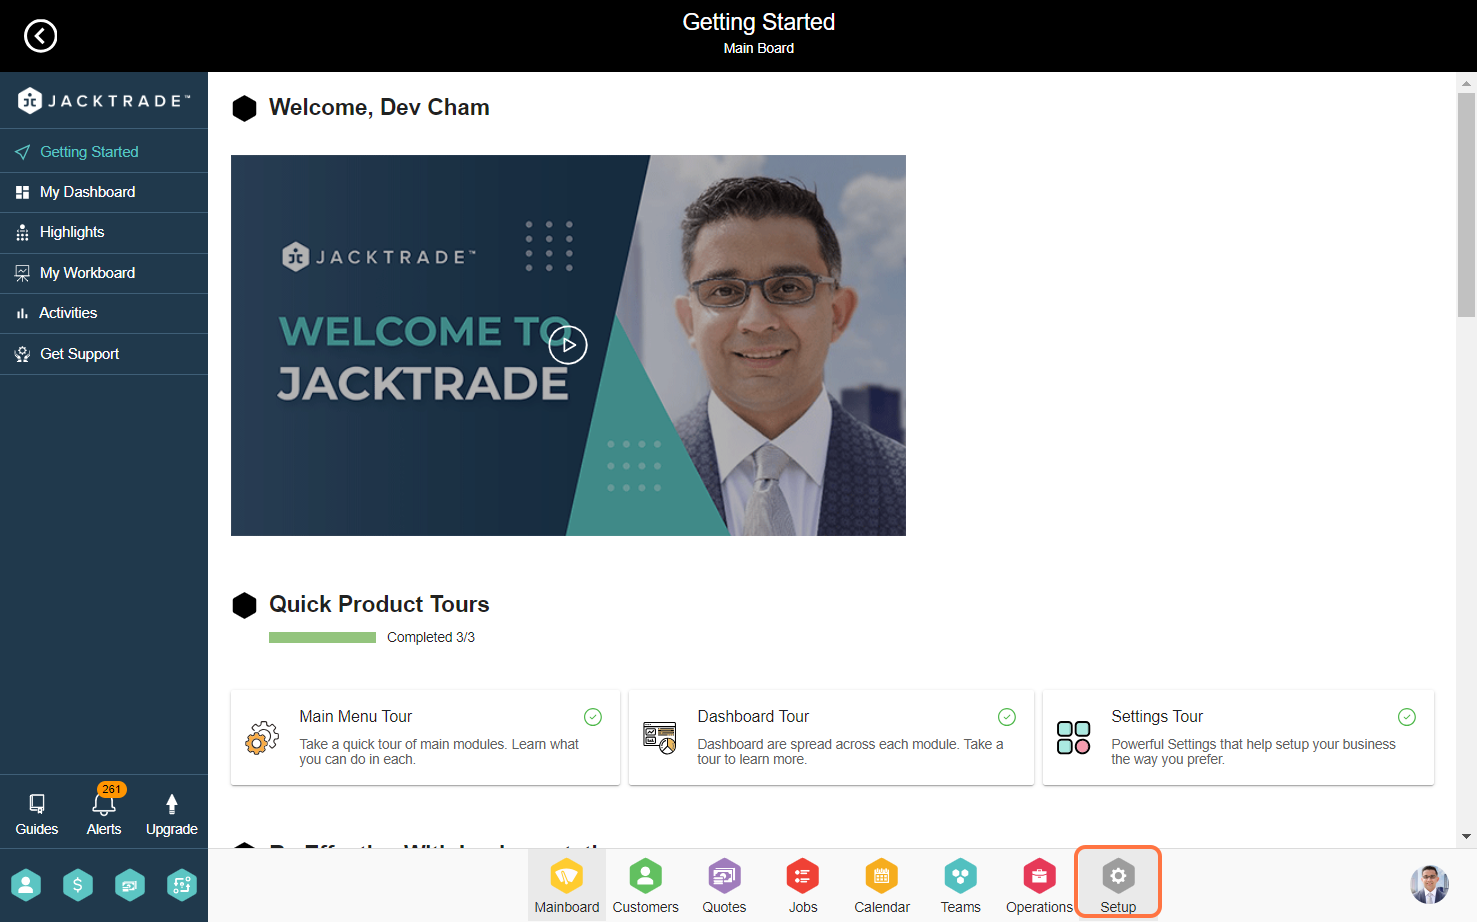
1. Go to the Setup Module.

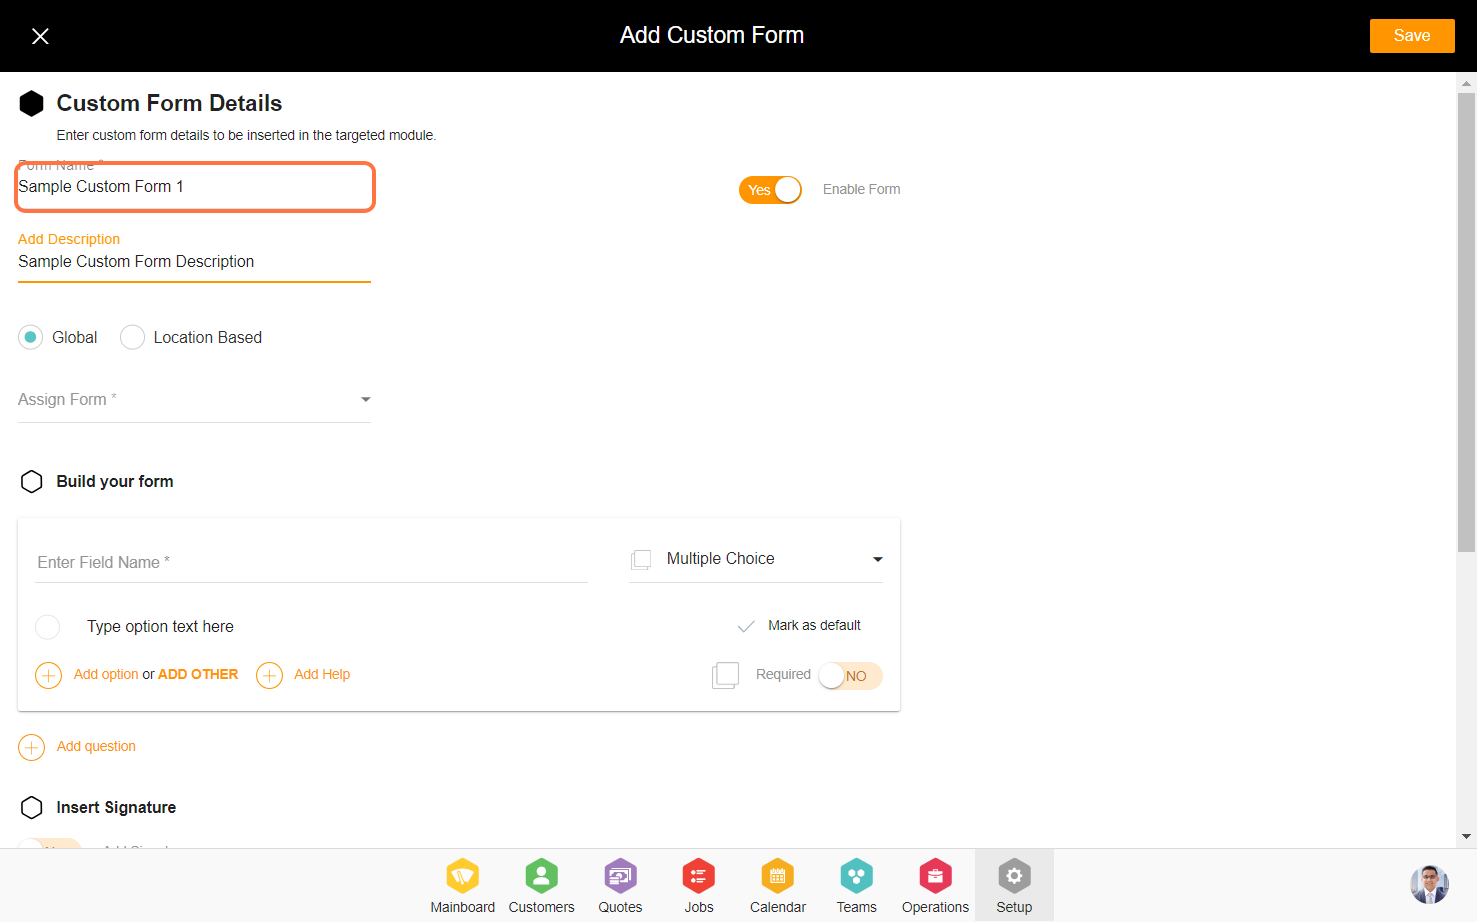
3. Click on 'Add A New Form'.

4. Provide a distinct form name and description.
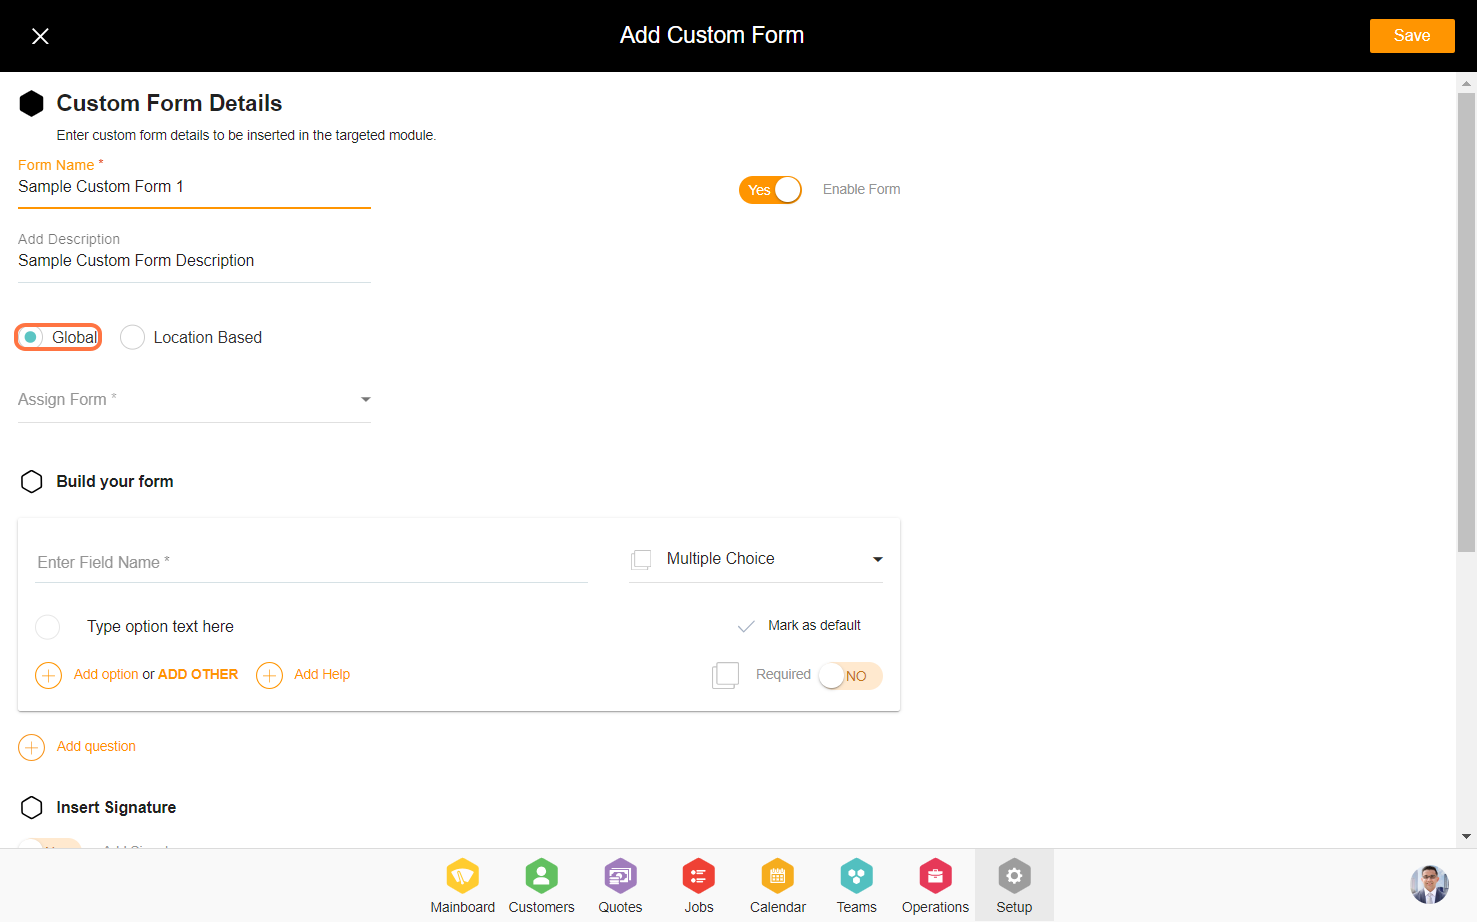
5. The custom form offers two options, allowing you to choose a single option for the form.
a) Global: Opting for the global option makes the form universally accessible across all business locations.
b) Location-based: When choosing the location-based option, the custom form becomes exclusive to the selected business location.
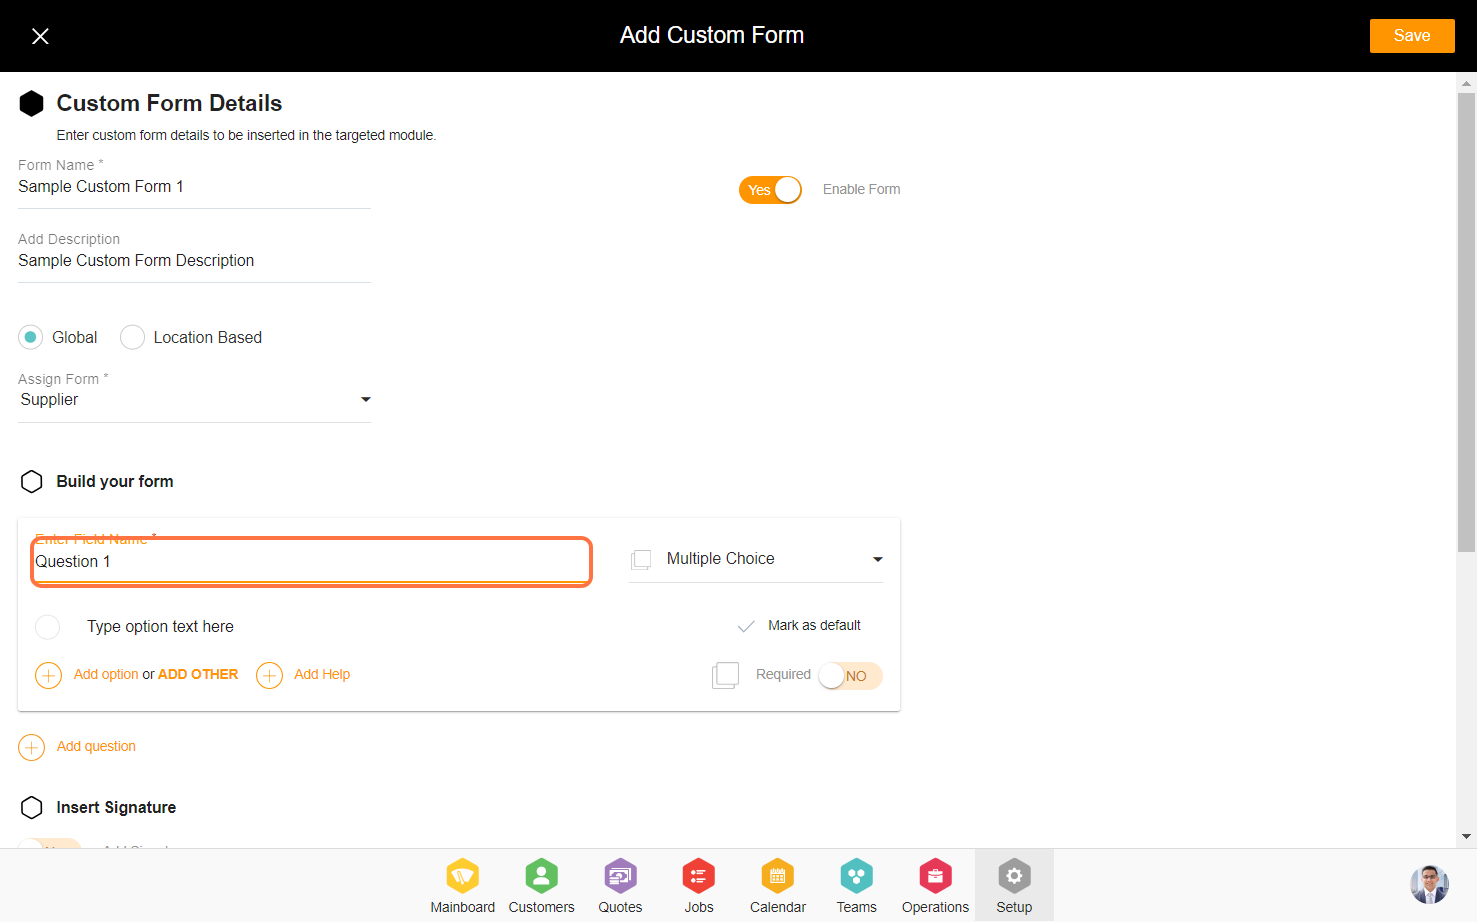
6. By clicking on 'Assign Form', you can allocate the form to different modules such as quotes, jobs, customers, etc.
7. Input the question you wish to include in the form.
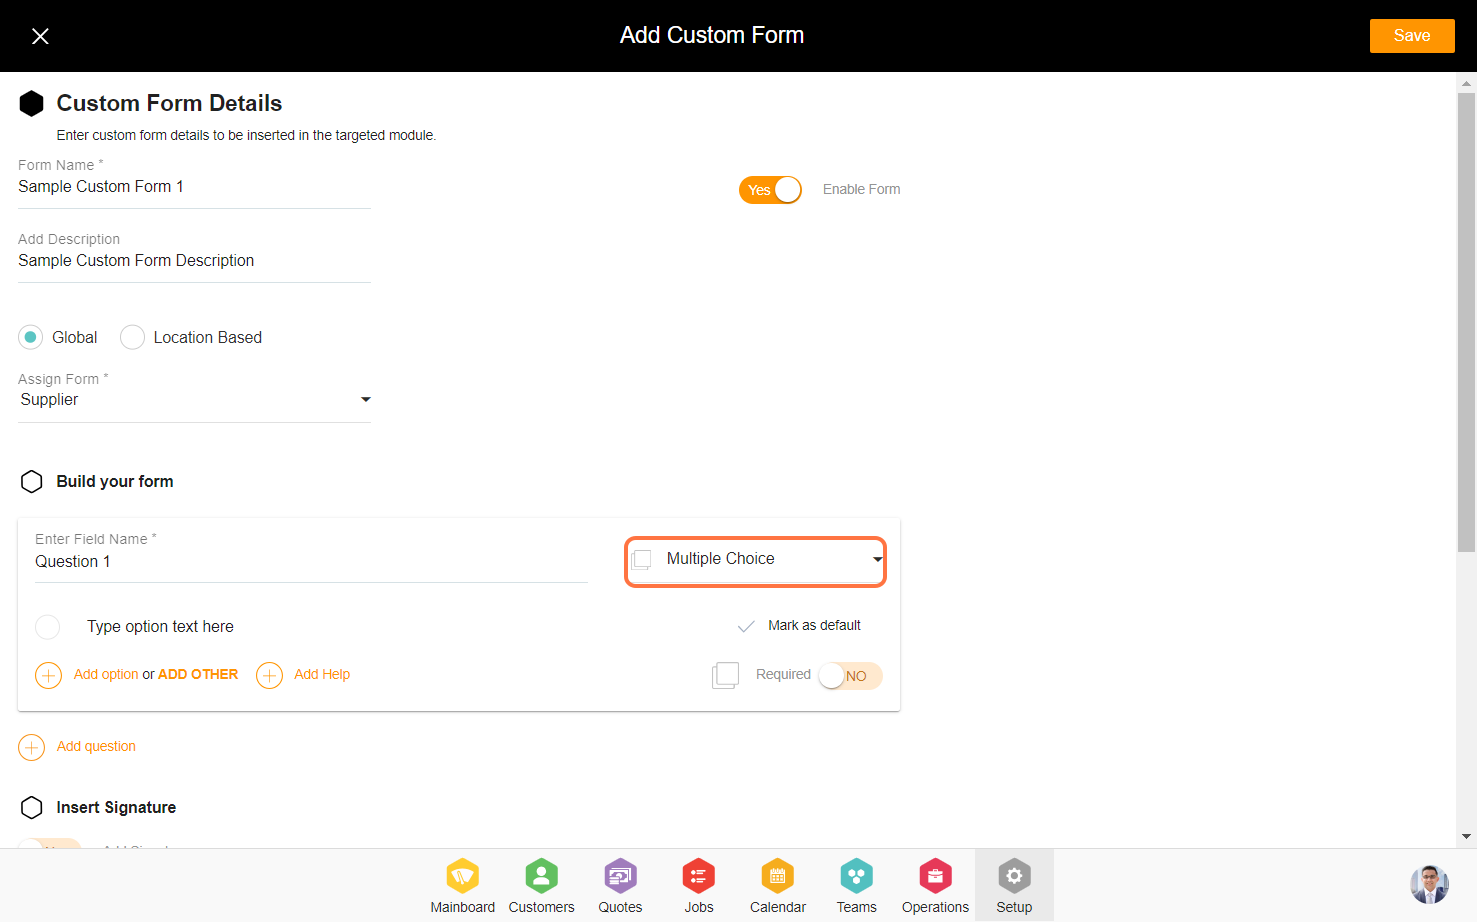
8. Select the question type for the form, such as multiple choice, short answer, dropdown, etc.
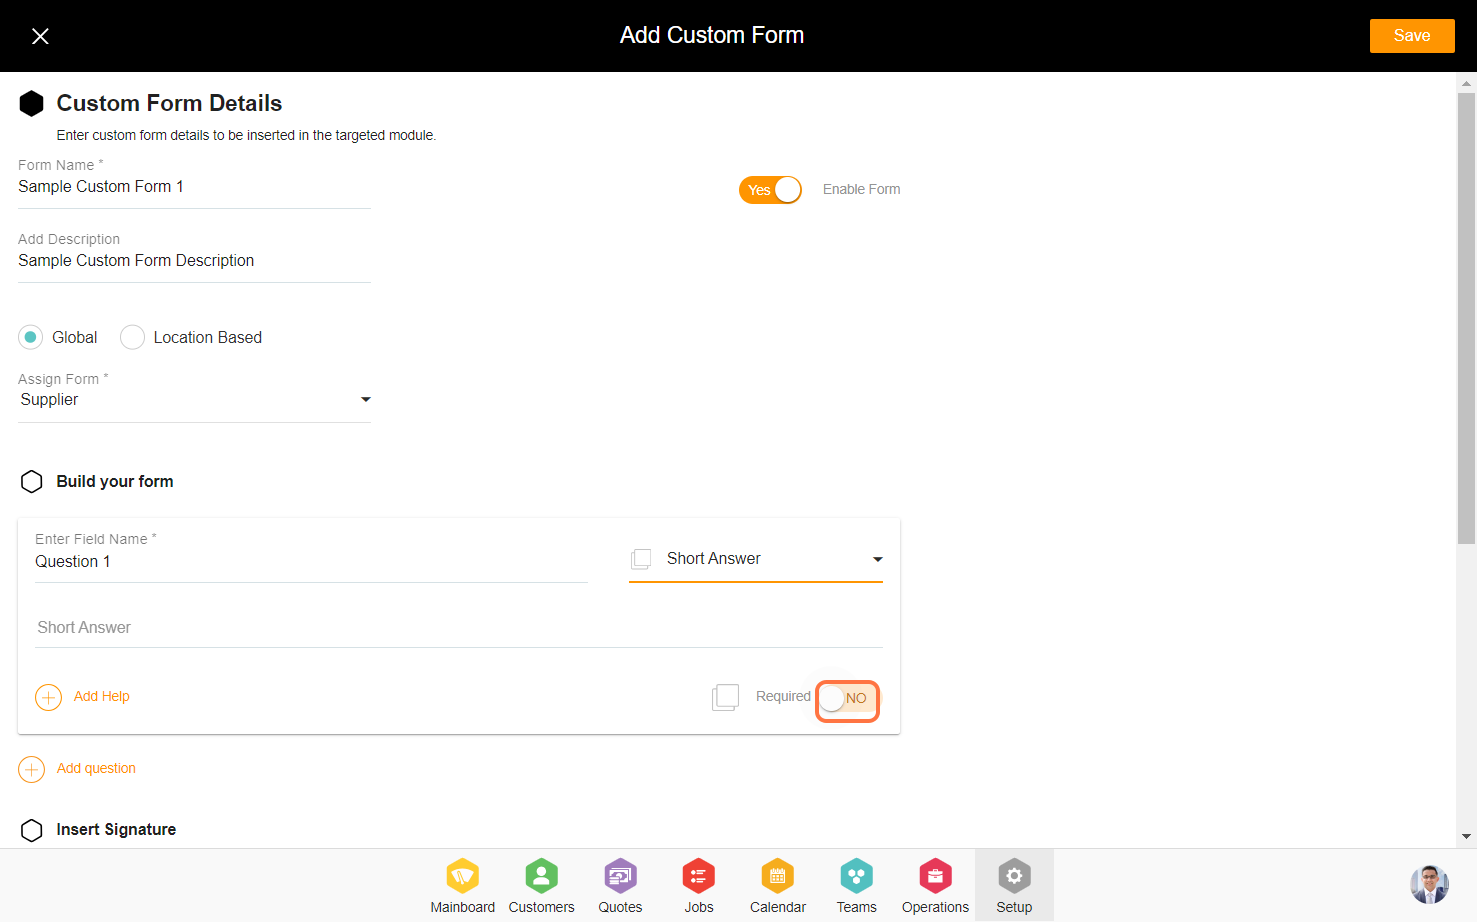
10. You can select the 'Add Help' option to input a help statement for the question.
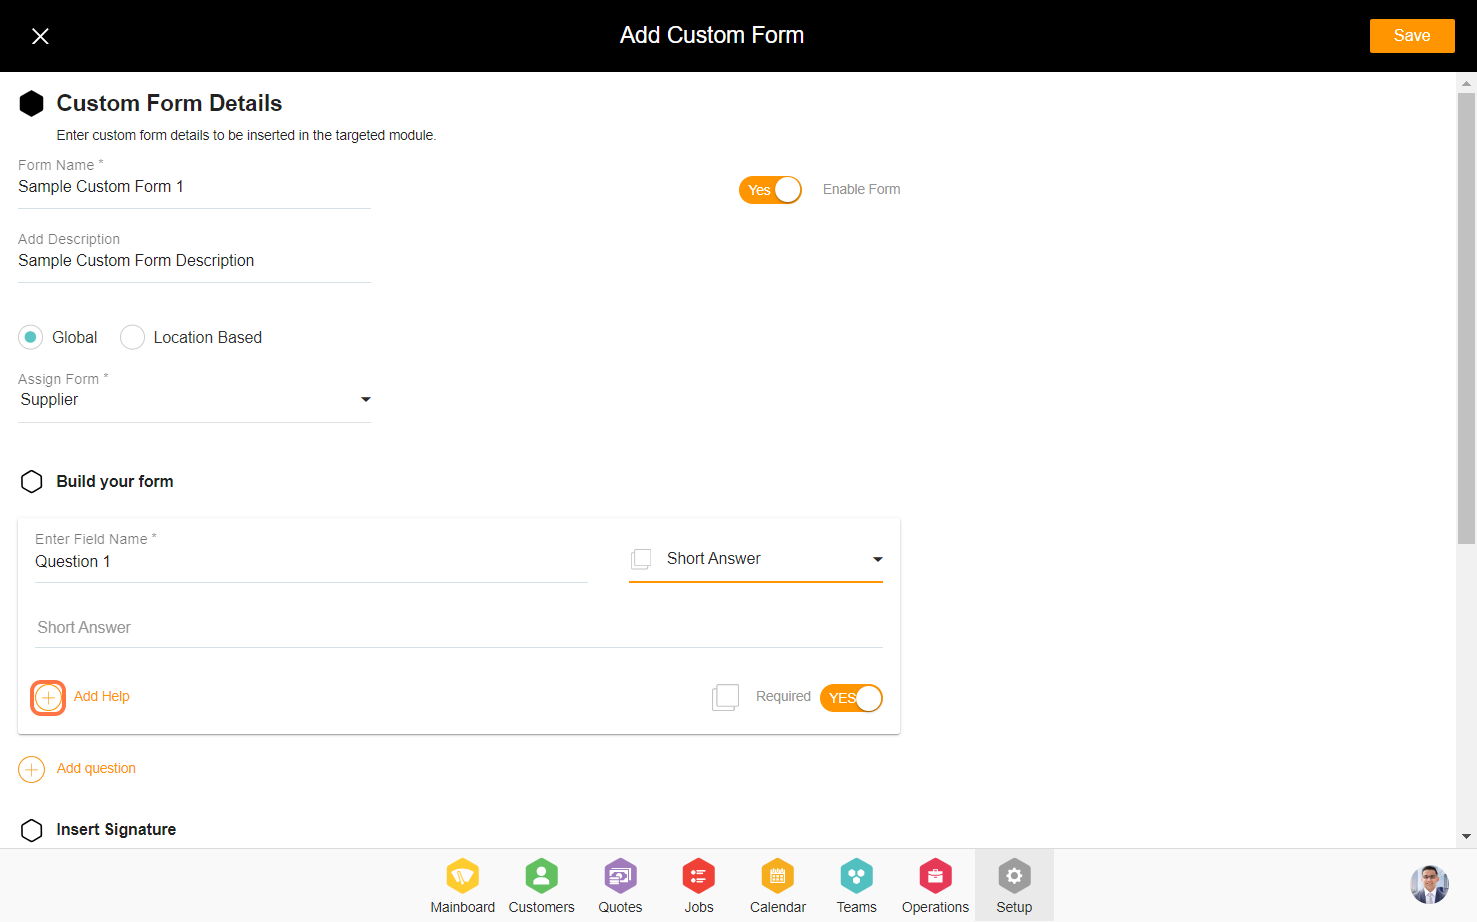
11. You can incorporate a signature into the form from the Insert Signature section.


13. Click on save to add the form.
