Contents
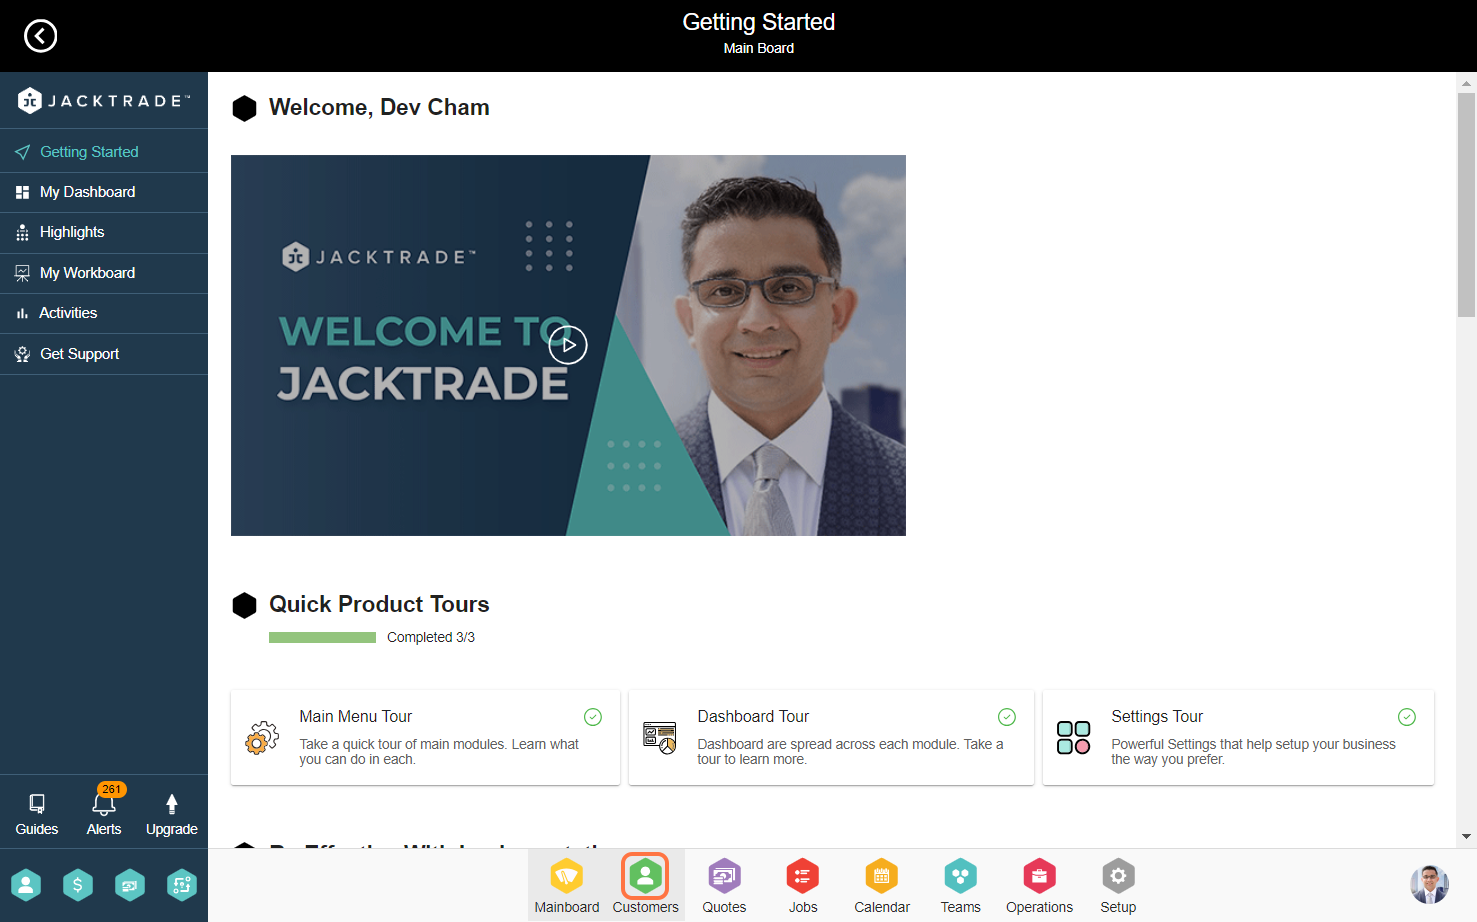
- Steps to record and track conversations and notes with customers
- 1. Go to the Customers Module.
- 2. Navigate to the customer profile under which you want to add or track conversations/notes.
- 3. Click on the Notes option on the left menu.
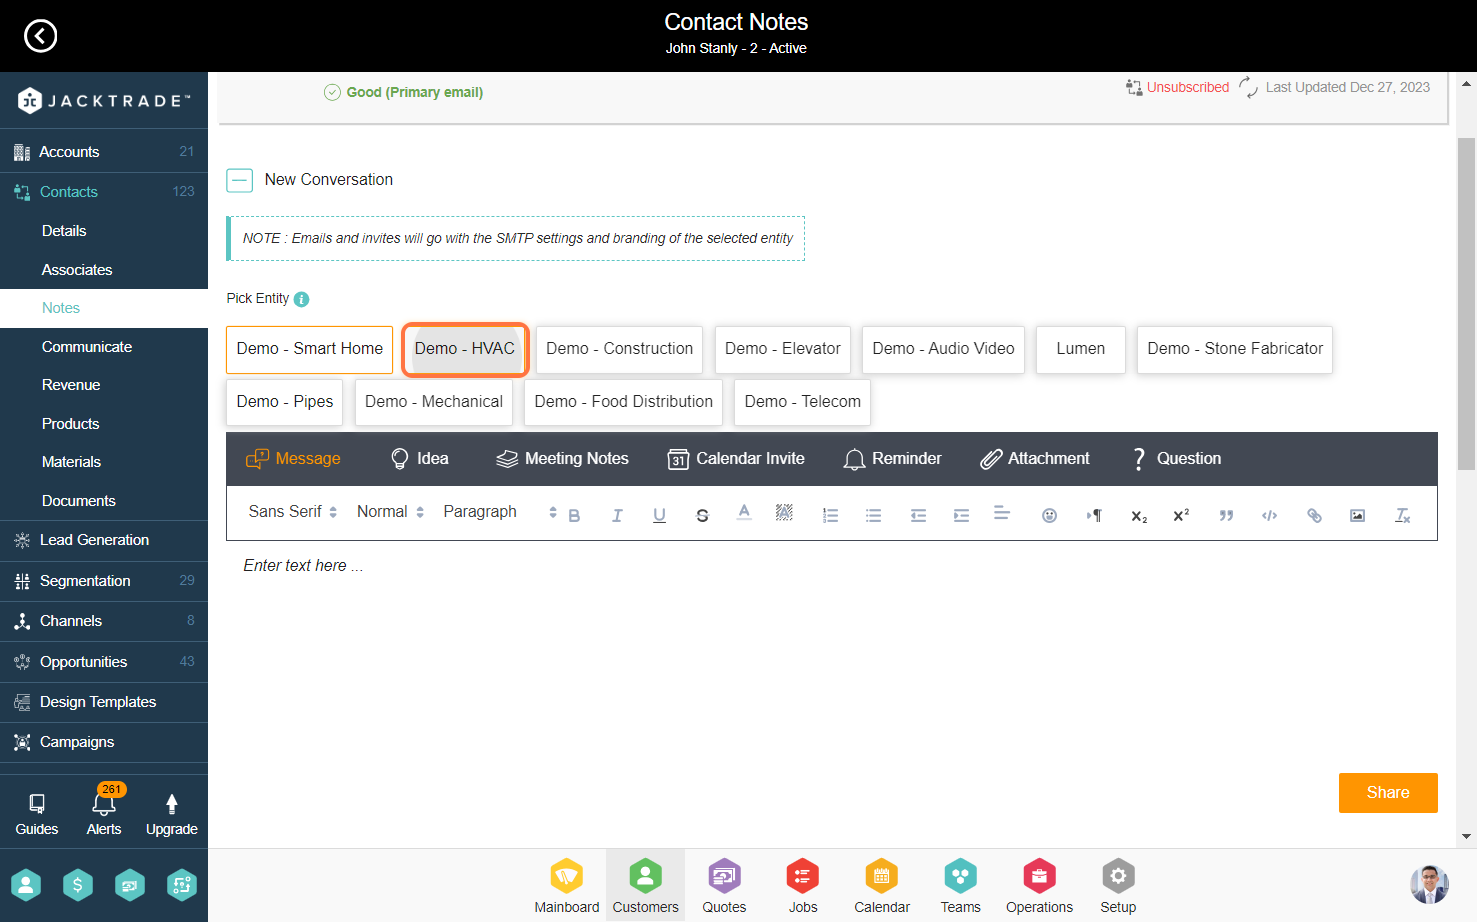
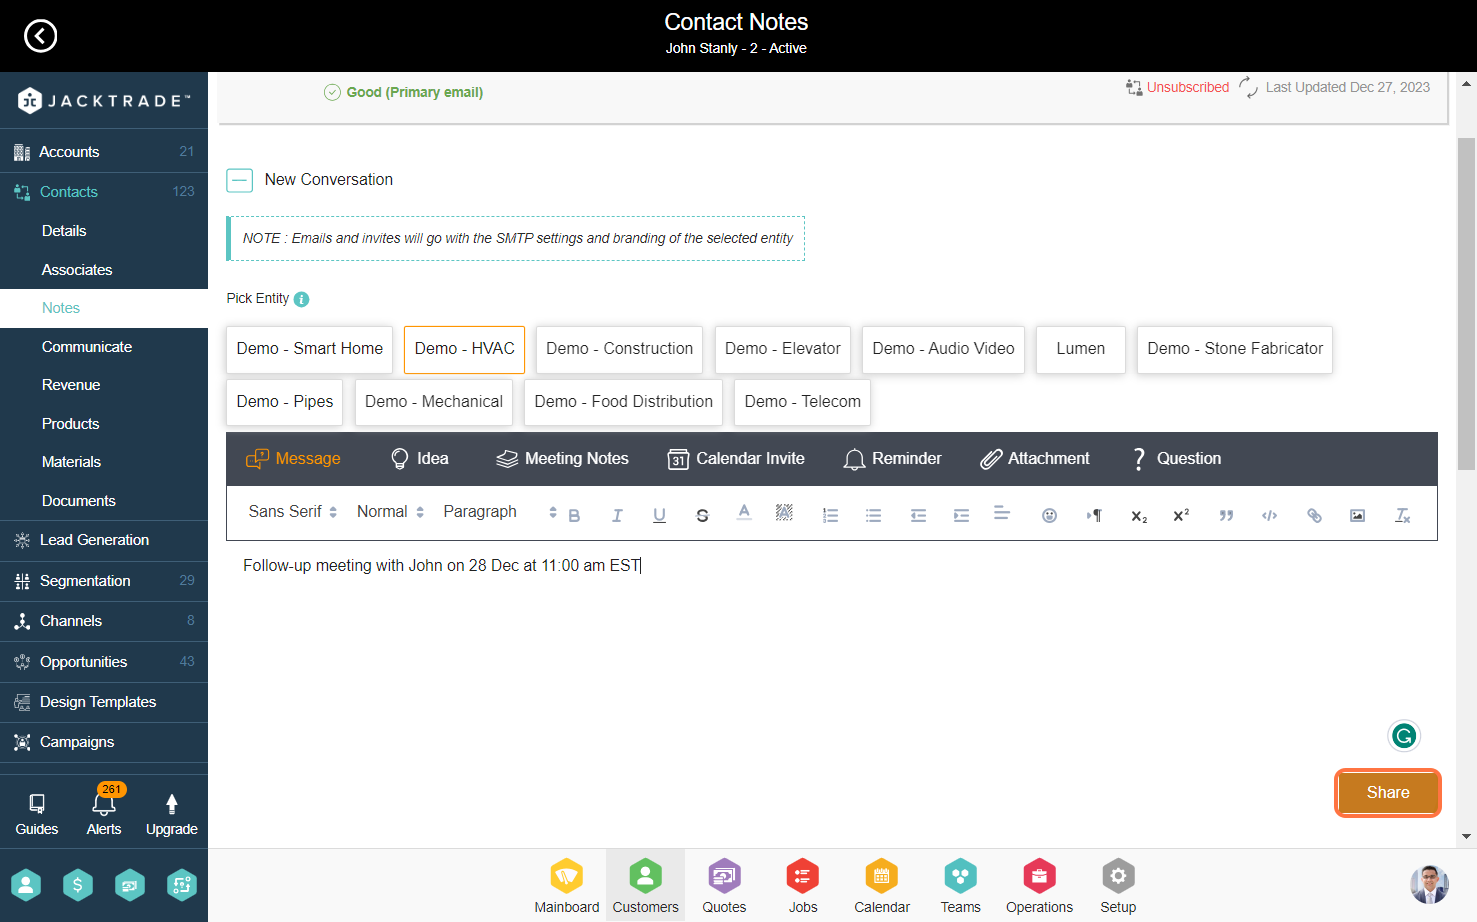
- 4. Select the entity here. Email and invites for the notes that you will share from here will be sent from the email settings and branding of the selected entity.
- 5. The “Notes” feature encompasses various types of records like messages, ideas, meeting notes, calendar invites, reminders, attachments, and questions. You have the option to choose any of these types and create a message accordingly.
- 6. Insert the content of the note in this rich text editor.
- 7. Various editing fields are available, allowing you to tailor the message as needed.
- 8. After composing the message, click on “Share” to save the conversation record.
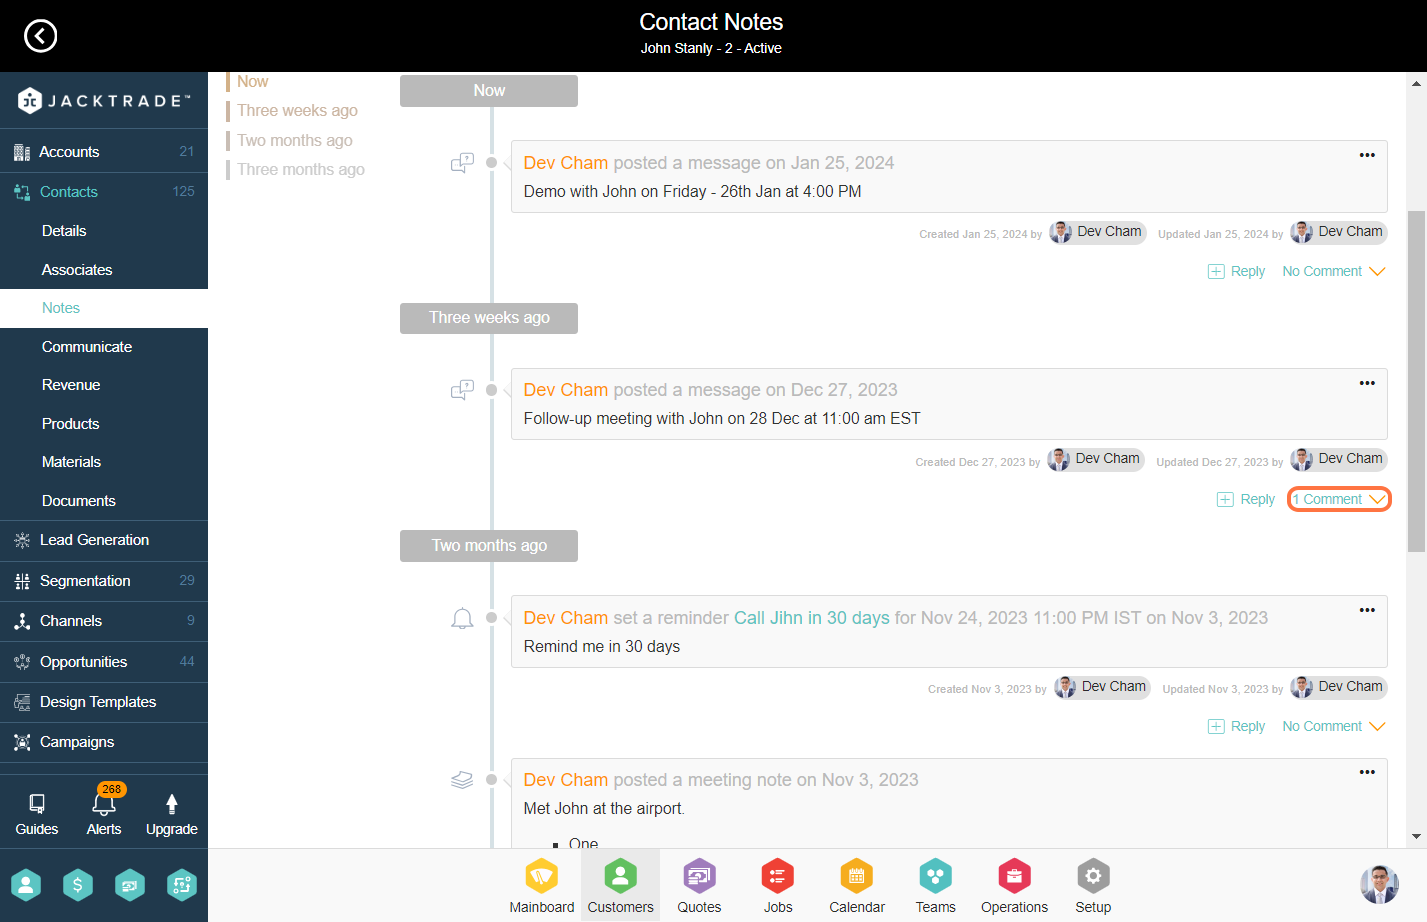
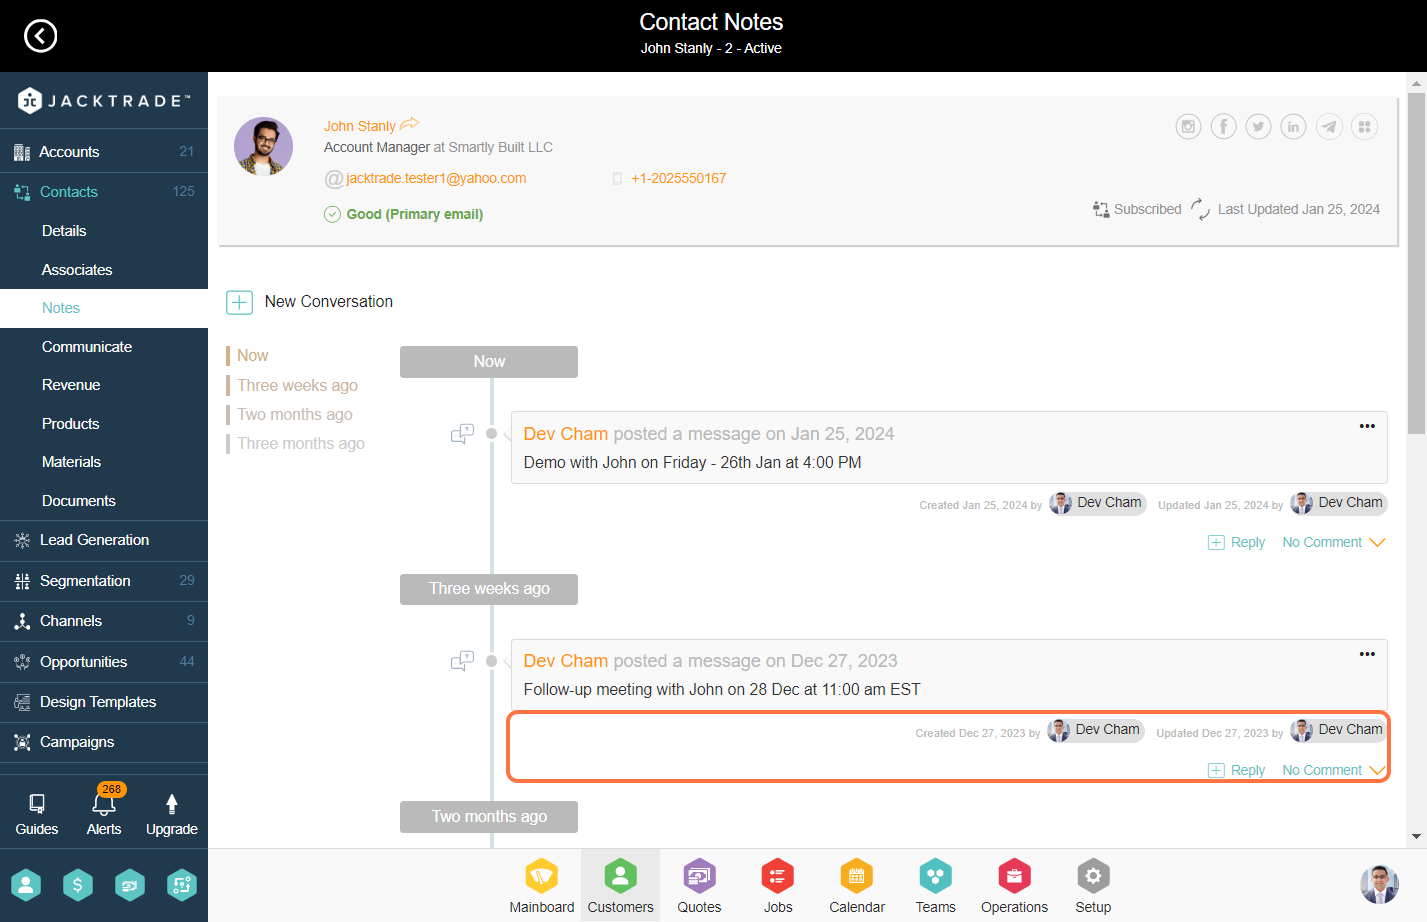
- 9. You can review both current and past recorded conversations from here. On the left, you will see a timelapse and you can view messages belonging to that timeframe.
- 10. For every conversation, you can track which resource has created and updated the post.
- 11. Click on ‘Reply’.
- 12. After clicking on ‘Add Reply’ you will encounter a description box. Enter the desired reply and then click on ‘Reply’.
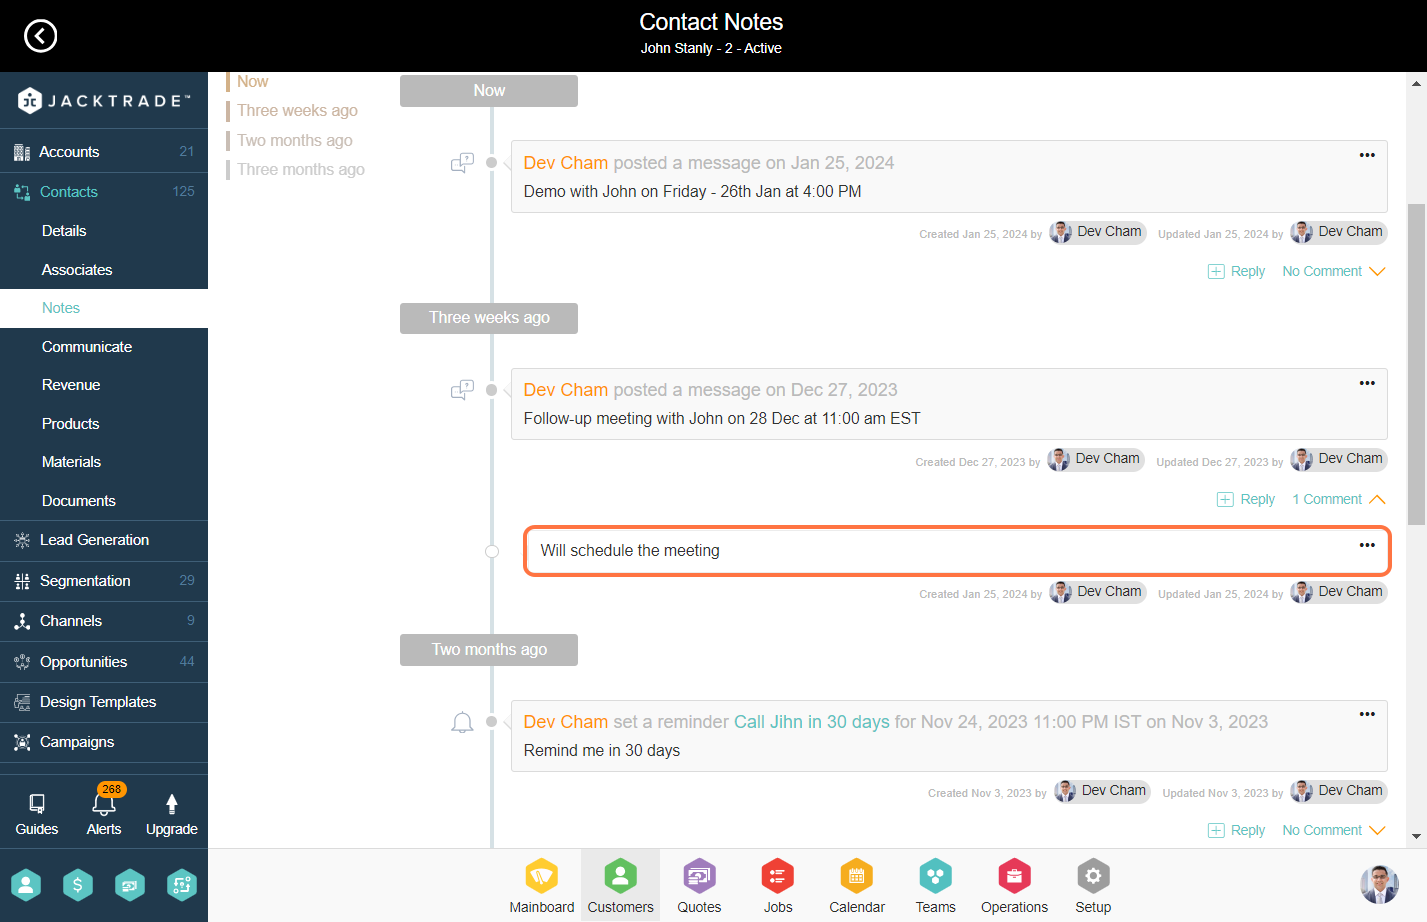
- 13. After adding the reply, click on ‘Comment’ to view the reply.
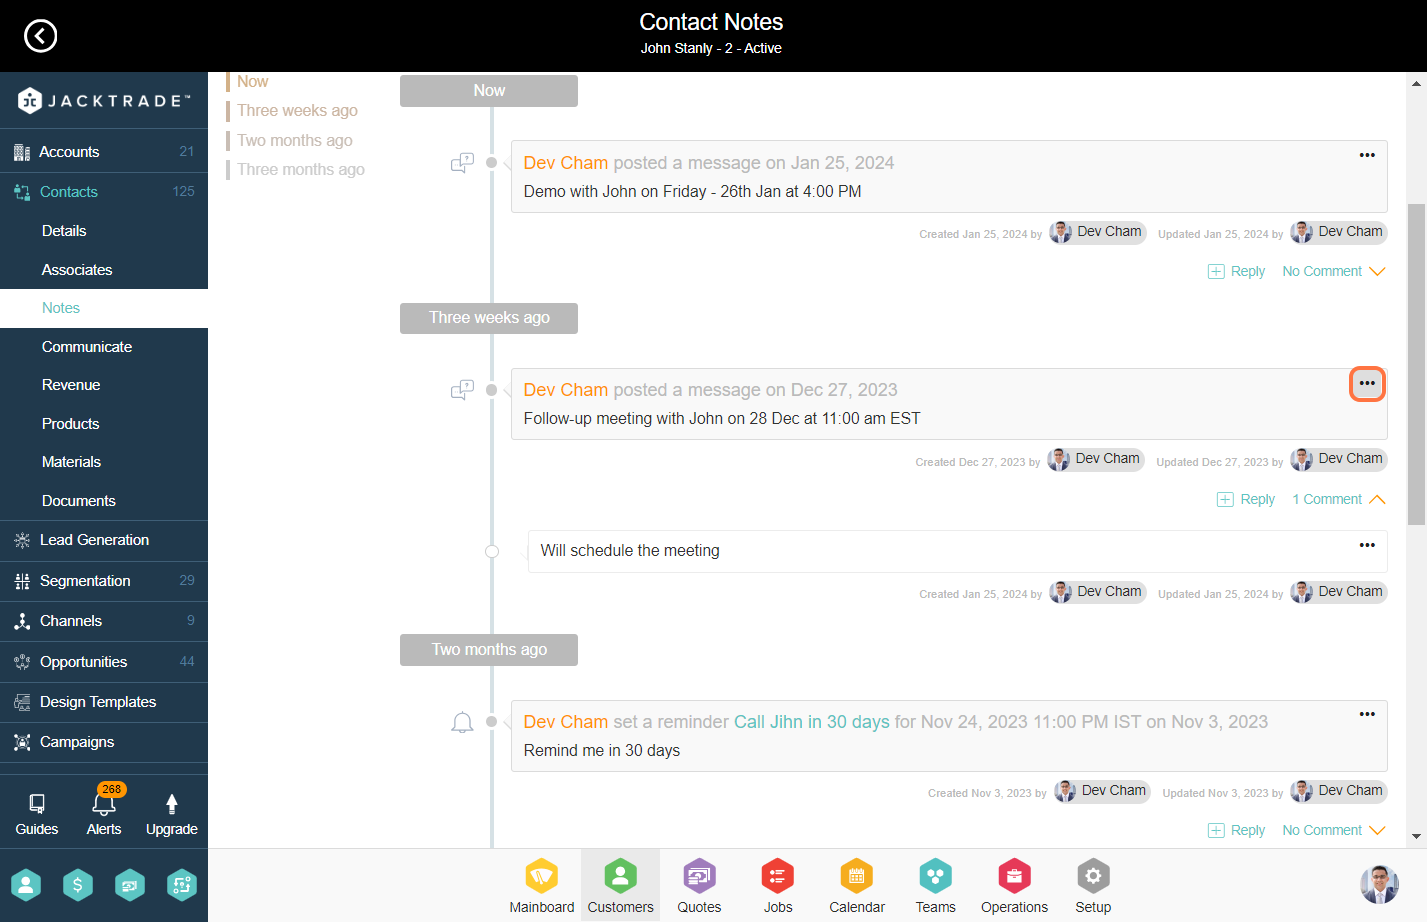
- 14. You have the option to edit, share, and archive the post. To access these options, click on the three dots next to the post.
Steps to record and track conversations and notes with customers
1. Go to the Customers Module.


5. The “Notes” feature encompasses various types of records like messages, ideas, meeting notes, calendar invites, reminders, attachments, and questions. You have the option to choose any of these types and create a message accordingly.

6. Insert the content of the note in this rich text editor.

7. Various editing fields are available, allowing you to tailor the message as needed.

9. You can review both current and past recorded conversations from here. On the left, you will see a timelapse and you can view messages belonging to that timeframe.

10. For every conversation, you can track which resource has created and updated the post.
11. Click on ‘Reply’.
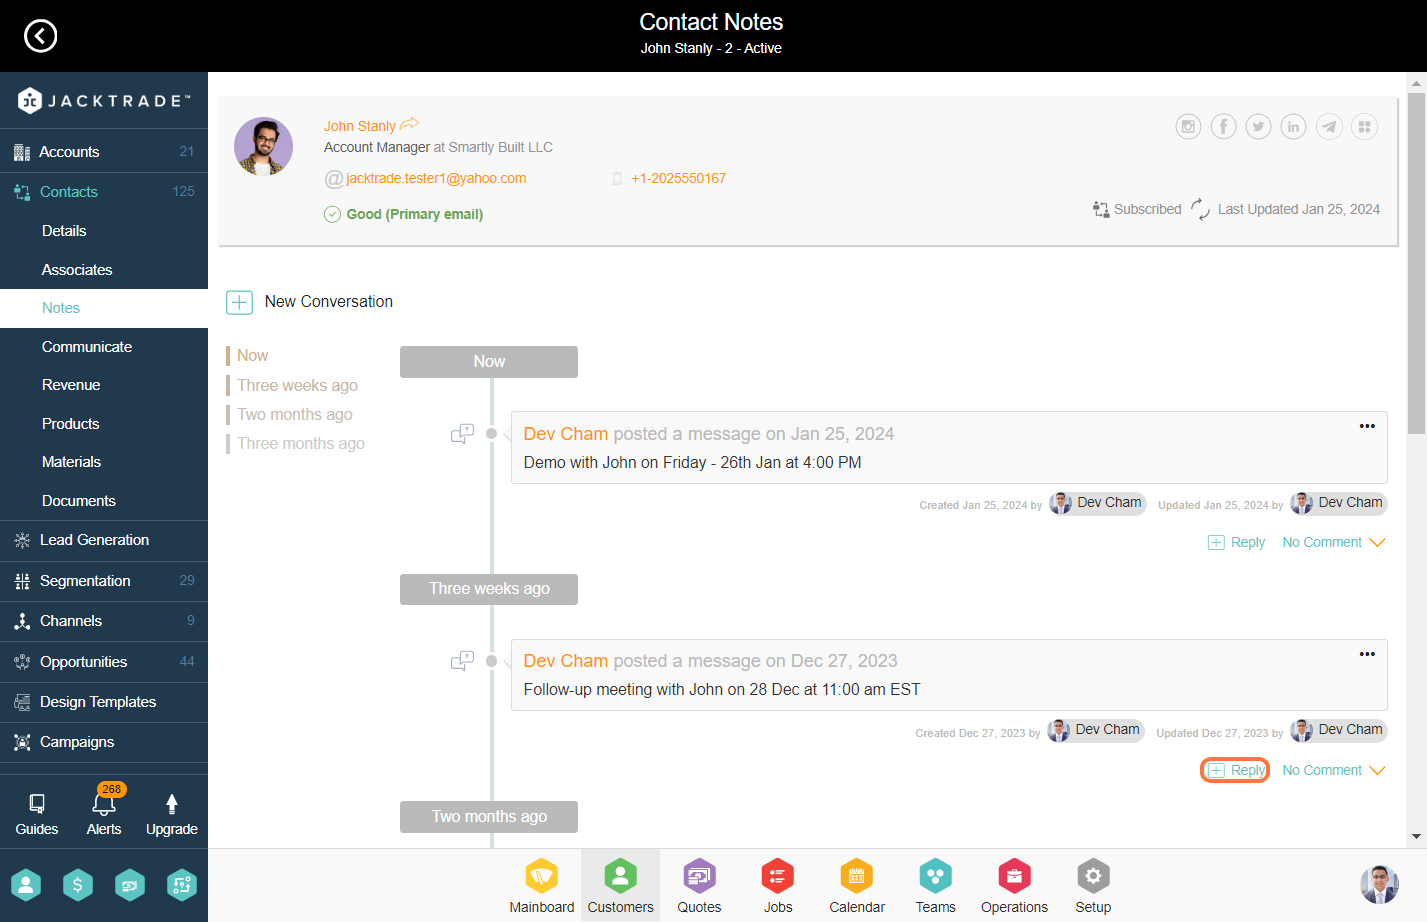
12. After clicking on ‘Add Reply’ you will encounter a description box. Enter the desired reply and then click on ‘Reply’.

13. After adding the reply, click on ‘Comment’ to view the reply.
