Steps for managing the lead cards


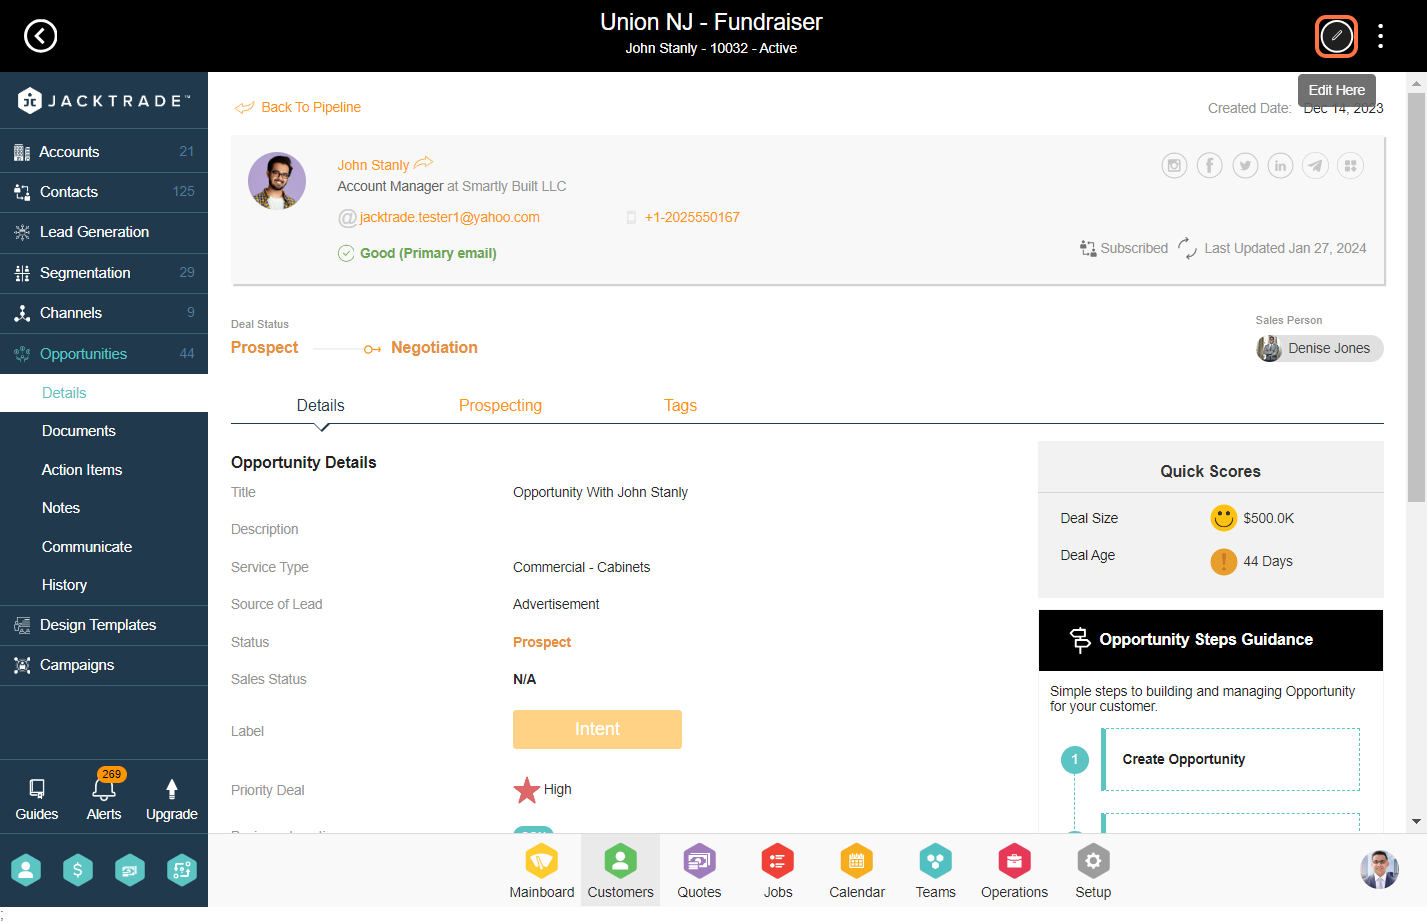
1. After creating the opportunity, click on the edit icon from the top right.

Note: Learn 'How To - Add an Opportunity'.

 
Click on basic:icon-ico-edit


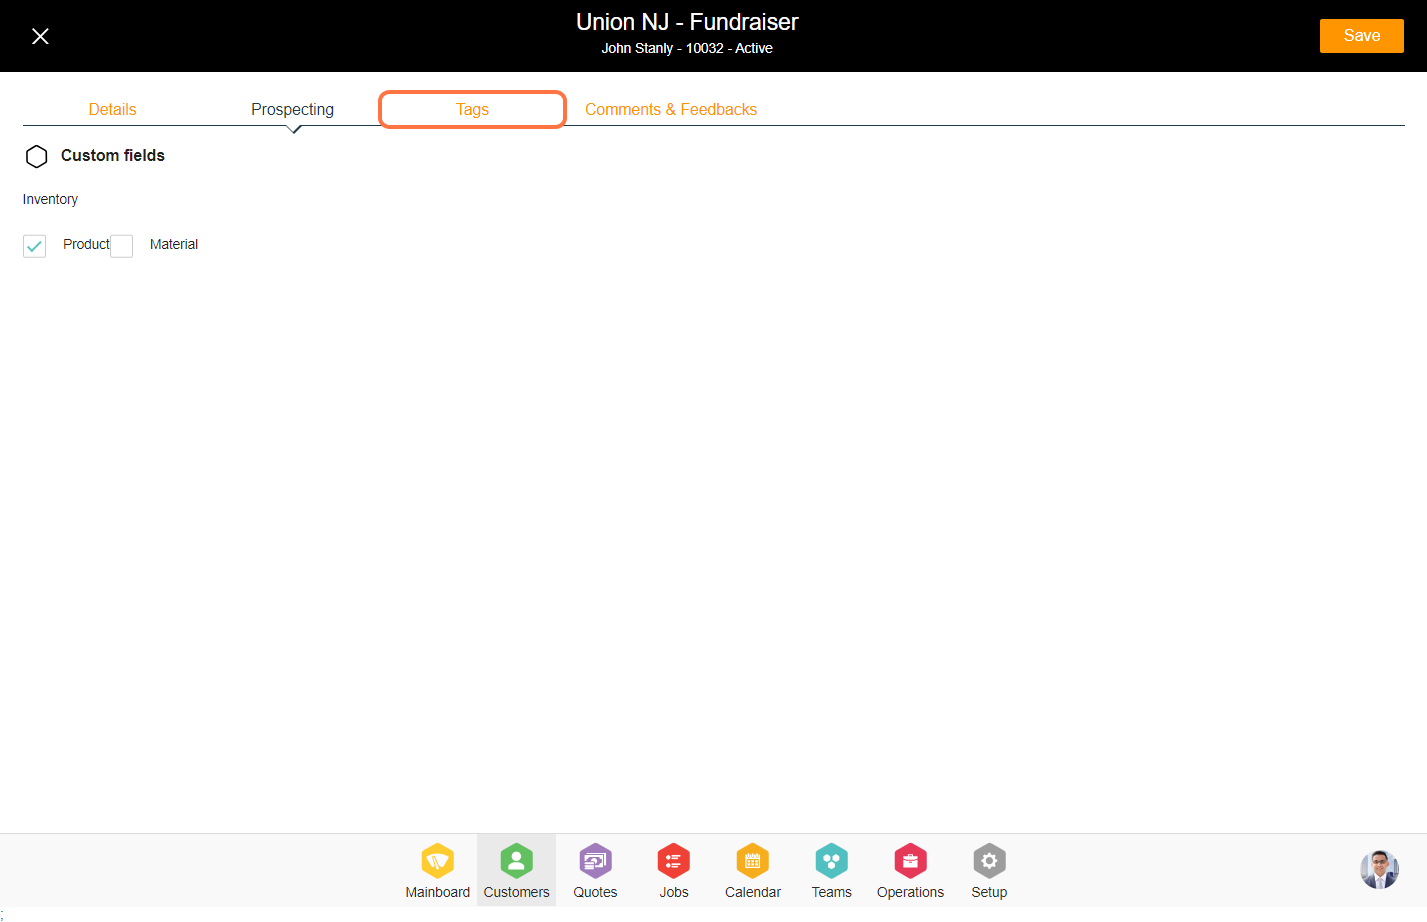
2. Click on 'Prospecting' tab.

 
Click on Prospecting


3. Prospecting is a form that you can configure from the setup. Select the fields from the custom fields.

Note: Learn 'How To - Add a Custom Form'.

 
Click on Product


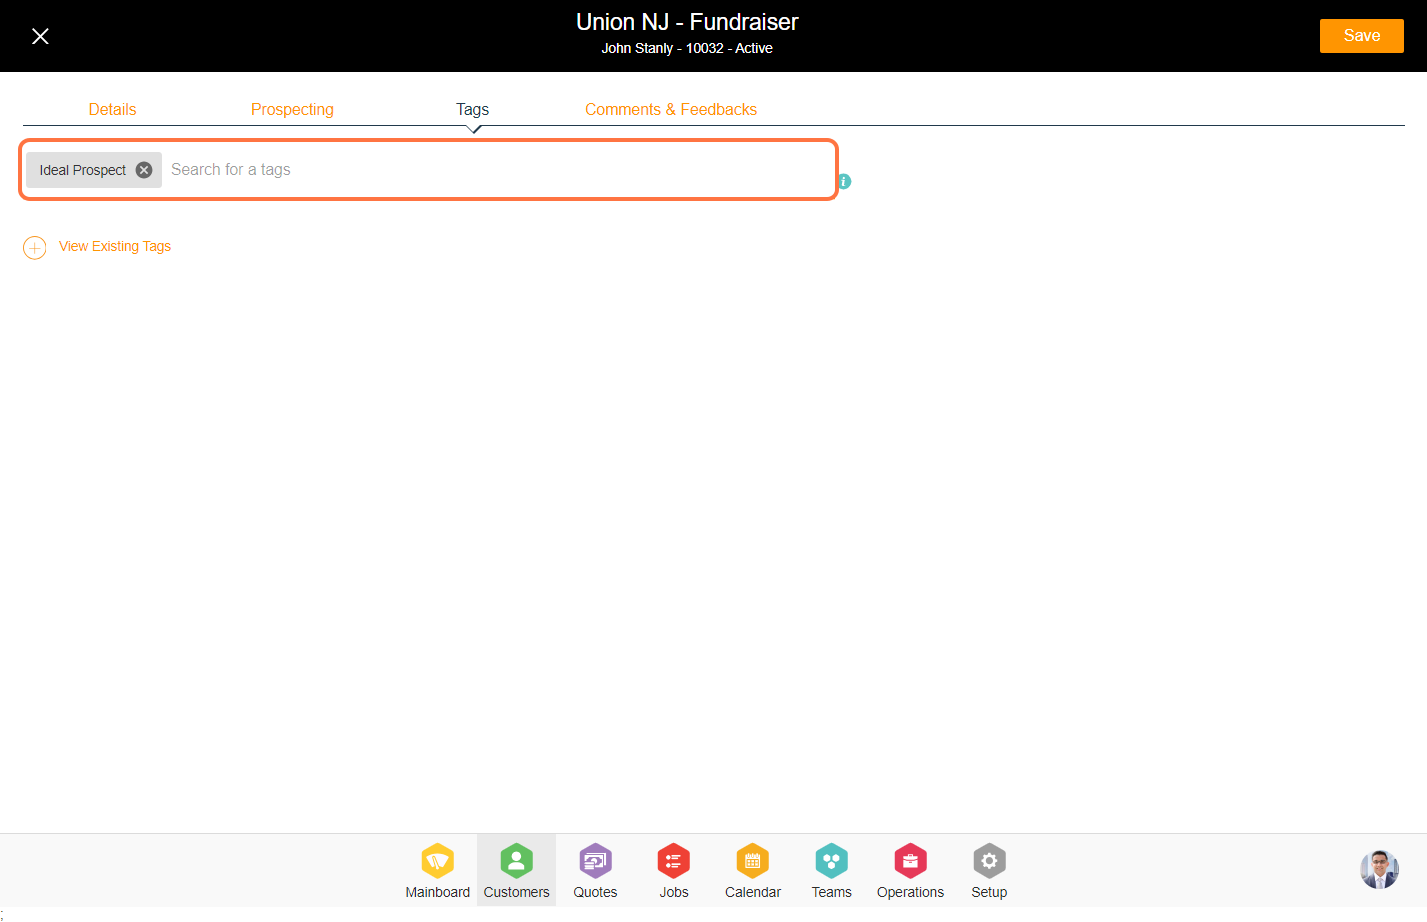
4. Click on the 'Tags' tab.

 
Click on Tags


5. Enter the tag manually or select the existing tag by clicking on 'View Existing Tag'.

 
Click on Chips container. Use arrow keys to select chips.


6. Click on 'Documents' from the left menu, and click on the 'Add' icon from the top. 

 
Click on Documents
 
Click on basic:icon-ico-add


7. Enter the document details such as name, category, date, descriptions, tags, and image.

 
Click on Document Details…


8. Click on 'Action Item' from the left menu.

 
Click on Action Items


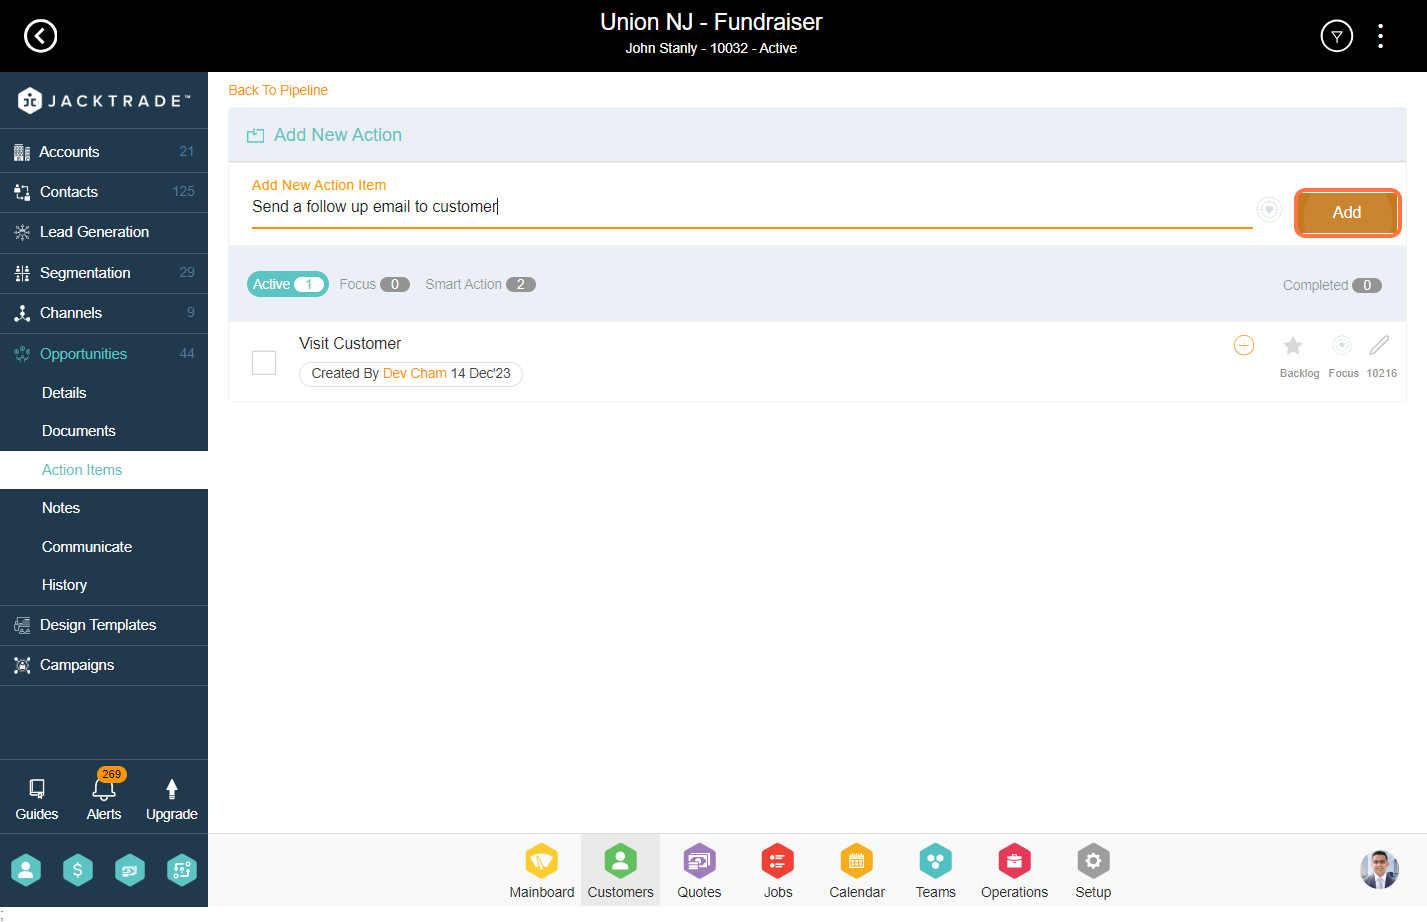
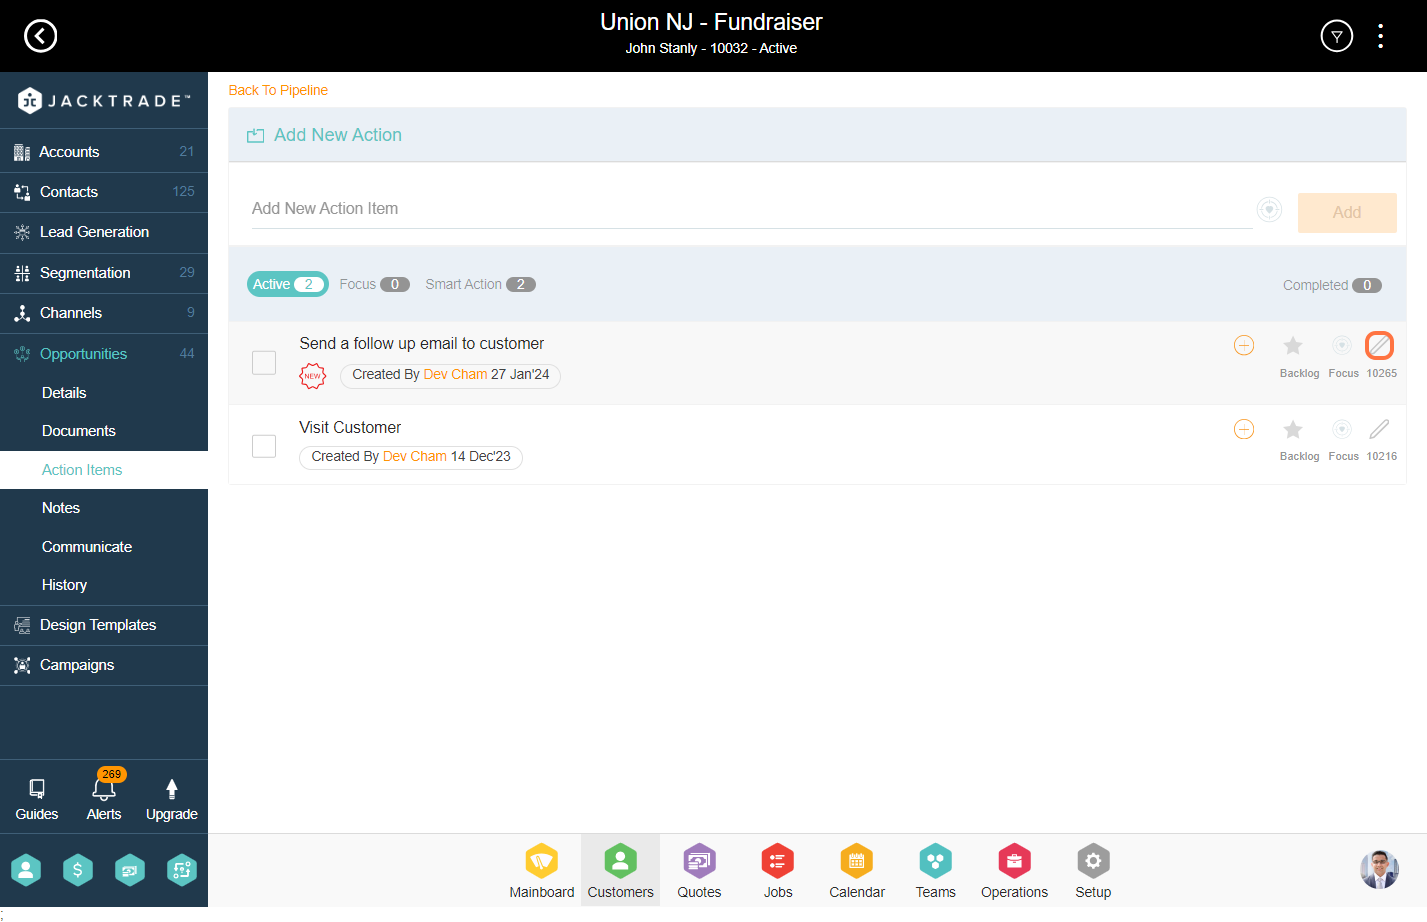
9. You can generate a specific action item for the opportunity. After entering the action item name, click on 'Add' to include the action item.

 
Click on Add


10. Select the edit icon for the specific action item, then input additional details such as description, tags, date, time, and resource for the action item, and then click on 'Done'.

 
Click on set-d:icon-ico-pencil
 
Click on Action Item…


11. Click on the 'Notes' from the left menu.

 
Click on Notes


12. Select the entity add the conversation and then click on 'Share'.

Note: Learn more about notes features from here 'How To - Record and Track Notes'.

 
Click on Setup a demo with John on 31st Jan at 4:00 PM


13. You can review both current and past recorded conversations from here. On the left, you will see a timelapse and you can view messages belonging to that timeframe.

 
Click on Now…


14. Click on 'Communicate' from the left menu.

 
Click on Communicate


15. Select the pre-built email which is built from the setup. 

 
Click on Closing An Opportunity


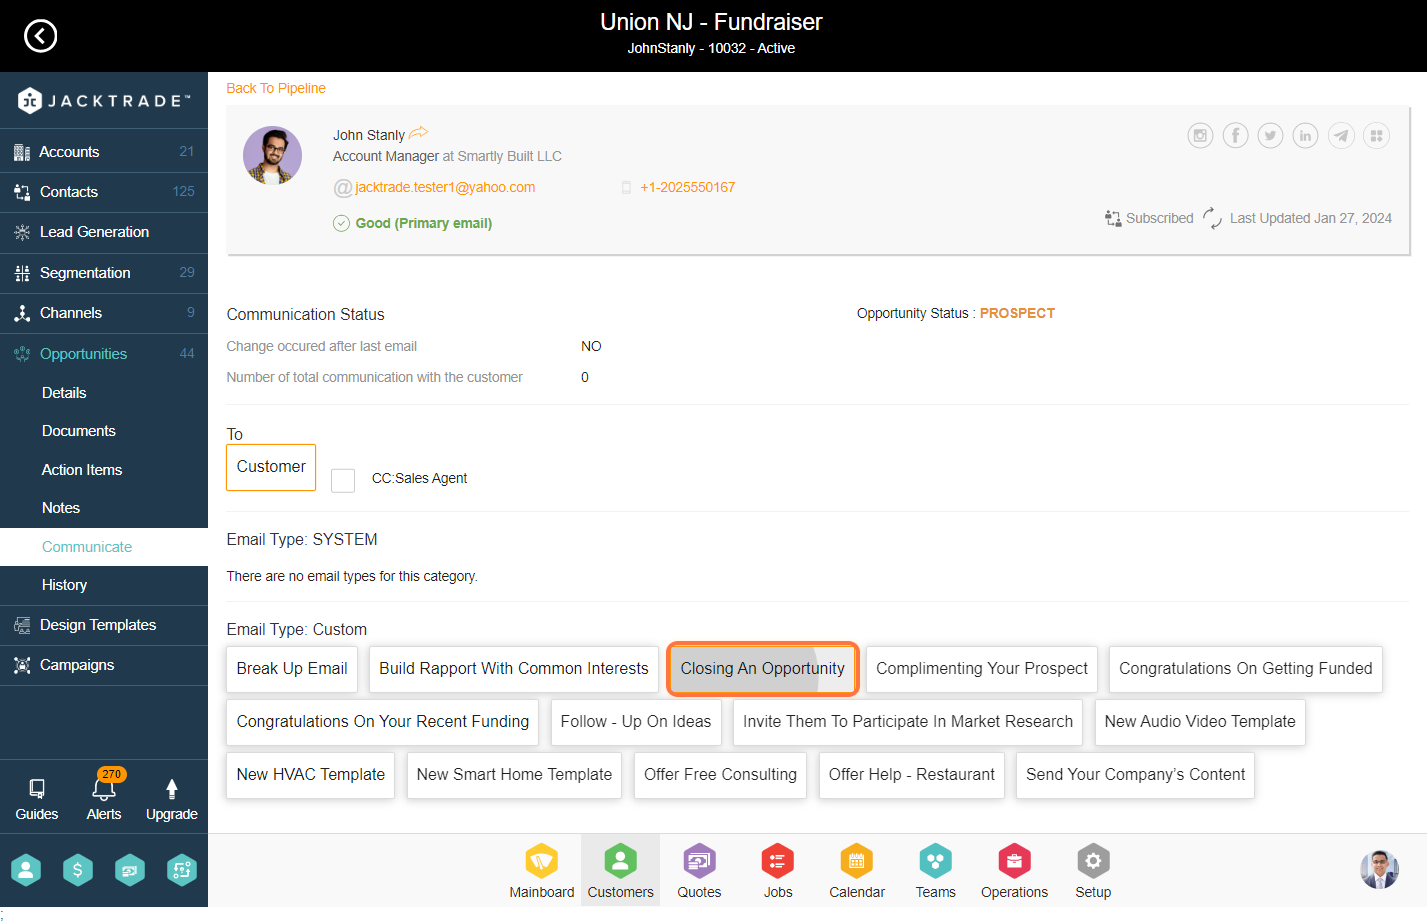
16. Pre-Built Email will pop up, click on send, and your email will be sent successfully.

 
Click on select-fleet


17. Click on 'History' from the left menu. You can view the lead card history from the productivity and communication tabs.

 
Click on History
 
Click on Productivity
 
Click on Communications

Contents