Contents
- Guidelines to create and manage action items: A Step-by-Step Guide.
- 1. Go to the Teams Module.
- 2. Click on ‘Action Items’ from the left menu.
- 3. This is the view of the ‘Action Workboard’ where you can see all the overall statistics of action items.
- 4. Click on the ‘Toggle Dashboard and List View’ icon.
- 5. Enter the action item title and click on ‘Add’.
- 6. Click on the ‘Edit Action Item’ icon to edit the action.
- 7. Enter the other action item details and click on ‘Done’.
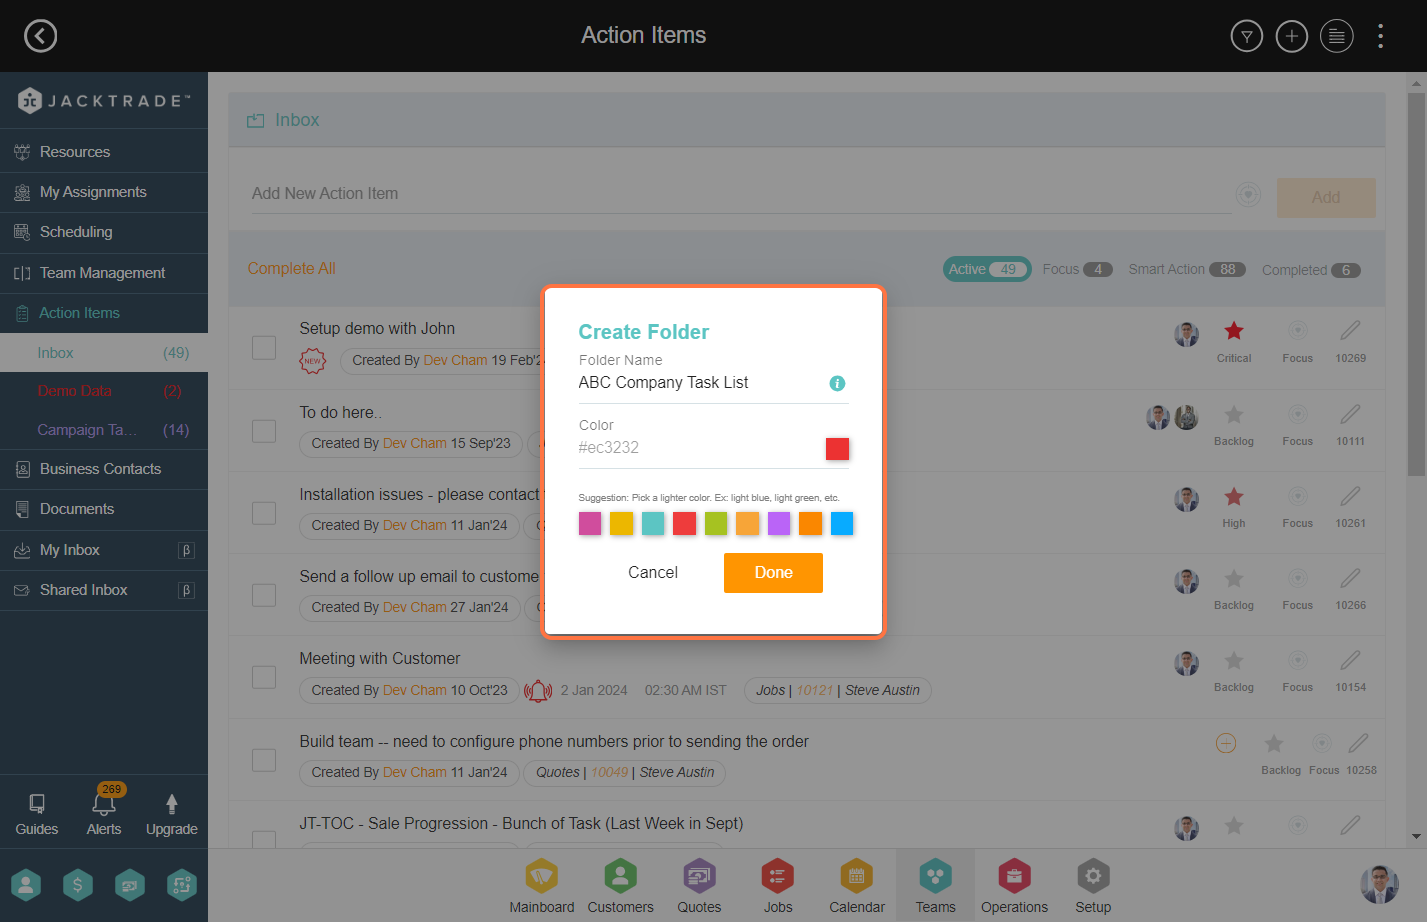
- 8. Click on the ‘Add’ icon from the top to add the folder.
- 9. Enter the folder name and color and then click on ‘Done’.
- 10. Click on the options menu (3 dots) and select ‘Bulk Operations’.
- 11. Enter the details for bulk operations, such as the sales agent, priority label, folder, date, and time.
- 12. Select the action items you wish to modify, then click “Apply” to implement bulk operations.
Guidelines to create and manage action items: A Step-by-Step Guide.
1. Go to the Teams Module.


3. This is the view of the ‘Action Workboard’ where you can see all the overall statistics of action items.

4. Click on the ‘Toggle Dashboard and List View’ icon.

5. Enter the action item title and click on ‘Add’.


6. Click on the ‘Edit Action Item’ icon to edit the action.


7. Enter the other action item details and click on ‘Done’.

8. Click on the ‘Add’ icon from the top to add the folder.

9. Enter the folder name and color and then click on ‘Done’.


11. Enter the details for bulk operations, such as the sales agent, priority label, folder, date, and time.

12. Select the action items you wish to modify, then click “Apply” to implement bulk operations.

