Contents
- Steps for configuring the sales pipeline.
- 1. Go to the Customers module.
- 2. Click on ‘Opportunities’ from the left menu.
- 3. Select the board you wish to configure the pipeline.
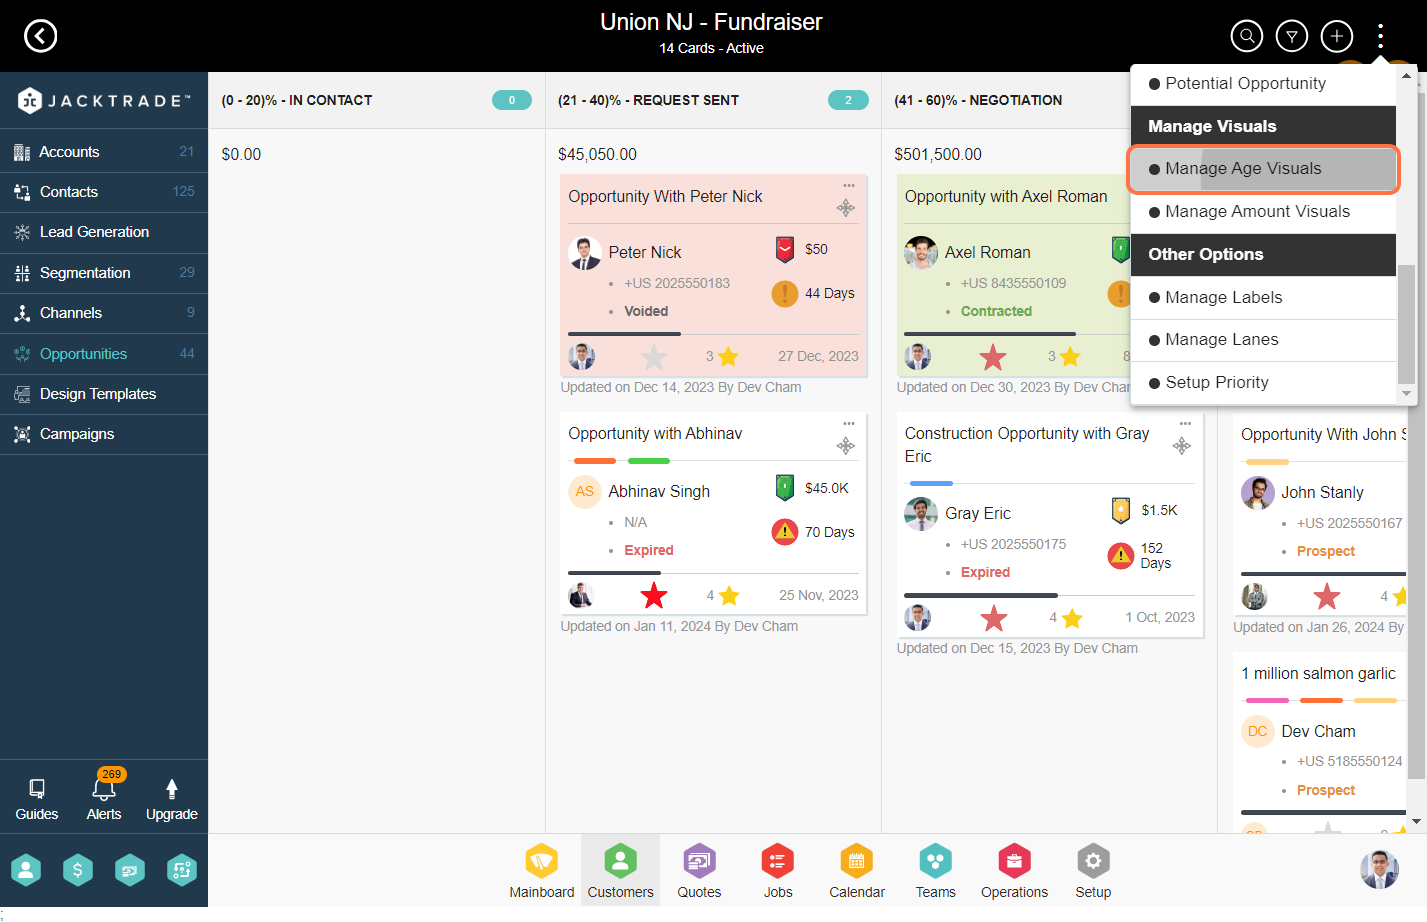
- 4. Click on the options menu (three dots) located at the top right.
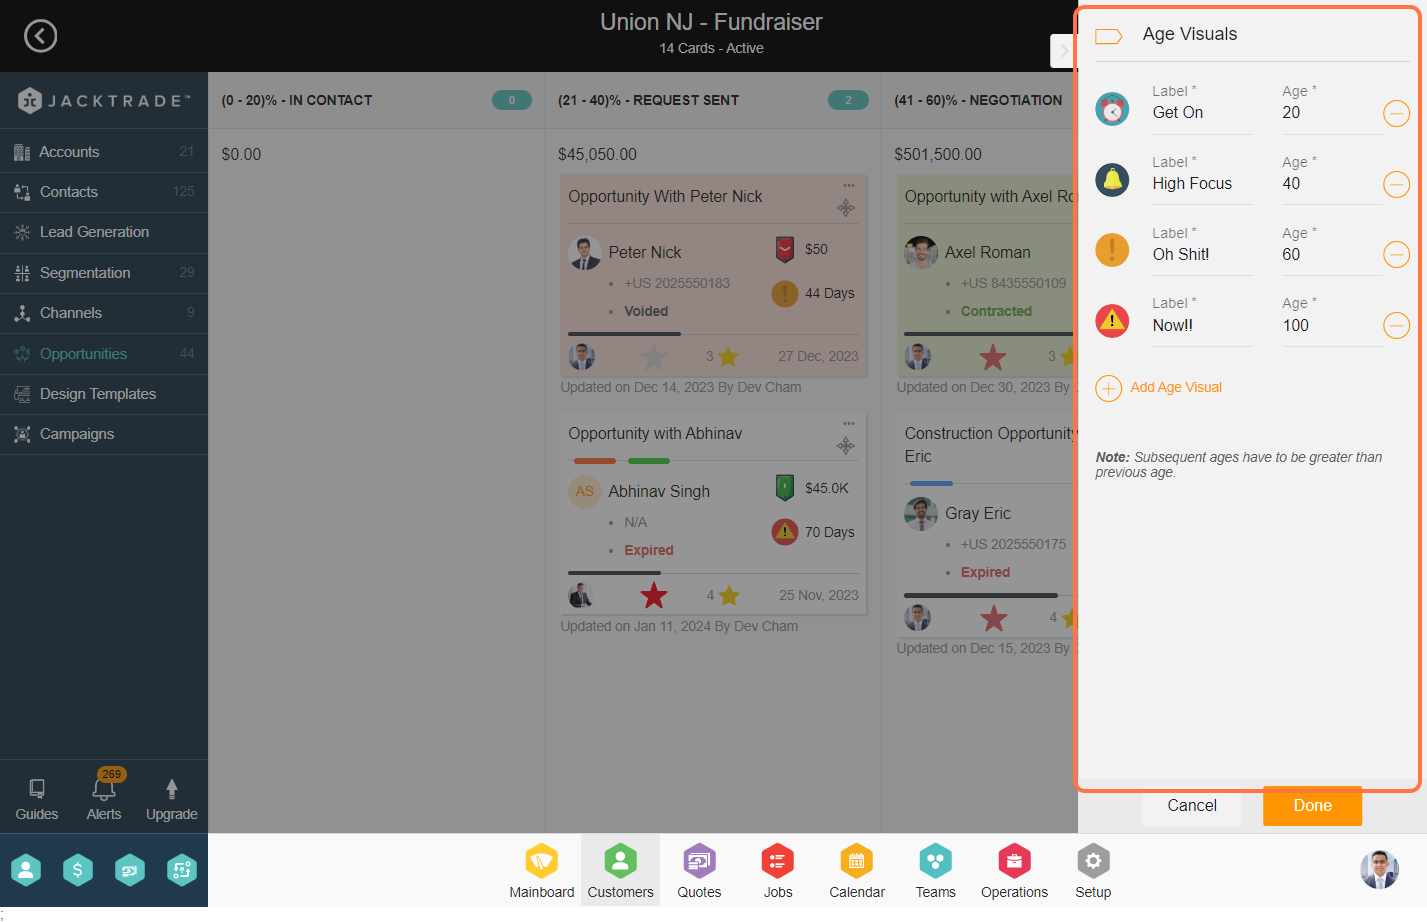
- 5. Scroll to the bottom, where you’ll find the “Manage Visuals” section. Click on “Manage Age Visuals” from there.
- 6. Visuals provide an easy way of identifying things on the opportunity cards. Initially, age visuals are provided by default. To add a new one, simply click on ‘Add Age Visual’.
- 7. Enter the age visual label and the corresponding age.
- 8. To modify the visual label image, click on the emoji, choose one from the assortment of emojis, and then click on ‘Done’.
- 9. Click on the options menu(3 dots), and then from the manage visuals section click on ‘Manage Amount Visuals’.
- 10. Initially, age visuals are provided by default. To add a new one, simply click on ‘Add Age Visual’.
- 11. Enter the label and corresponding amount for the amount visual and then click on ‘Done’. To change the image of the label, follow the same process as the age visual.
- 12. Click on the options menu(3 dots), and then from the other options section click on ‘Manage Labels’.
- 13. Labels can be set by the businesses per opportunity board. Labels help businesses uniquely tag the opportunities for visual differentiation. By default, seven labels are provided by the system.
- 14. To create a new label, enter the label name, select the color, and then click on the checkmark icon next to the label name.
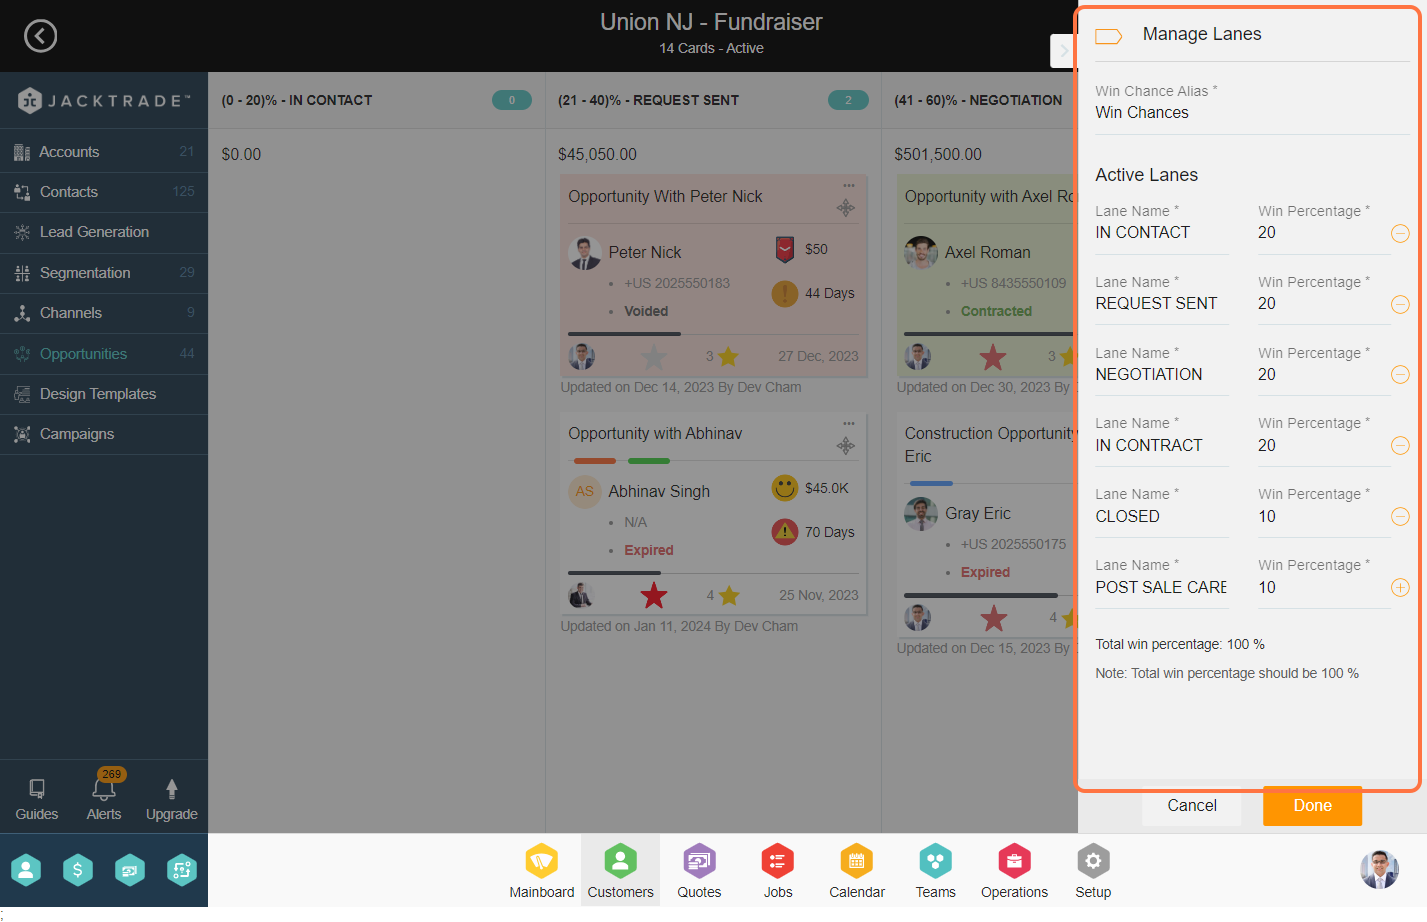
- 15. Click on the options menu(3 dots), and then from the other options section click on ‘Manage Lanes’.
- 16. Swim lanes for the opportunity cards can be configured from the ‘Manage Lanes’.
- 17. Click on the options menu(3 dots), and then from the other options section click on ‘Setup Priority’.
- 18. Priorities help the teams to tackle the opportunities, By default, six priorities are set per board. You can create a new priority by clicking on ‘Add New Priority’.
- 19. Enter the priority name and change the emoticons for visual differentiation.
- 20. Click on the ‘Alias’ Tab to configure the productivity quadrant setup. The new Badge setup helps the business users to identify newly created opportunities on the board. Upon completion of the configuration, click on ‘Done’.
Steps for configuring the sales pipeline.
1. Go to the Customers module.


3. Select the board you wish to configure the pipeline.


5. Scroll to the bottom, where you’ll find the “Manage Visuals” section. Click on “Manage Age Visuals” from there.
6. Visuals provide an easy way of identifying things on the opportunity cards. Initially, age visuals are provided by default. To add a new one, simply click on ‘Add Age Visual’.
Note: Subsequent ages have to be greater than the previous age.

7. Enter the age visual label and the corresponding age.

8. To modify the visual label image, click on the emoji, choose one from the assortment of emojis, and then click on ‘Done’.


10. Initially, age visuals are provided by default. To add a new one, simply click on ‘Add Age Visual’.
Note: Subsequent amounts have to be greater than the previous amount.


11. Enter the label and corresponding amount for the amount visual and then click on ‘Done’. To change the image of the label, follow the same process as the age visual.


13. Labels can be set by the businesses per opportunity board. Labels help businesses uniquely tag the opportunities for visual differentiation. By default, seven labels are provided by the system.

14. To create a new label, enter the label name, select the color, and then click on the checkmark icon next to the label name.


16. Swim lanes for the opportunity cards can be configured from the ‘Manage Lanes’.
Note: Total win percentage should be 100% among the lanes.

18. Priorities help the teams to tackle the opportunities, By default, six priorities are set per board. You can create a new priority by clicking on ‘Add New Priority’.


19. Enter the priority name and change the emoticons for visual differentiation.

20. Click on the ‘Alias’ Tab to configure the productivity quadrant setup. The new Badge setup helps the business users to identify newly created opportunities on the board. Upon completion of the configuration, click on ‘Done’.

