Guidelines to fulfill and return the products: A step-by-step guide.
Fulfillment of inventory refers to the comprehensive process of managing, organizing, and delivering products within a business's supply chain. The fulfillment process typically includes inventory storage, order processing, picking, and packing items, and finally, shipping them to the designated destination. Efficient fulfillment of inventory is crucial for businesses to meet customer demands, minimize delays, and maintain optimal stock levels. Additionally, modern fulfillment processes often integrate technology and automation to enhance accuracy, speed, and overall efficiency in managing inventory.
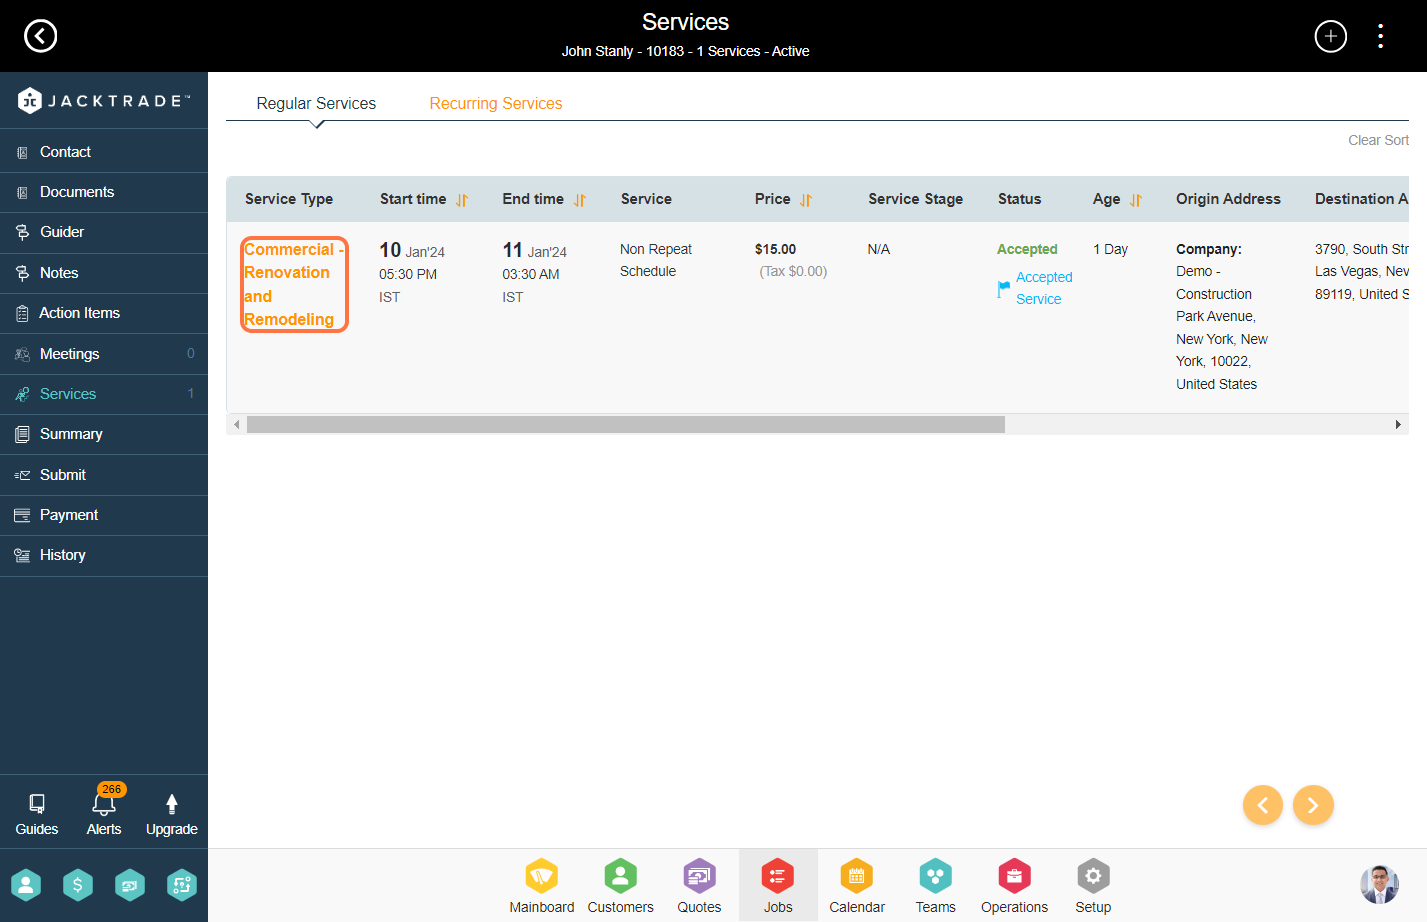
1. After your quote is converted into a job, click on the services.
Note: Products and materials can be fulfilled only in Jobs. Learn more about 'How To Convert Quote to Job'.

2. Select any service from which you would like to fulfill the inventory.

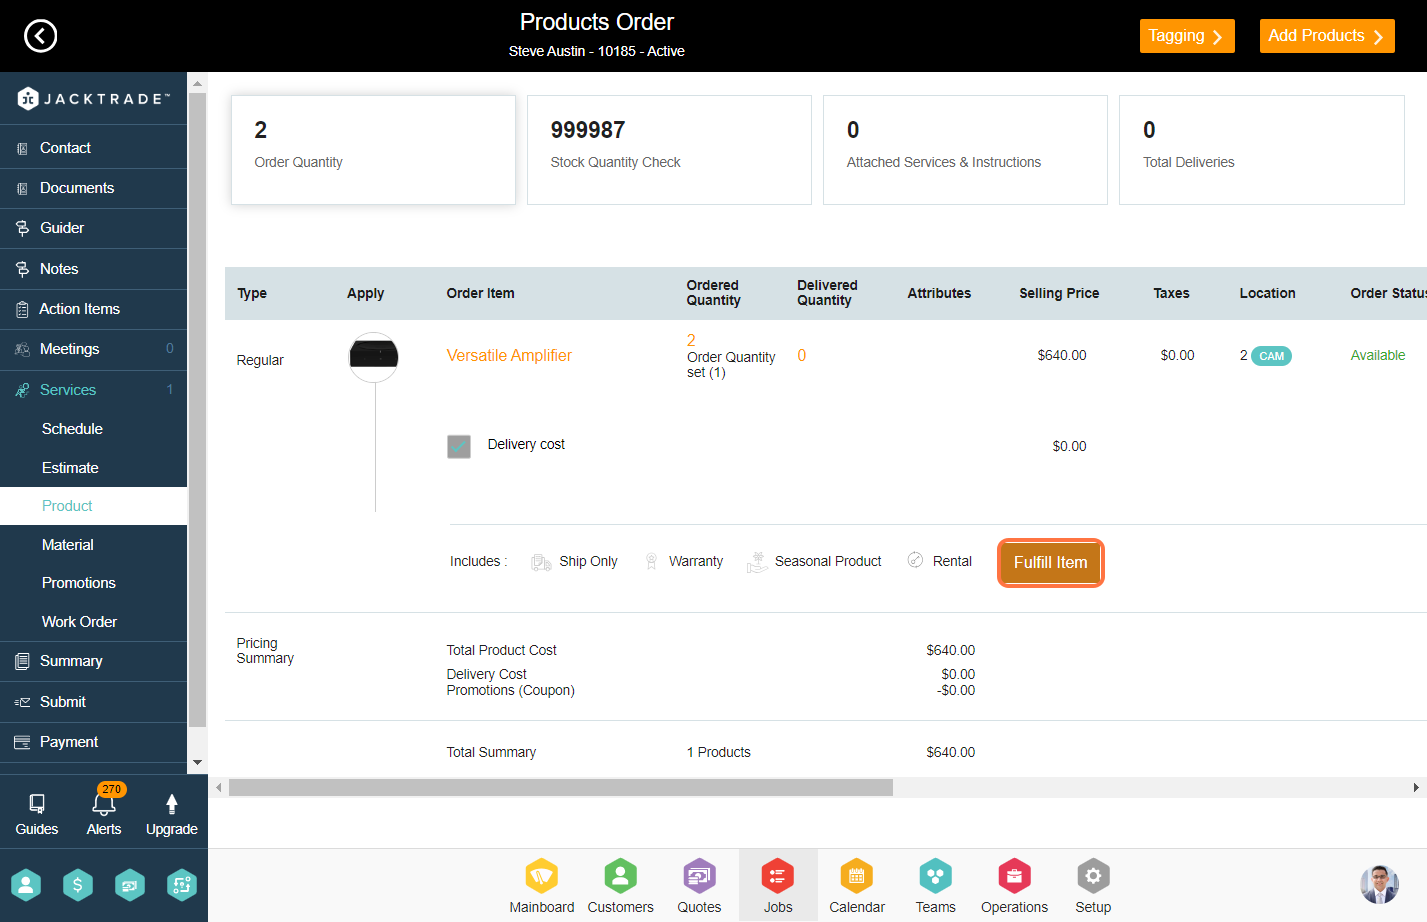
4. You land on the 'Product Order' page which shows you all the products added to the service. Here you can start fulfilling the products.
Click on the 'Fulfill Item' CTA corresponding to the product you wish to fulfill.
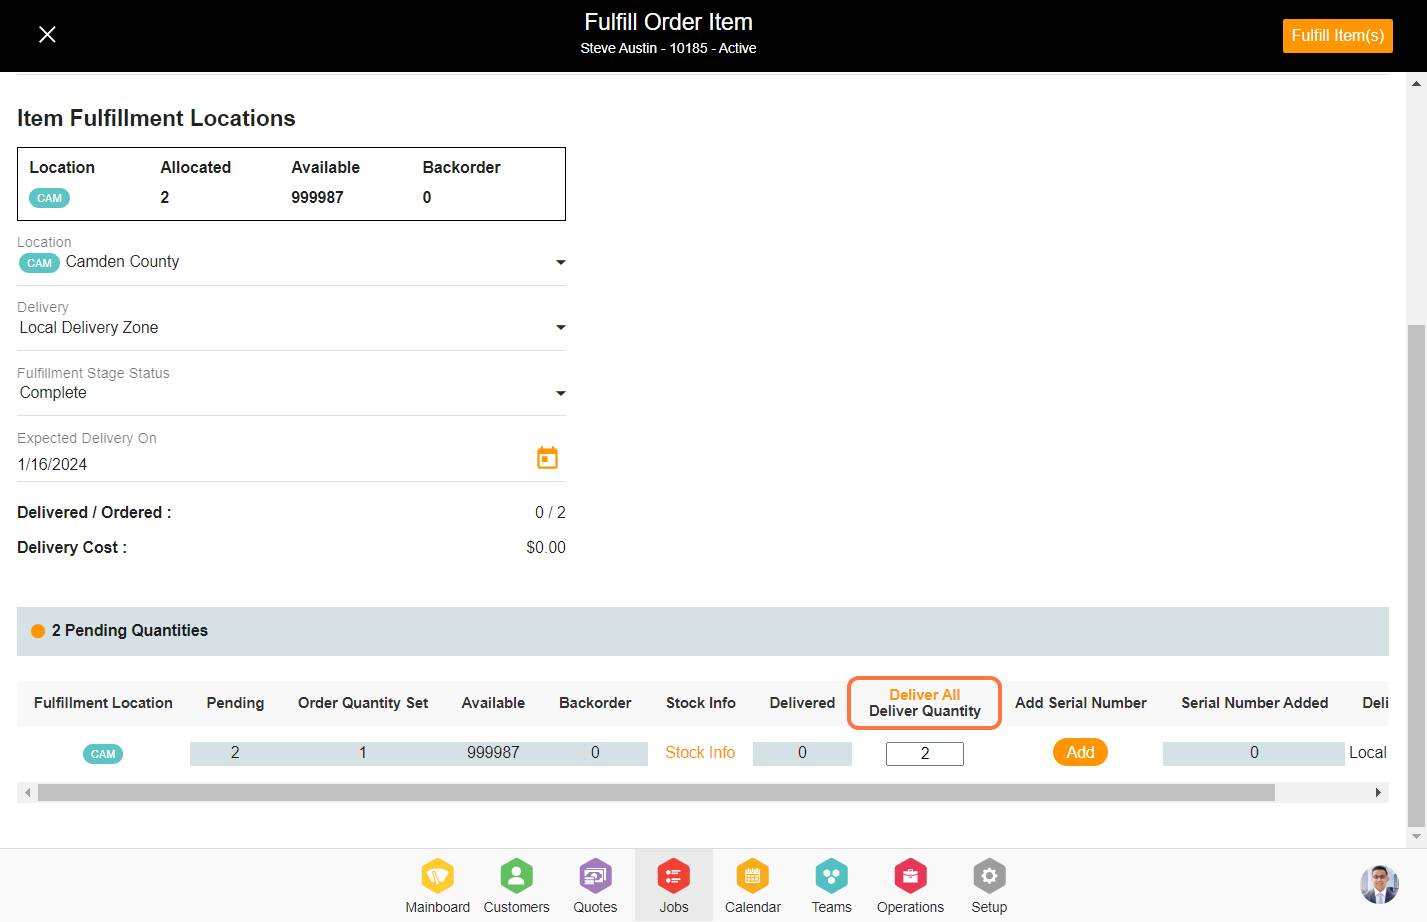
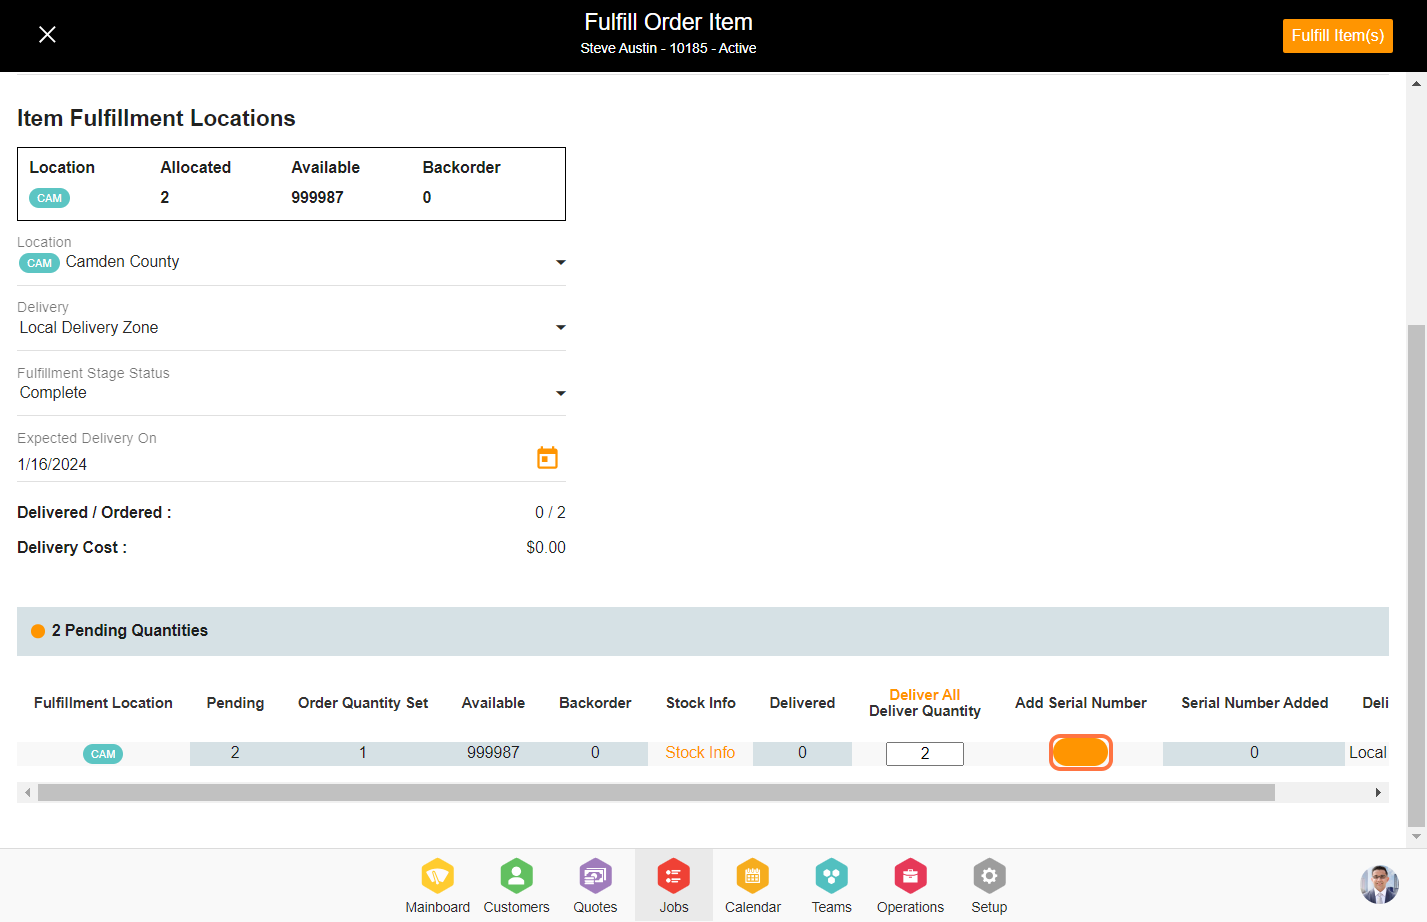
5. Select the 'Delivery type', 'Fulfillment stage status', and 'Expected delivery date'. Then, at the bottom, enter the quantity to be delivered.
Deliver Type - the mode through which you wish to fulfill the product. (Learn how to set up delivery types).
Fulfillment Stage Status - Stage in which the product is under fulfillment. This data set is configurable in the 'Data Sets'. (Learn how to set up fulfillment stage status).
Expected Delivery Date - The date on which you are fulfilling the product.
Note: If you wish to deliver all the required quantities, you can click on the 'Deliver All' link and it will populate the required quantity in the quantity input box.
6. Click on 'Add Serial Number' to insert the serial number to fulfill the product. Please note that the 'Add Serial Number' option will show up only when you are fulfilling a product with a serial policy attached to it.
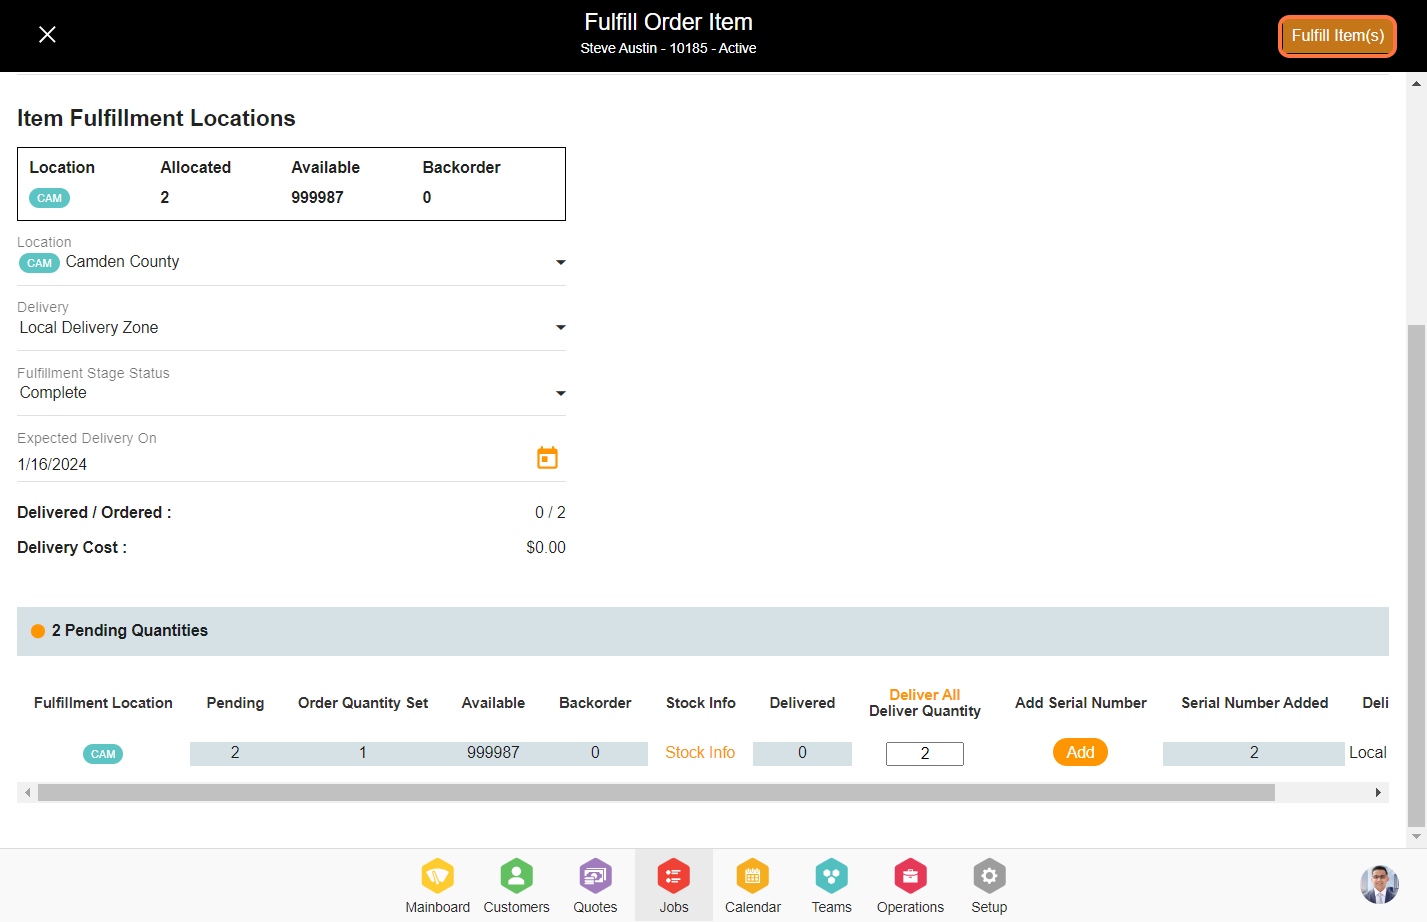
7. Select the serial numbers and click on done.
Note: Serial numbers can be incorporated by associating the serial policy for the specific product and subsequently inputting the serial number into the uncommitted serial tab within the product's SKU.

8. Click on 'Fulfill Items' at the top to complete the fulfillment of the products.
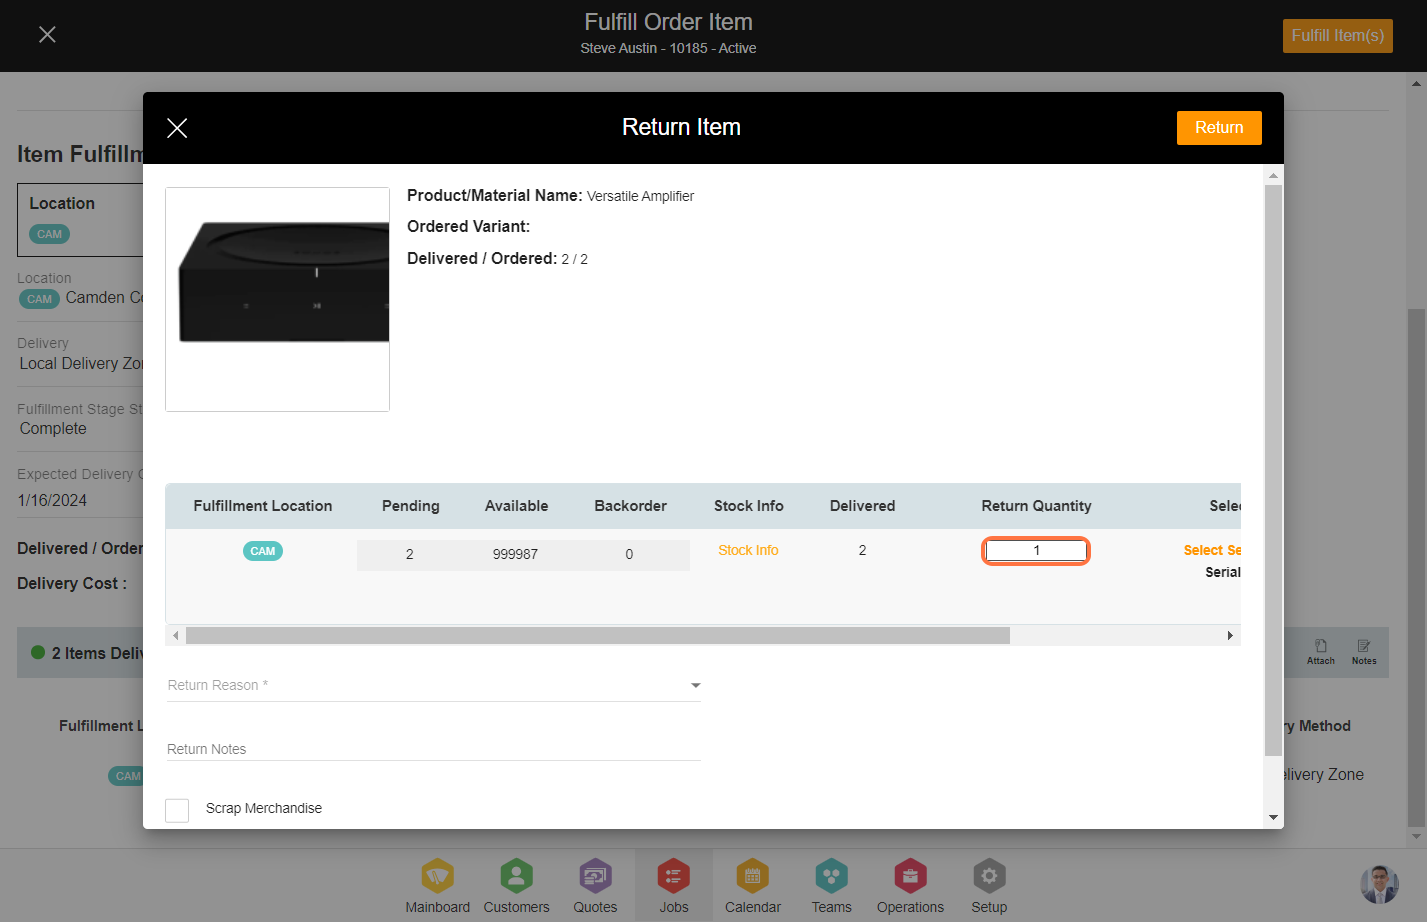
9. After your products are fulfilled, you will see a return option. Click on 'Return' to initiate the return process for the products.
a. If you wish to cancel the Quote, Job, or Service then it is mandatory to return all the fulfilled products.
b. If there are products that are defective or returned by the customer, in that case as well you can use the return functionality.

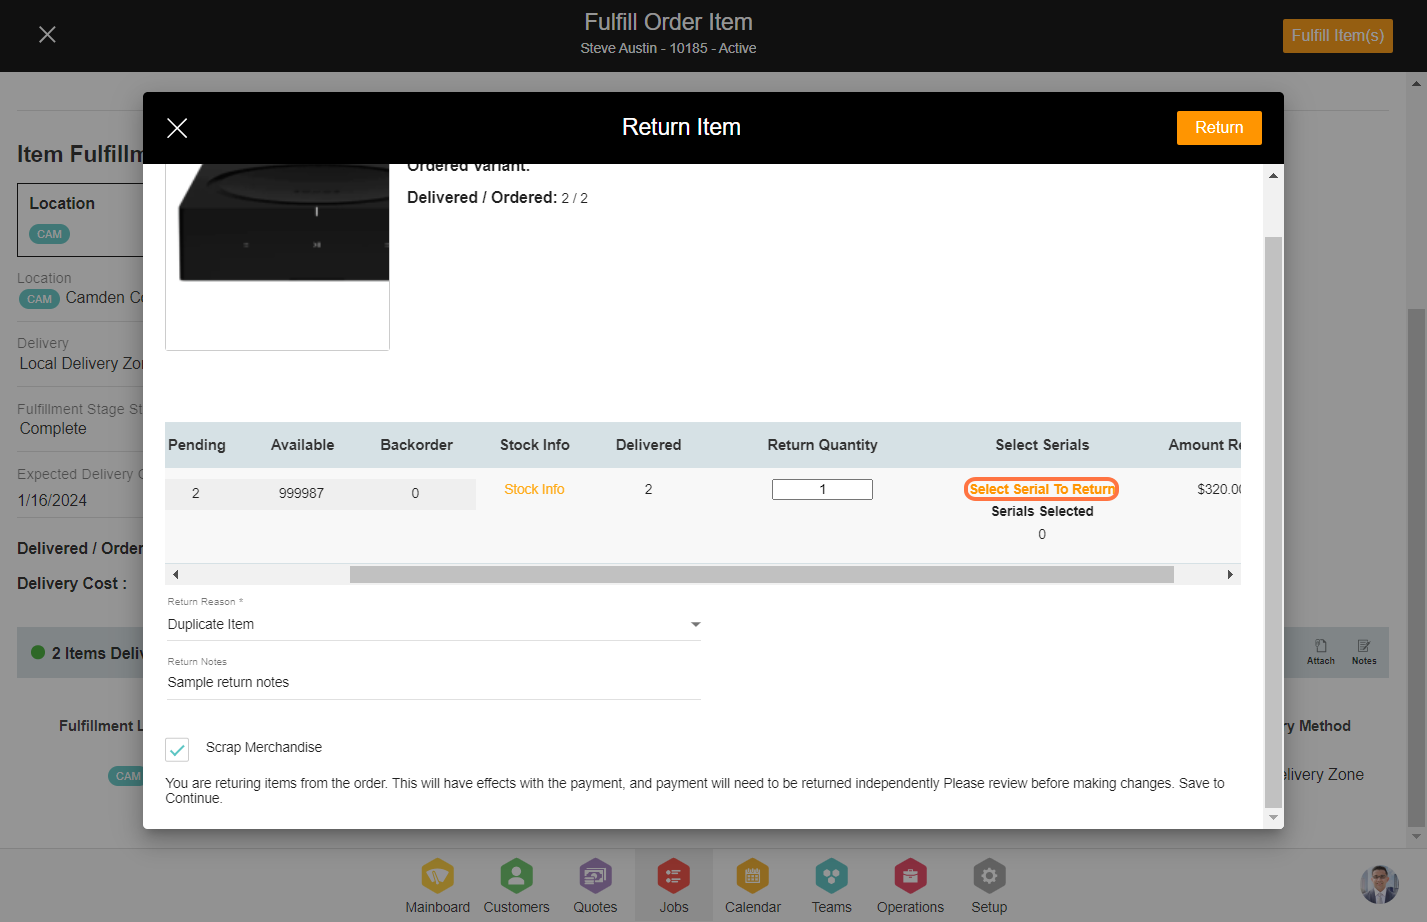
10. Add the quantity that needs to be returned.
11. After clicking on the 'Return Reason' dropdown, you will find multiple reasons to choose from and select one from it
Note: Learn 'How to configure return reasons in data sets'.
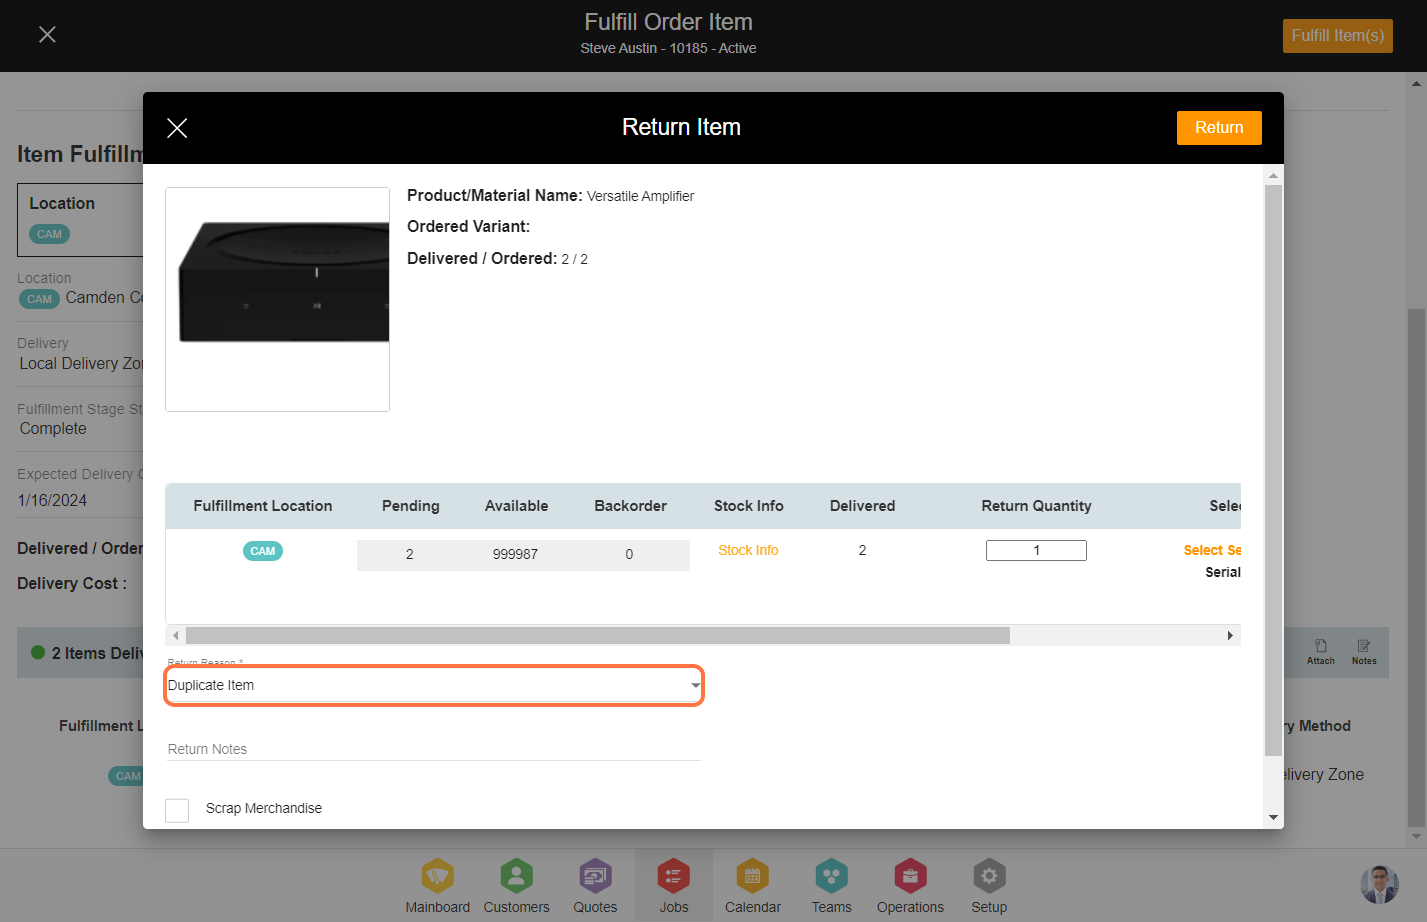
12. If necessary, provide optional return notes.

13. Scrap Merchandise implies that the item is removed from inventory without being returned to the inventory stock.

14. Click on 'Select Serial to Return' to include the serials for the return.
15. Select the serials you wish to return and click on the 'Done' CTA at the bottom.
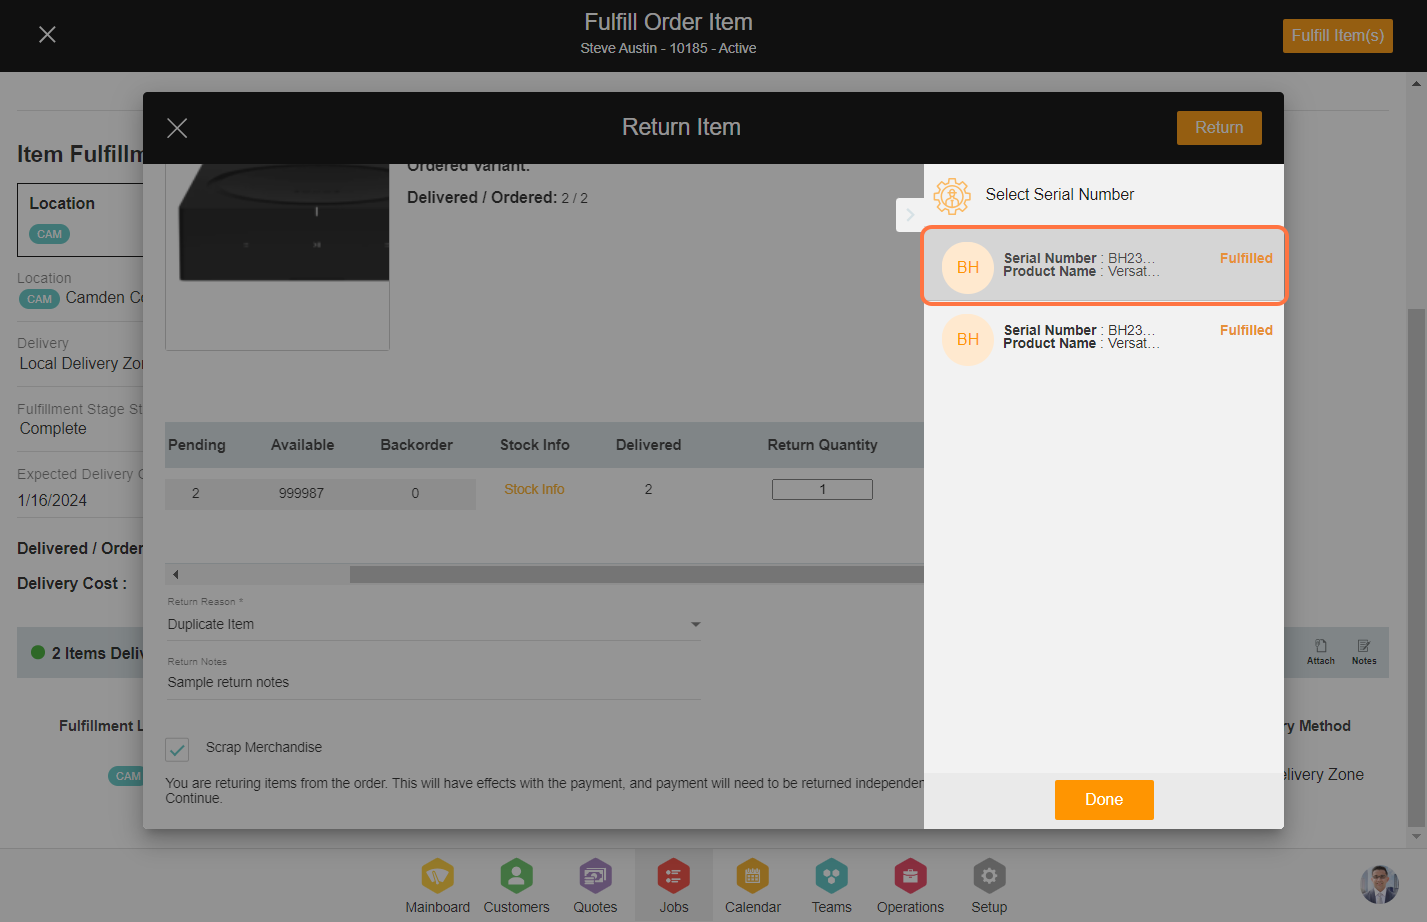
16. Click 'Return' to return the products to inventory.
