
Guidelines for Establishing a Conversations Channel: A step by step guide
Segmented conversation channels refer to a communication approach where discussions and communications are organized into different segments of contacts based on different criteria. Contacts can be segmented in Jacktrade based on different criteria and then channels can be created for these segments where all the communication targeted to the contacts belonging to a particular segment can be tracked in a single view.
This organizational structure provides several advantages. Firstly, it helps in reducing information overload by ensuring that participants only receive updates and notifications related to their areas of interest. Secondly, it promotes clarity and facilitates better communication, as individuals can quickly locate and contribute to discussions relevant to their needs.
Let's see how to set up segmented channels in Jacktrade.
Creating A Segmented Channel
You can create a new channel by simply picking an unused segment that is already created. Some use cases that are considered here are:
- Only a single channel can exist per segment created. If you want additional channels, you will need to create a new segment in the Segmentation module.
- Channels can be created for any Segmentation regardless of their status like active, inactive, expired, etc. Note that only active segmentations produce customer lists - others do not pass any segmentation criteria. So, your channel will be not active if your segment is not producing any customers which could be possible even if your segmentation is active but no criteria match your customer data.
When creating a new channel all segmentation profiles are shown and you can pick the ones that are not added already.
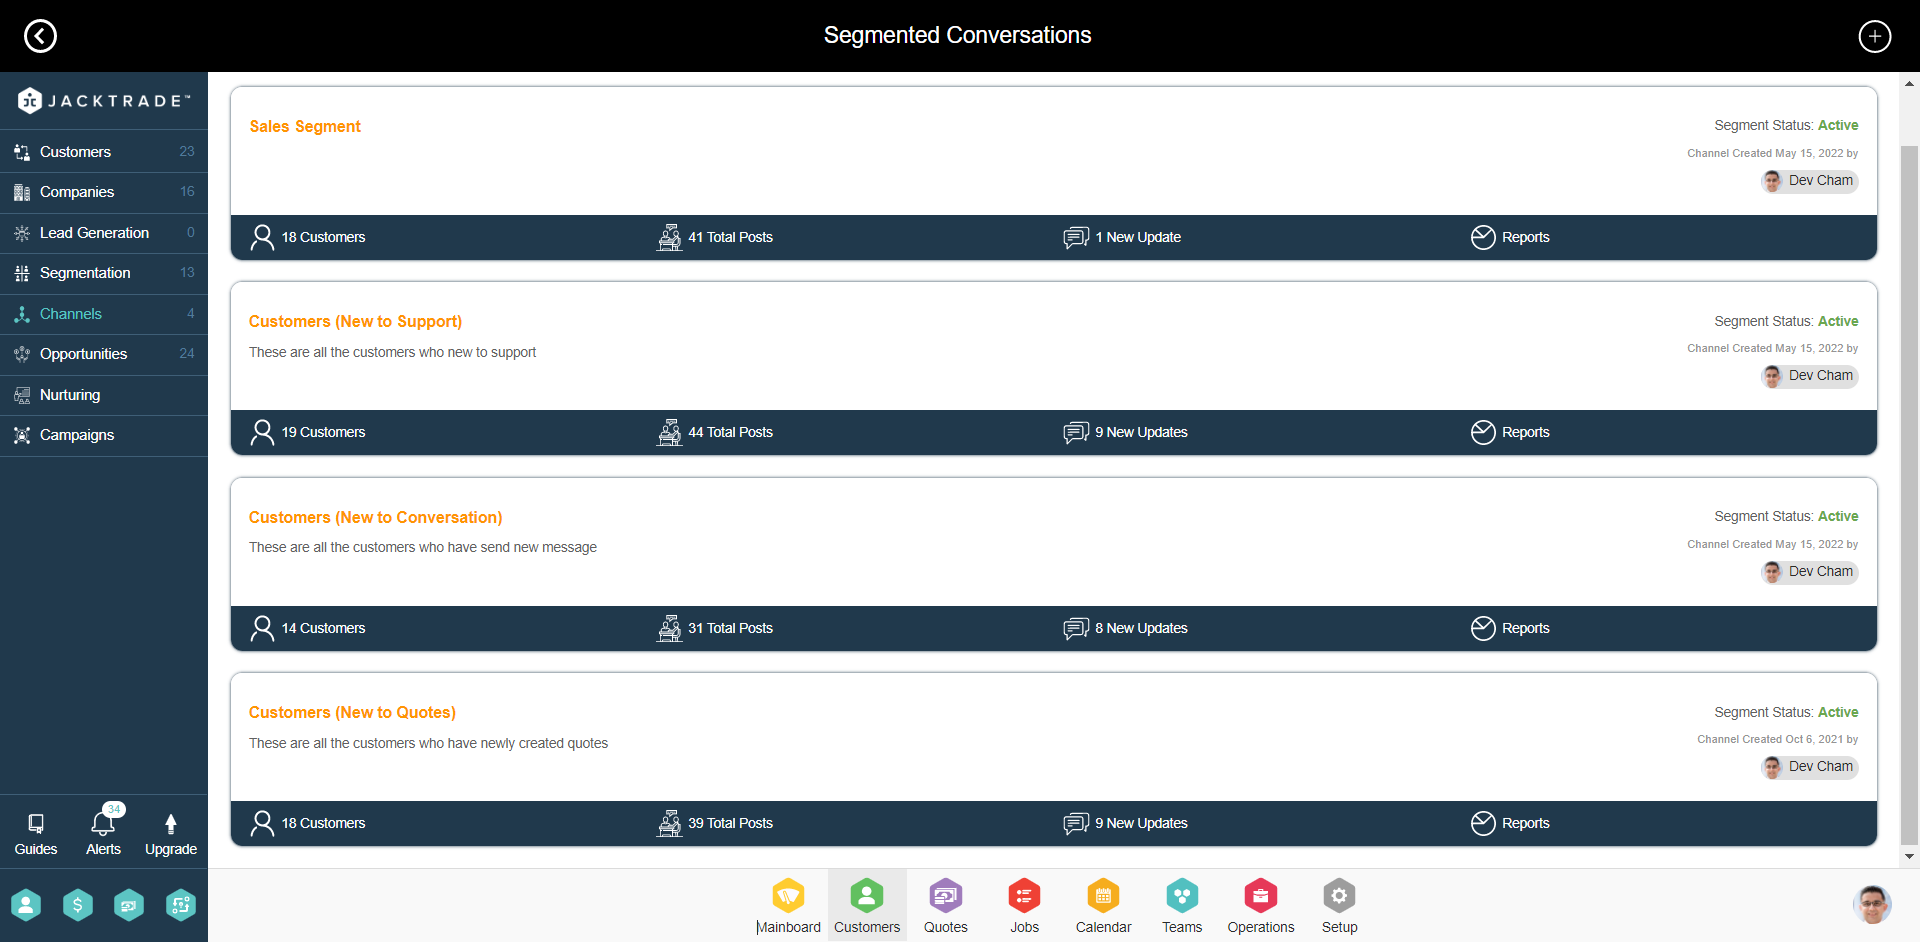
Channels inherit all the values created in the segment itself. Segmented conversations show a list of all the added channels with the following data:
- Segment Name
- Segment Description
- List of Customers identified in the segmentation
- Number of Customers In the Segment
- Segmentation Status
Another relevant data corresponding to the channel is ‘Created date and created by information.
Note: Removing a channel does not remove the customer conversations.
Listing Segmented Channels
All created channels are shown to the user. By default, channels are open to every user. Channels will be locked to specific users in the future where only allowed users will be able to see and enter the channel.
The list provides a simple filter as follows:
- Created date - The list is sorted by when the channel was created.
- Recently posted - The Channel keeps information on a post that is most recently added. This is based on the updated date of the most recent ‘master post’. Each channel considers only one most recently updated master post - it does not consider multiple updates or the accumulation of collective updates.
- Segment name - The list can be sorted by segment name alphabetically from A to Z, and then consider numeric alphabets and so forth.
Customer List In The Channel
Customers that belong to that segment are pulled into that customer segment. The list is the same as the customer list with table settings - this is an independent list with pagination support. The list provides the number of customers in the list.
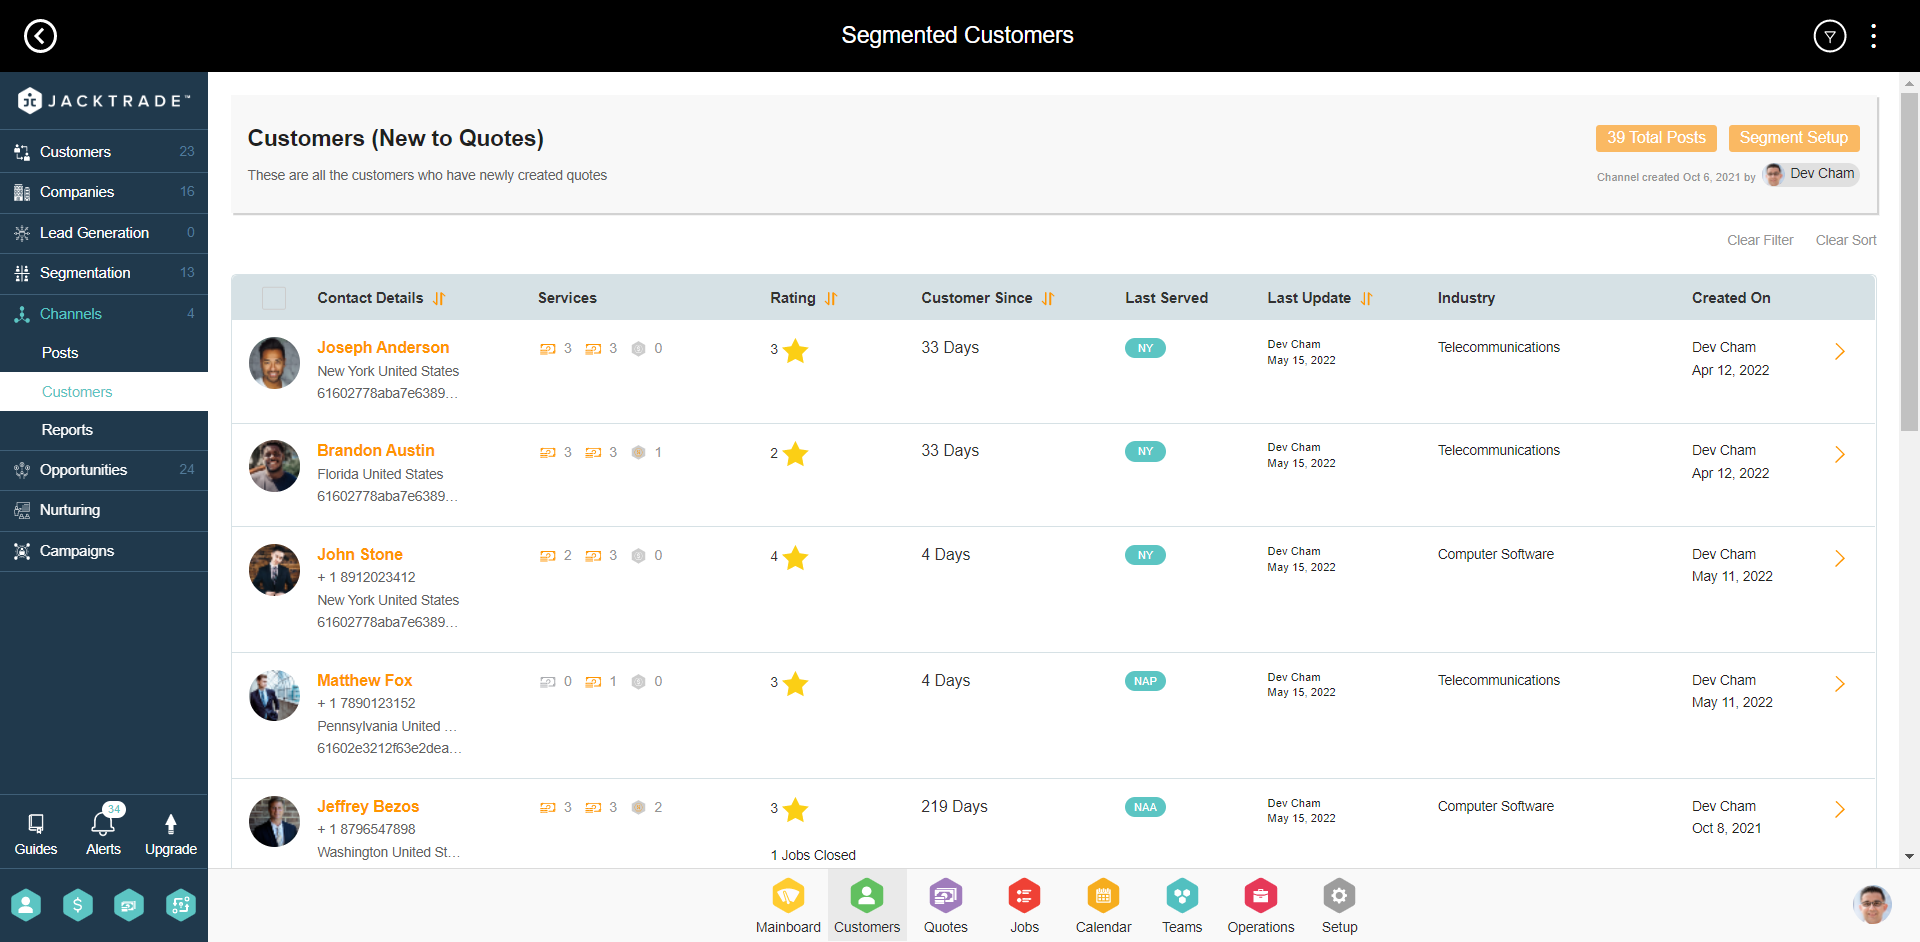
Reference: Channels → Go Inside the Channel → Customers
Filters Inside The Channel
Users can use Temporary-Permanent filters to filter conversations in the channel with the following criteria:
- Post Types
- Date Criteria - Note - ‘To date’ can not be behind the ‘From date.
- Updated Date - For master post only, Note - master post is updated based on replies to that post.
- Created Date - For master post only
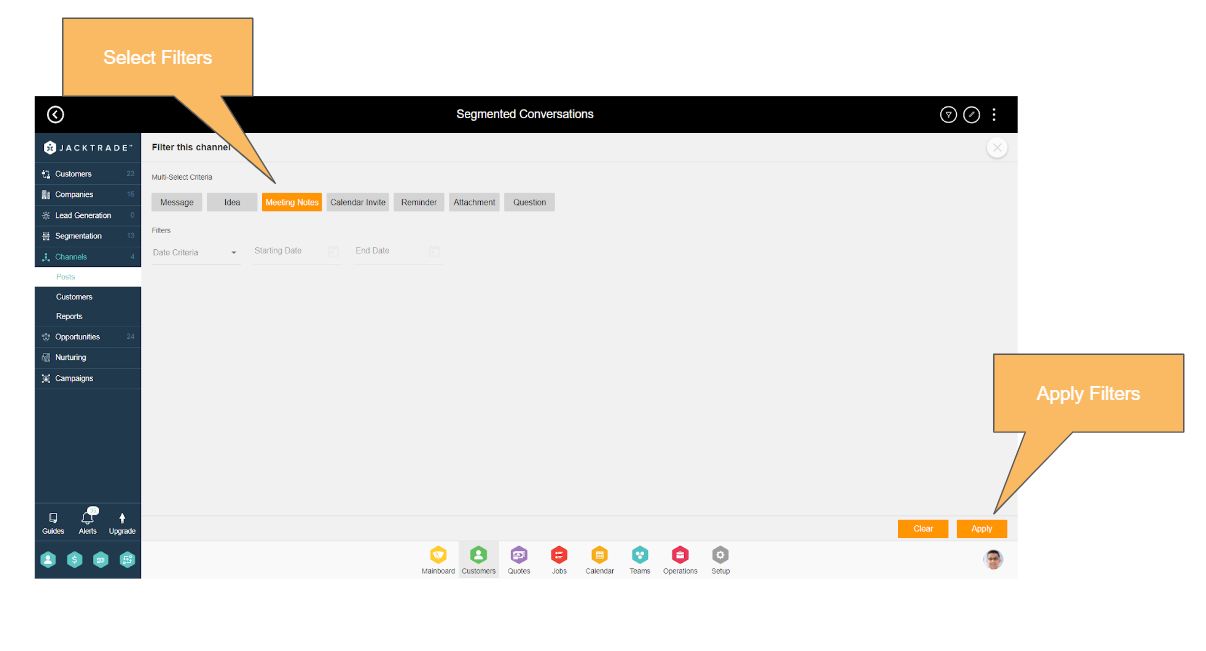
Reference: Channels → Go Inside the Channel → Choose the Filter Option from the top
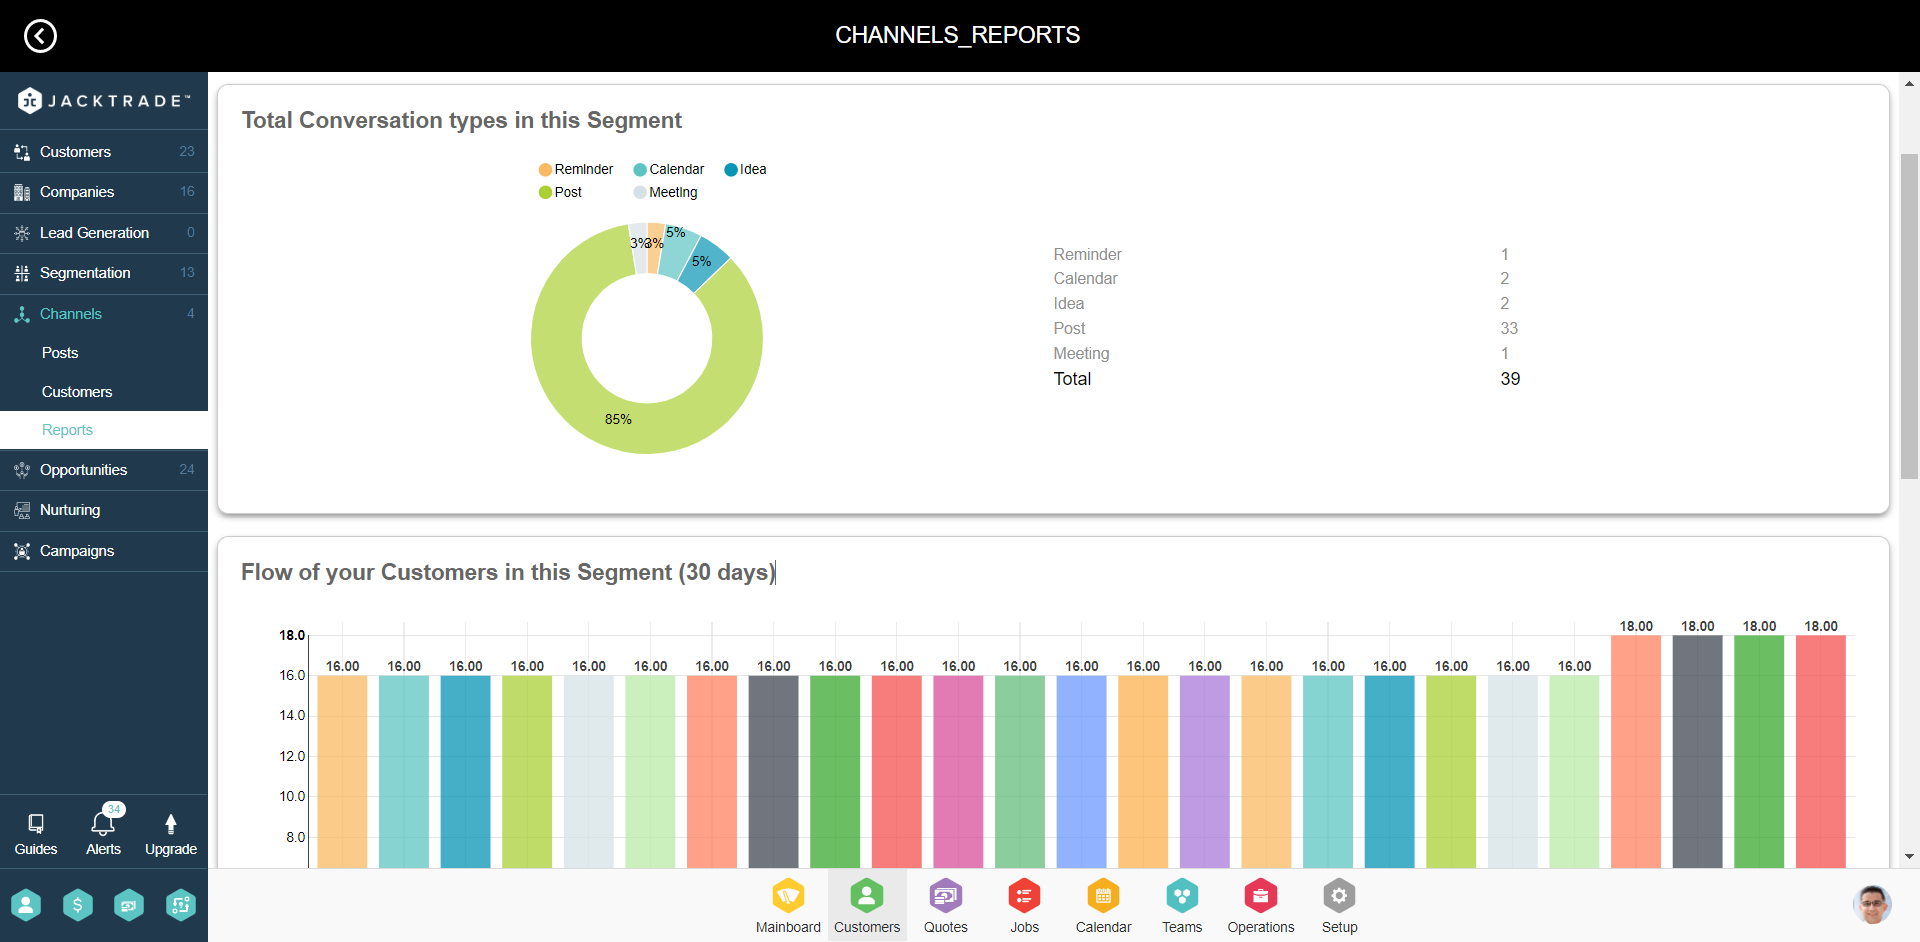
Reports Per Conversation Channel
Three types of reports are presented to the user. It may be possible that the reports are not fully updated in real-time (engineering debate).
- Total Conversation types in this Segment - Presents distribution of post types in the specific channel for all the associated customers.
- Customers Count In This Channel - Flow of your Customers in this Segment - The number of customers that were in the segment every day. Users can identify how many users are going in and out every day.
- Posts Count In This Channel - Flow of your Posts in this Segment - The number of posts that were added (new master or reply posts) that were added to all the associated customers in the segment.
Viewing And Replying To Conversation Posts
Users can enter each channel and view conversational posts. Features included here are:
- Time Lapse for navigation to specific posts based on time helps users navigate to a post based on the time lapsed for the post. The same feature as in customer conversations.
- Expanding Replies On Demand - Each post is initially loaded without any expanded replies. Expansion happens and comments are loaded upon each expansion. Expansion remains open as long as the user is on the screen (debate - can we keep them open for the session? - difficult)
- Pagination in the conversation - load the initial 10 posts, then subsequent posts are loaded.
- Quick Navigation - Quick navigation is the same as the customer profile which is specific to the customer. The customer name and profile are visually represented for a clear understanding of who this post belongs.
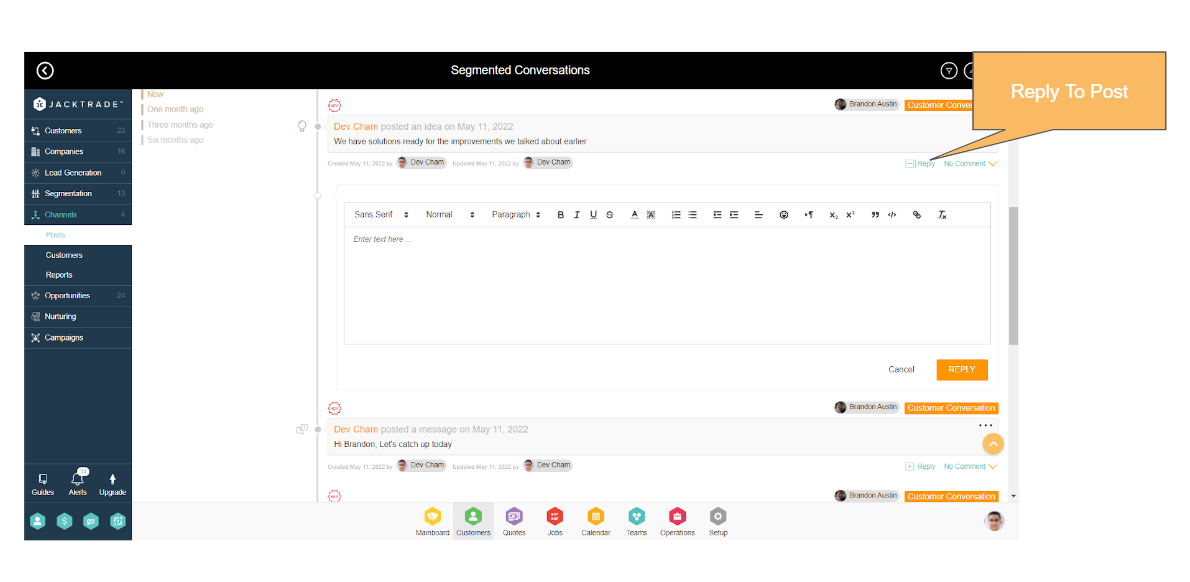
- Updating or Replying To Posts - Users can reply to posts in the channel itself. Post updates and replies are also reflected in the customer conversations as well. Conversations always belong to the customer profile.
- Replies are not forwarded/sent to anyone.
- Replies can be edited and deleted by anyone.
Steps to create a conversational channel
1. Go to the Customers Module.


3. Click the 'Add' icon on the top right to add a conversation channel.

4. Select any segment that you wish to create a channel for and click on 'Create'. A prerequisite for creating a channel is to have a segment created. One channel can be set per segment.

Please note that, after the creation of a channel, data may take a couple of hours to reflect the data. So please check back again sometime if you don't see the data immediately.

6. On the channels, you can see different options to view various details about these channels. Let's explore each of these options -
TOTAL POSTS - Click on the 'Total Posts' option on the channel to view all the posts and conversations under this channel.

7. You can view contact conversations that are in the channel segment here.

8. CUSTOMERS - Click on customers to view the list of contacts that are part of this segment associated with this channel.

9. REPORTS - Click 0n reports to view the channel reports.

10. NEW UPDATES - Any new posts added to this channel within the last 5 days will show up under 'New Updates'. This is a quick view to see the recently added posts only.

