Setup Regular Products
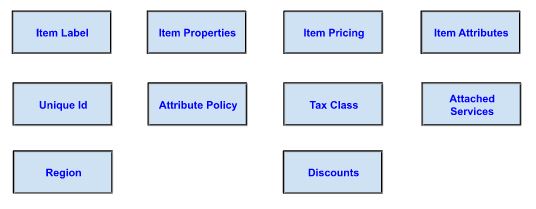
The following details are considered when creating a product or material
- Product labels (Name, id, region).
- SKU properties (attributes).
- Pricing
- Additional Services
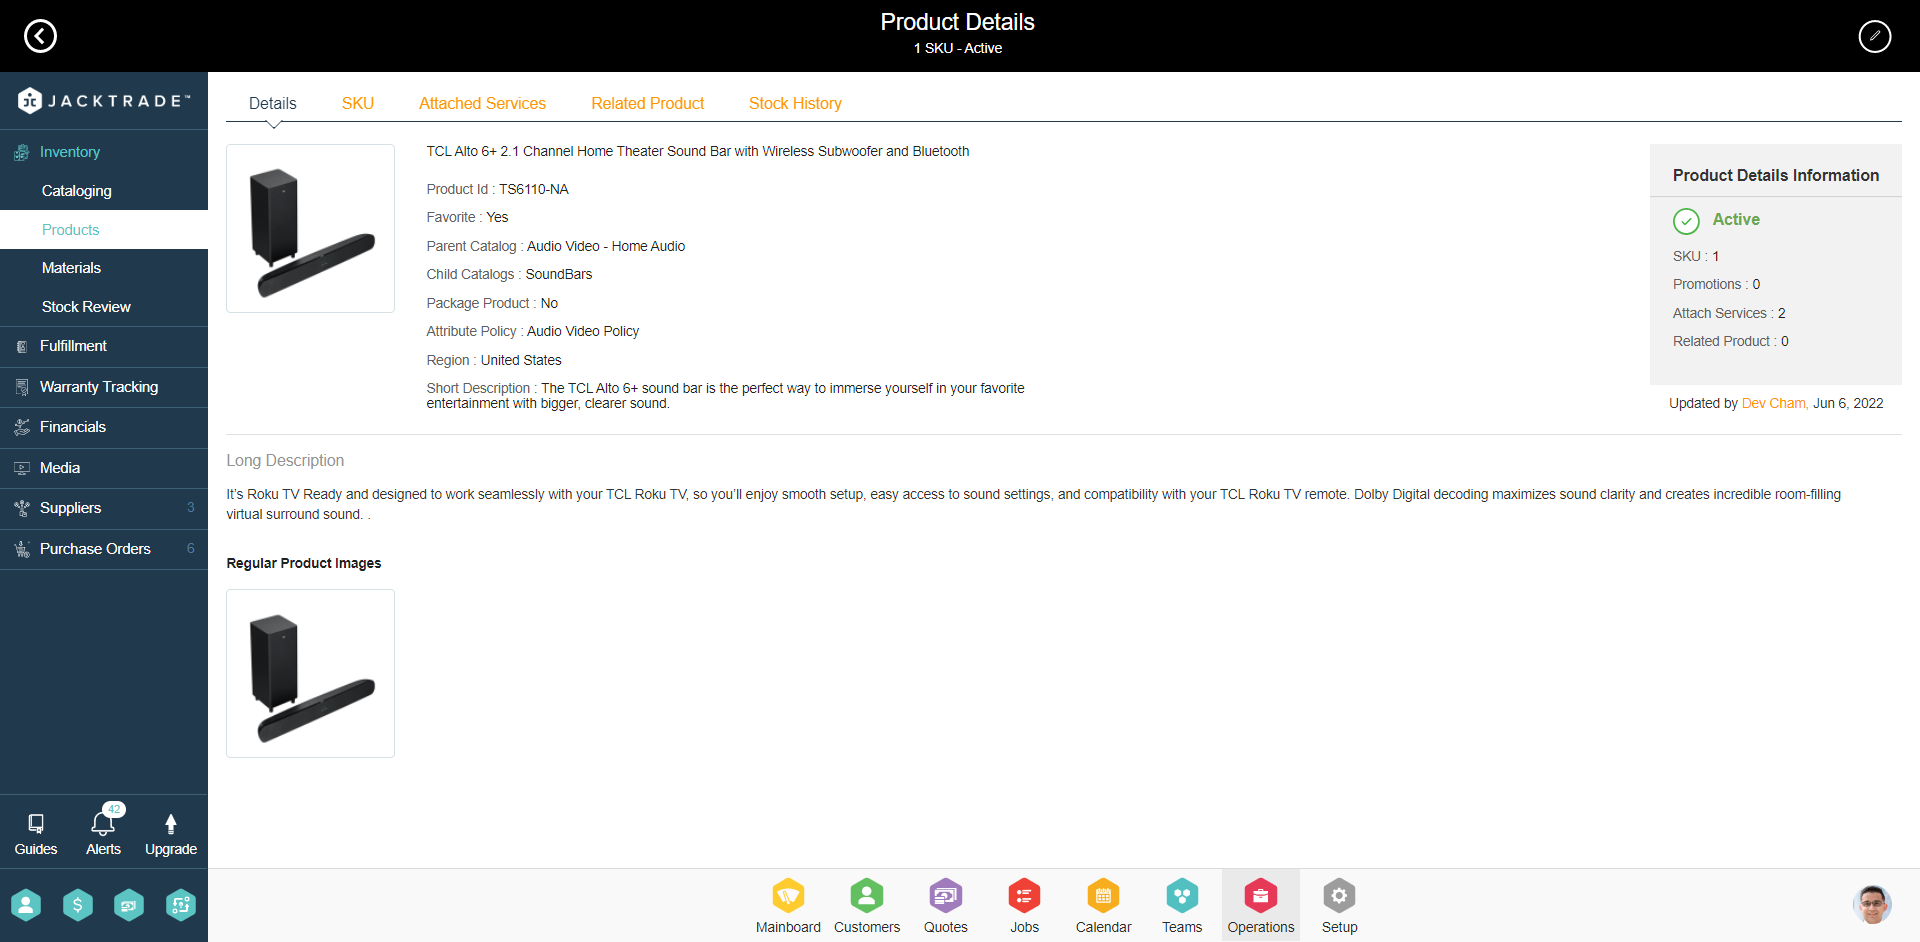
Product Information
Product information is used mostly for good presentation and to identify the right product through menu navigation or clickable filters. Here are some fundamental fields required to fill up product information.
- SKU - SKU is mapped to a unique item.
- Product ID - Product ID maps to multiple items with unique SKUs. (Example: T-Shirt type X has large, or X-large sizes, and the stock has 15 quantities each for it).
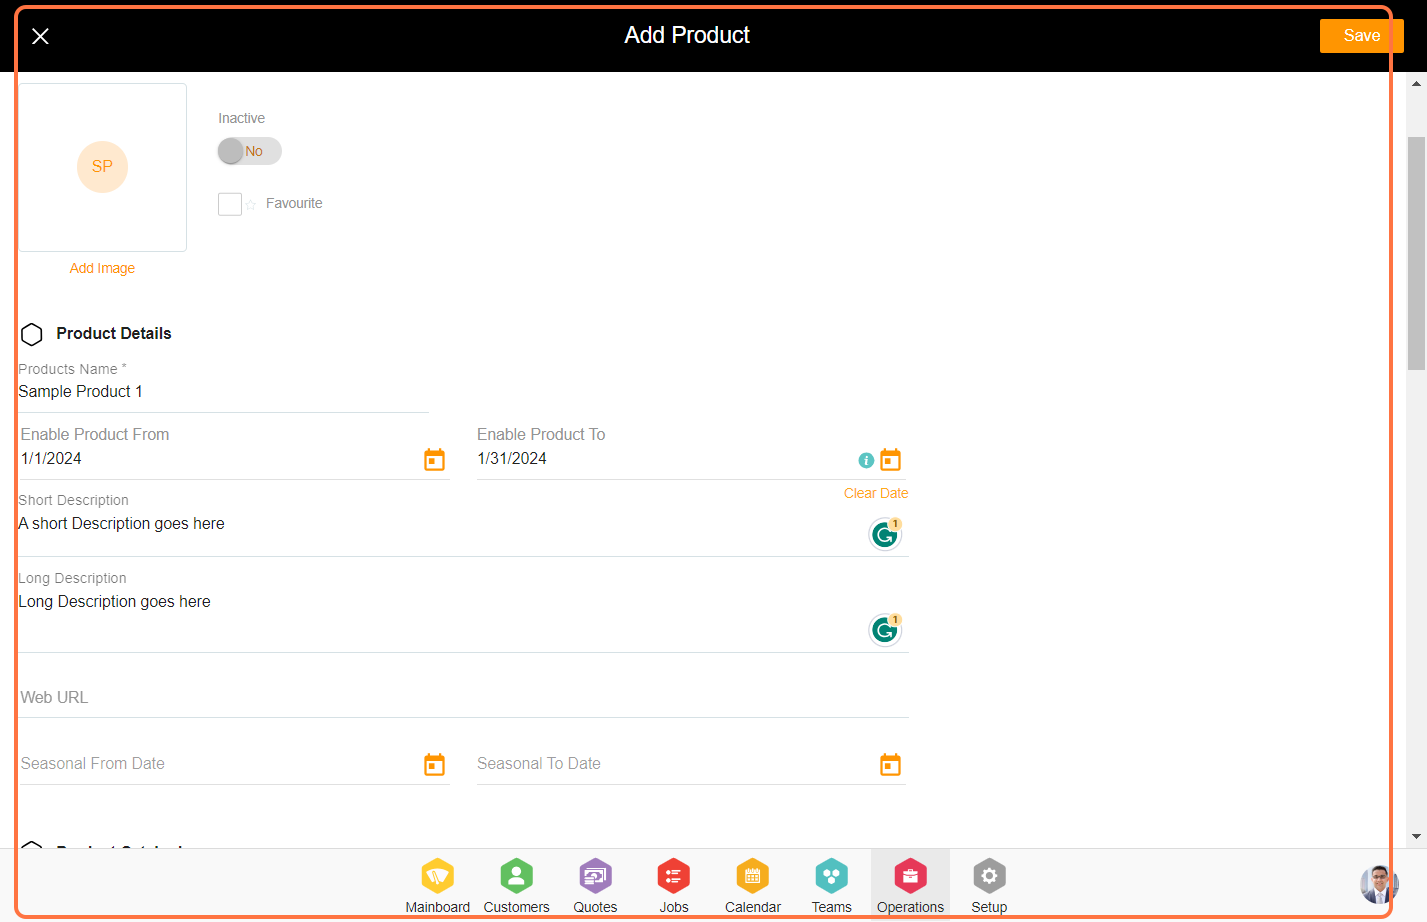
- Product Name (short) - appears as a small title.
- Short Description (long) - quick short description of the product.
- Long Description - Detailed description of the product that could be a paragraph or more.
- Parent Catalog - Defined by the user. The catalogs list is defined separately. Instead of a pull-down menu, it has comma-separated values that turn into a chip when the value matches the suggestions that show the available catalogs. A single product can appear in multiple categories.
- Child Catalogs - Products can reside under the parent catalogs directly or under the child catalogs. Child catalogs are defined under the parent catalog in the 2-level hierarchy.
- Product Image(s) - Image of the product. See the image requirements in this document for further info.
- Visible from and till - Visibility date (from the date and till date). If you don't want to restrict the product for a particular period then you can leave this field blank.
- Web URL - URL if any for the product
Product Images
Product image is supported both in the product setup and item setup.
- The product's Main Image is used for the product thumbnail image in the Catalog and the main landing image in product details. Up to 3 images can be assigned to the product directly.
- Item Images are attached to the SKU. Up to 3 images can be assigned to each individual item directly.
Item Pricing
When the product has the same price regardless of the product properties. For example, T-shirt sizes Small, Medium, and Large are all the same price. Each product with attributes is individually priced.
When the product has different prices of the product properties. For example, Food tray sizes of Small, Medium, and Large are different prices. Each product with attributes is individually priced under the same product ID.
Item pricing defines both the base price of the product and what is showcased.
- Retail Price - Retail price of the product.
- Sale Price - Visible price that the product is offered to customers. If not present, then only the Retail Price is shown. The sale price can not be higher than the retail price.
- MSRP - The manufacturer suggested the retail price of the item.MSRP can be of any price regardless of Retail or Sale Price.
- Unit Price - Manufacturer price per item when received from the vendor.
- Min Price - Minimum price that the product could be sold at, This value supersedes any discount value lowering this amount. For example - If the product is 1000 rs. and the promotion is 50% off, with the Min price set at 600, the cost will not be lowered to 600 for the product item.
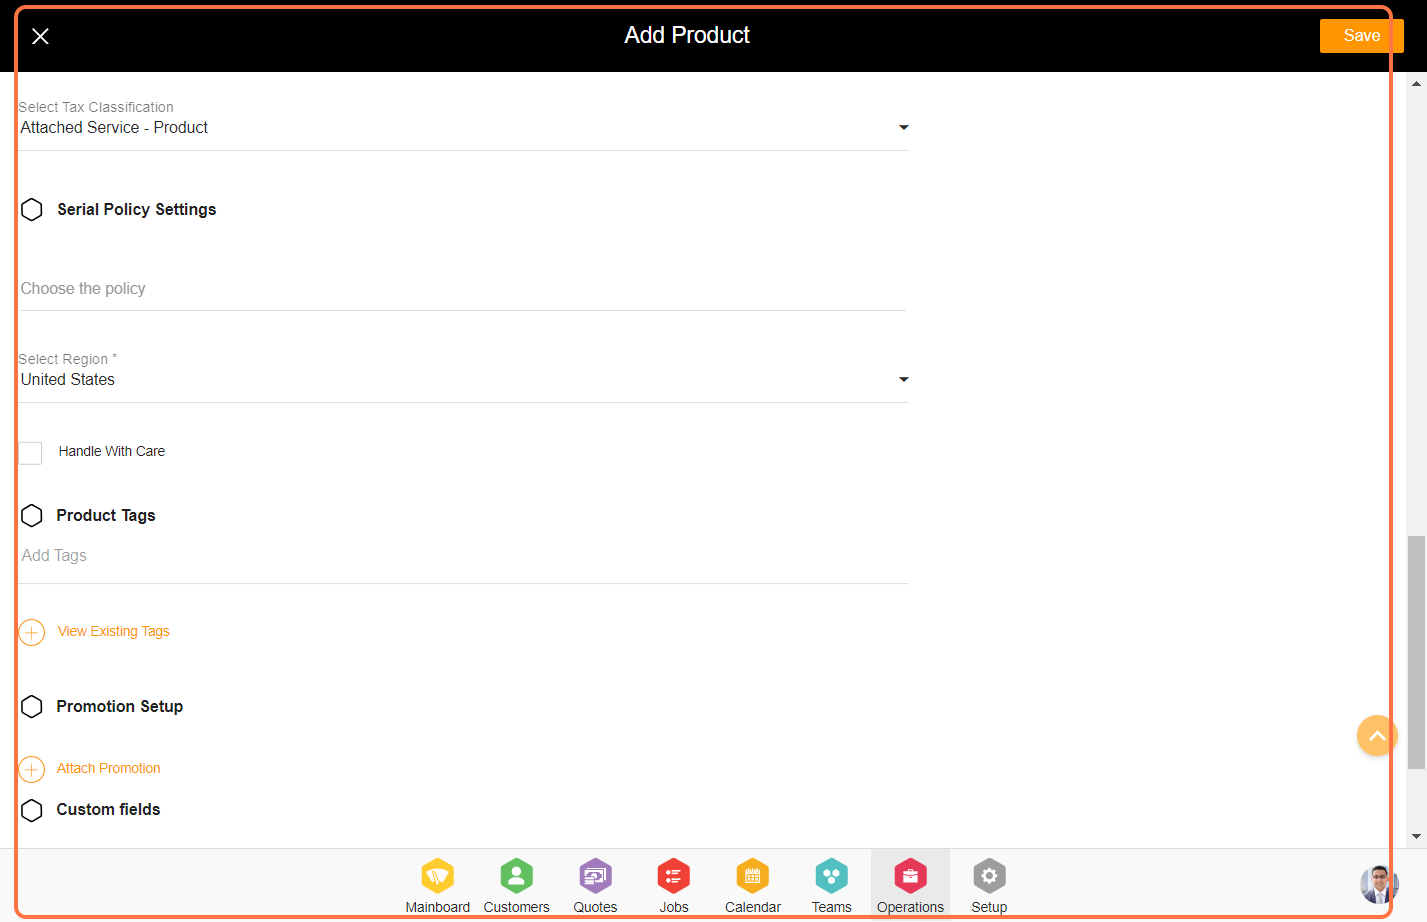
- Promotion(s): Any associated promotional policies that apply to the product.
- Tax Class: Associated tax class
- Attached Service(s): 'Attached Services' are defined separately and applied to the product.
Item Pricing - Changing Item Pricing
Businesses can change pricing at the time per SKU level. The new pricing is always reflected when a user views Quotes and Jobs independently without products being added to the cart. If a product is added to a shopping cart in Quote or Job, the price is the price of the item when it was added to the cart. When the user navigates to the added product in the cart, the old price is shown on the product detail page. Manual removal of a product from the user is required to show any updated price.
If the price changes and the user navigates to an existing product attached to the cart, the product detail page will show both the old and the new price.
Seasonal Product
When seasonal dates are active, a seasonal price takes effect. Seasonal product is activated per product. Seasonal products work with all product types. So, you can even set up and sell product bundles as a daily special.
For example, A sweater may be of higher price during the winter season, or motorbikes may have lower price during the winter season. For example, “Seasonal products'', ‘Today’s Special’ items, holiday special items, etc.
The product can be enabled for seasonal dates with pricing managed within each SKU.
Seasonal Product - Pricing Setup
To configure a seasonal date, a seasonal price needs to have a value in all the corresponding variants of the product. Configuring seasonal prices without establishing price values is not allowed. Seasonal price becomes mandatory for seasonal configuration.
Such items would be available with special prices during the configured time and would go back to normal pricing once the season is over.
Seasonal Product - Setting Time
Schedule Product Availability by date and time: You can select a duration (start date and end date), of which, the product will be available in the catalog, as an exclusive product. This would be something similar to scheduling a sale price.
To schedule one-day sales, you have to set the start date and end date as the same date.
If you want to feature a product after a certain date, you either have to create and publish the product on the same day, or save it as a draft, and publish it on that day.
Seasonal dates can be set anytime from 1 day to days within 12 months. A seasonal icon is shown on the product details page showing the from and to seasonal dates.
Seasonal Product - Showing Prices
Seasonal price is shown either as a new price by striking off to “Retail Price”, or as a replacement to MSRP showing only a single price.
Creating a Regular Product: A Step-by-Step Guide
1. Go to the Operations module

2. Within the Inventory section, Select the 'Products' section

3. Select the 'Add' icon to include the regular product

4. In the product details section, the product name is mandatory, while all other fields are optional. To add an image at the top of the product details, use the 'Insert Image' box and click on 'Add Image'
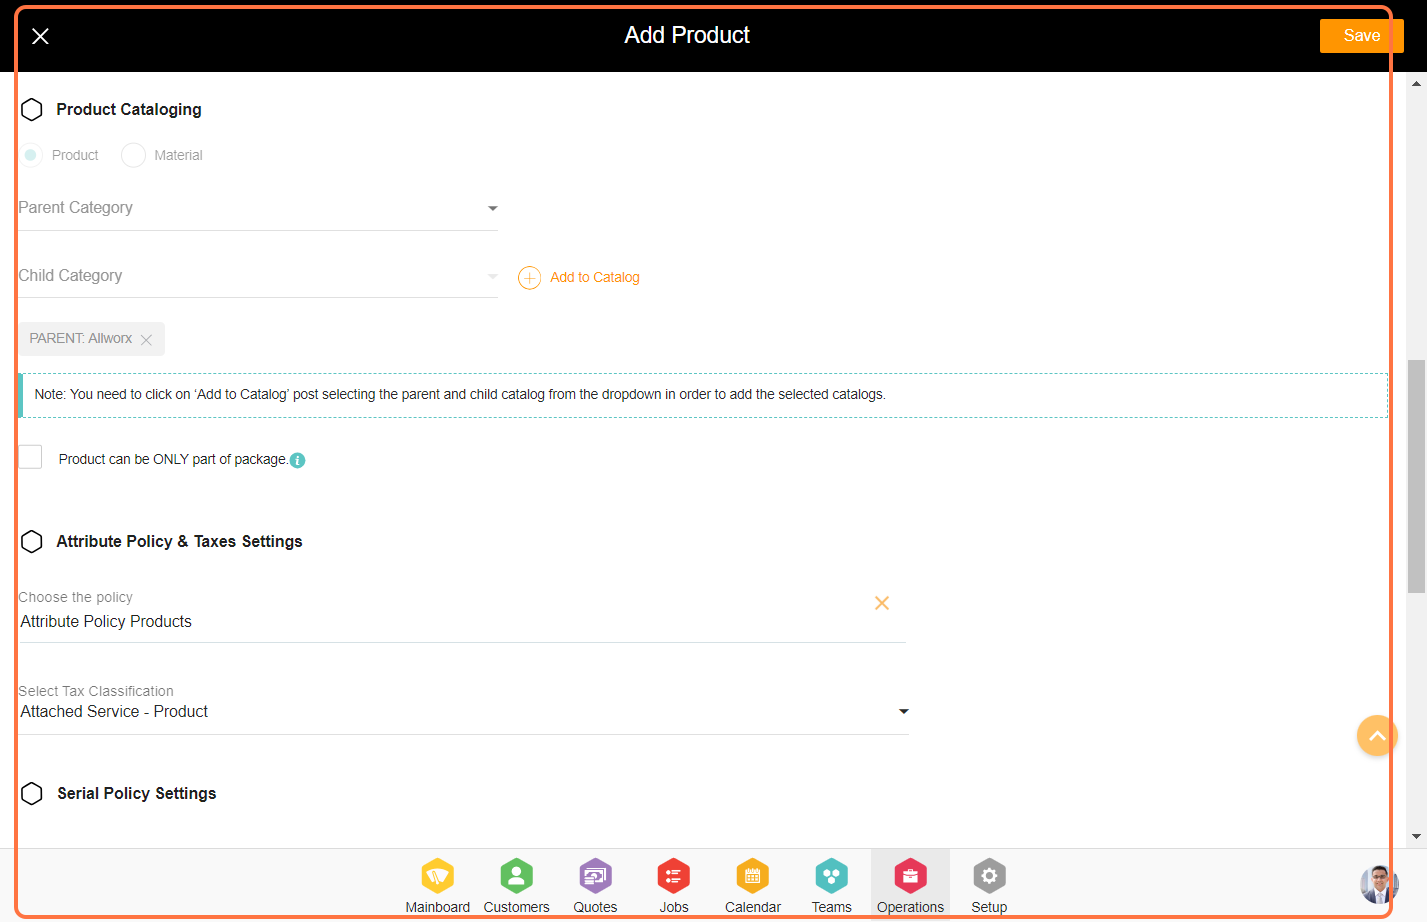
6. Allocate the product to a region to activate it for that specific area, then click on 'Save' to add the product