Customer Contact Import
To import customer contact, Jacktrade follows a three-step process. This import process ensures that the data is imported optimally and integrated seamlessly into Jacktrade’s CRM to make your operations easier. The three steps carried out by Jacktrade are:
- Import data from a CSV file
- Show import-related conditions and errors. Here you will be able to modify data and correct any errors.
- Continuously import data successfully, till all of the data is imported. You can discard any data that you may not want to import.
Import Using CSV Template
You can start importing customer contact information from the Customer Contact List by clicking on the 3-dots in the top right corner.
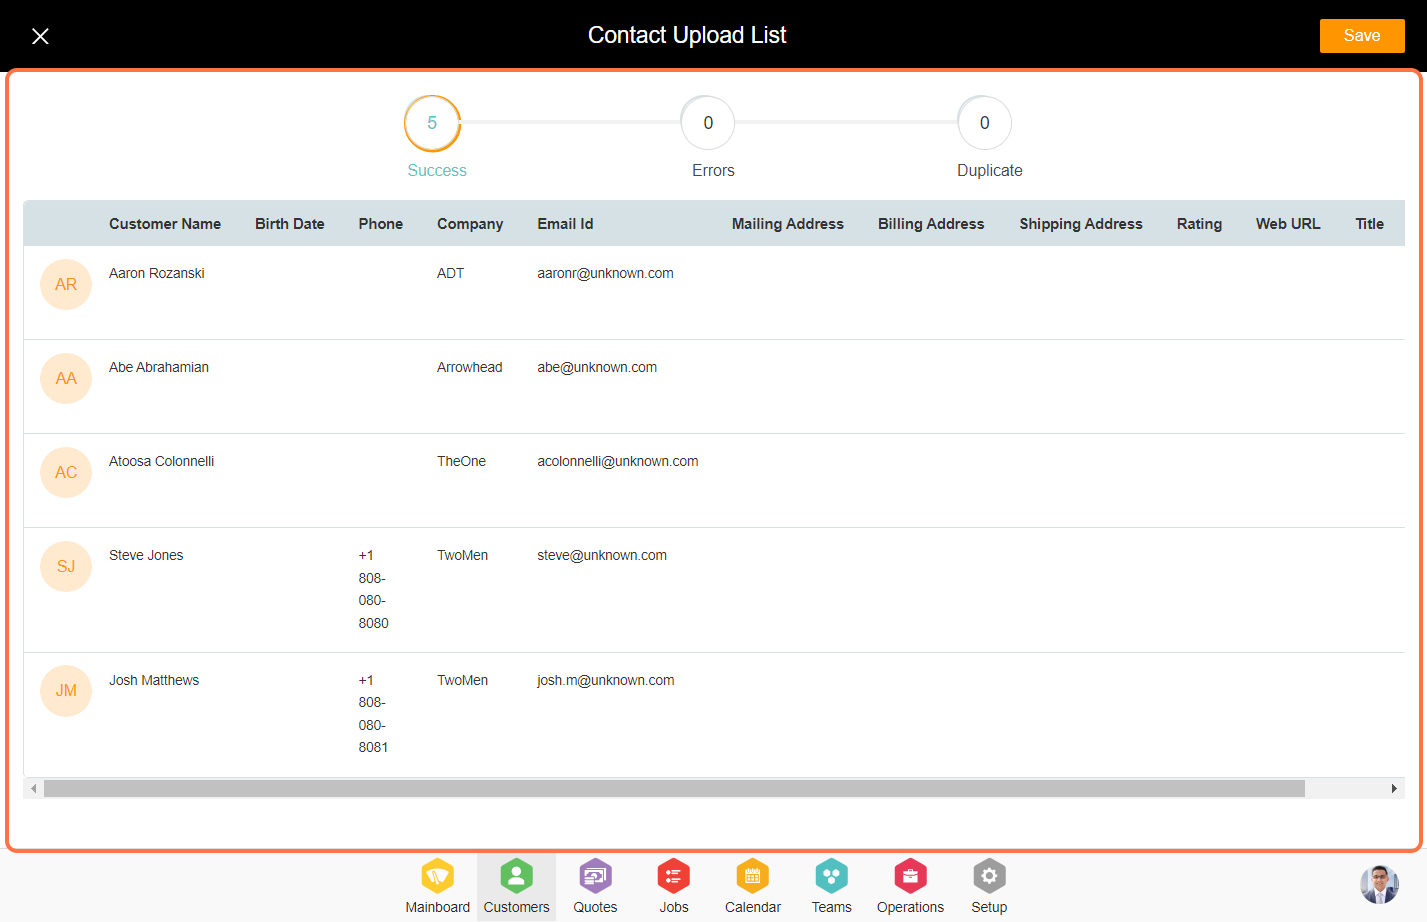
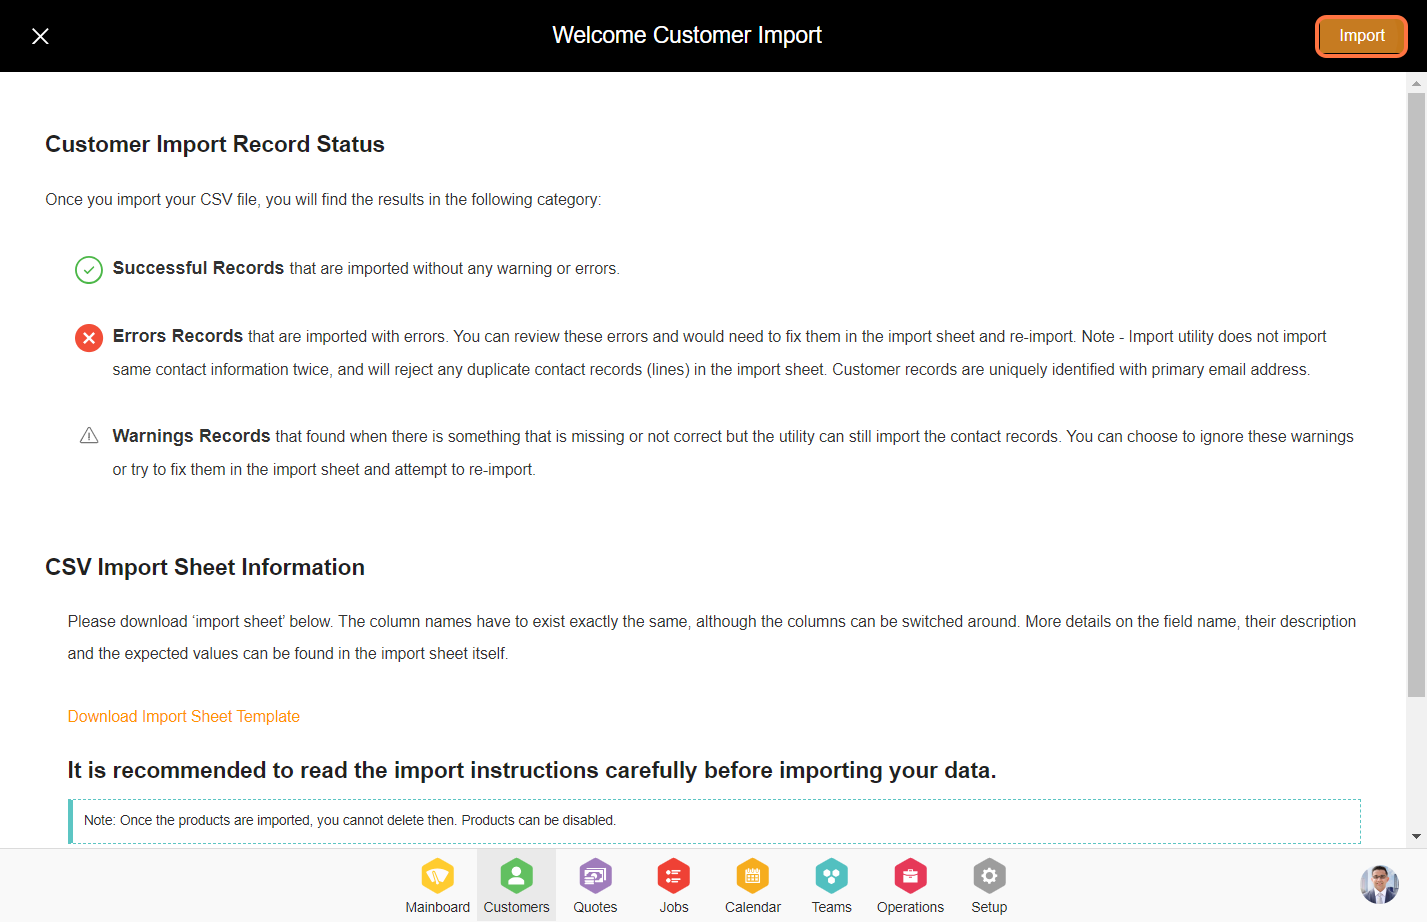
Once you import your CSV file, you will find the results in the following category:
- Successful Records that are imported without any warning or errors.
- Errors Records that are imported with errors. You can review these errors and would need to fix them in the import sheet and re-import. Note - Import utility does not import the same contact information twice, and will reject any duplicate contact records (lines) in the import sheet. Customer records are uniquely identified with a primary email address.
- Warnings Records are found when there is something that is missing or not correct but the utility can still import the contact records. You can choose to ignore these warnings or try to fix them in the import sheet and attempt to re-import them.
The user is responsible for data correction, manipulation, and validation, whereas the system is responsible for presenting analysis and identifying results of success, errors, or duplicates.
Uploading CSV Format
Data can be imported using a CSV sheet in UTF-8 format. And, a sample template is provided with proper column headers.
CSV Column Headers
Here is some information that you need to know about the CSV column headers:
- Column headers will have to maintain the exact format of the attribute.
- Columns can be any vertical sequence as long the column header describes the right attribute name that defines that column.
- Any column header not understood will be ignored if it's not a mandatory field. A list of not understood fields will be presented post-import.
Correction Data On The Screen
Successfully correcting data in the error screen then shows ‘correction status’ as Success or Failure. Data can be imported into the error screen for successfully corrected data. UI will present an option for users to do so with the action ‘Import corrected data’.
You may view and resolve conditions related to import in the UI, and then import successful data until all data is imported.
Data Import Errors
Importing shows collective import results presenting success, errors, and duplicate records. The contact import utility supports informing users of the following conditions:
- Mandatory data fields check
- Wrong data inputs
- Duplicate record with primary email is the most unique
- Unrecognized column headers
- File not importable
- Empty rows found
- The wrong data type found
- Missing mandatory field
- Special characters are not allowed
Guidelines to import customers - A step-by-step guide
1. Go to the Customer module.


3. Under the 'Other Options' section click on 'Import Customers'.


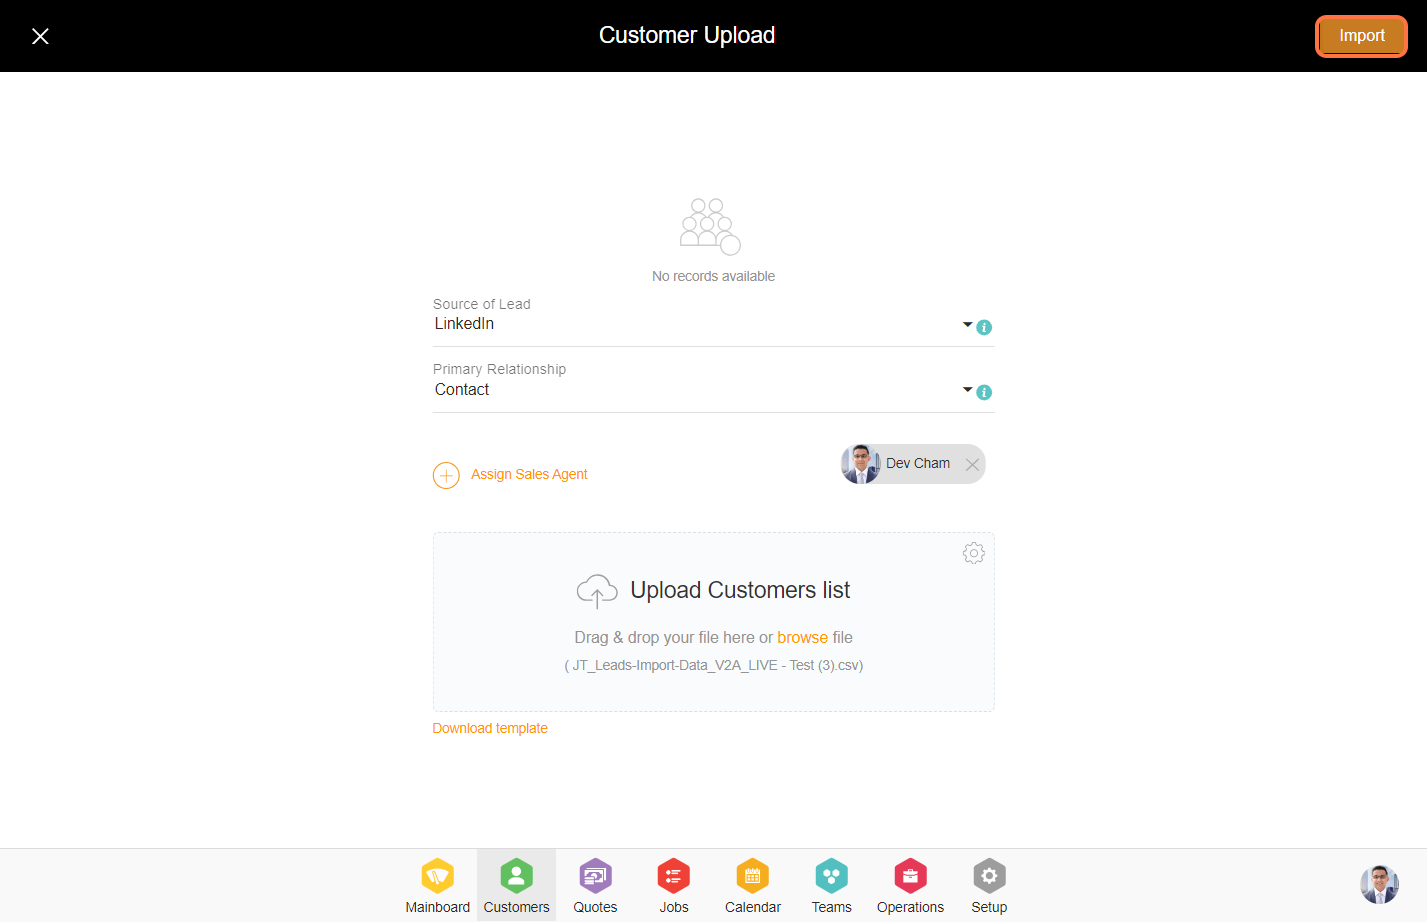
6. Enter the source of the lead, primary relationship, and sales agent details. These details will be attached to the customers being imported.

7. Click on 'Browse' to select and upload the CSV file containing the customer details.

9. After importing the file you will see the contact list here, Click on 'Save' to upload the contacts into the business.
Note:
- Successful Records that are imported without any warning or errors.
- Errors Records that are imported with errors. You can review these errors and would need to fix them in the import sheet and re-import. Note - Import utility does not import the same contact information twice, and will reject any duplicate contact records (lines) in the import sheet. Customer records are uniquely identified with the primary email address.
- Warnings Records that found when there is something that is missing or not correct but the utility can still import the contact records. You can choose to ignore these warnings or try to fix them in the import sheet and attempt to re-import them.